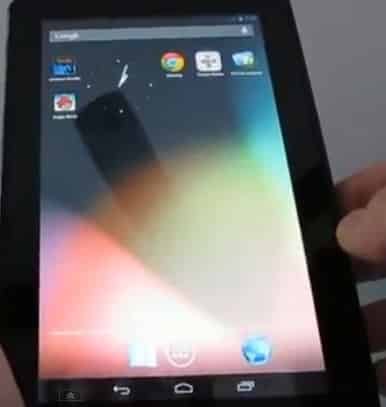
Good news for the Kindle Fire owners. Amazon Kindle Fire comes with Android 2.3 Gingerbread build on preloaded apps and access media from Amazon’s store. But now Kindle Fire owners can also Google’s latest mobile operating system Android 4.1 Jelly Bean on their device. Earlier, we have covered “How To Install Custom ROM In Samsung Galaxy S III”. This time we will show how to install Android 4.1 Jelly Bean On Kindle Fire. Find the detailed procedure below.
 |
Developer Hashcode has ported Android 4.1 Jelly Bean for the Kindle Fire. But some hardware may not work at the start like the WiFi and video acceleration. But don’t worry, you can fix it manually. So let’s start with the details.
Steps To Install Custom ROM On Kindle Fire:
1. To install Android 4.1, root the tablet and install a custom recovery (To do this download latest version of Kindle Fire Utility from the xda-developers forum).
2. Unzip the downloaded file to a directory on your computer and click-open the install_drivers.bat file.
3. Plug Kindle Fire with your computer using the USB cable and wait for the computer to recognize the device.
4. Click the run.bat file and follow the on-screen instructions to install TWRP or ClockworkMod Recovery
5. To boot into recovery mode install the latest FireFireFire utility.
6. Now download the latest Android 4.1 Jelly Bean .zip ROM file on your PC and copy it on your device. Also get the latest gApps.zip file (package includes Play Store, Gmail, and other Google apps) from that site or, you can download the latest Jelly Bean gApps file, dated 11july, 2012 if the earlier versions don’t work properly.
7. If device power got off, then press the power button again to start it up.
8. After start when it show the boot logo, press and hold the power button for 5-10 seconds.
9. This should tell FireFireFire to boot into TWRP instead of loading Android.
10. Use your on-screen commands to backup your device.
11. Flash Jelly Bean and the latest gApps.
12. Once the zip files are selected, the device will be updated and then select “reboot system now” for rebooting the system.
After the device restarts, it should be running Android 4.1. Now check how to fix the Wi-Fi below.
Steps To Fix WiFi:
1. Connect your Kindle Fire to a PC using the USB cable.
2. Install the “install_drivers.bat” file again on your PC.
3. Open command prompt, navigate to a directory where you have adb.
4. Type the following commands:
- adb shell
- su
- fix-mac.sh
- exit
5. If adb shell command does not work properly just unplug your Kindle and plug in again.
6. Try steps 1-4 again.
If you the process work you will be able to use the Wi-Fi. Otherwise you have to wait until Hashcode incorporate the Wi-Fi fix into a future build.
You are done, your device should run Android 4.1 Jelly Bean nicely. Here we have suggested Android 4.1 Jelly Bean ROM from xda-developers. For more you can visit xda-developers forum.
[ttjad keyword=”kindle”]


