Since its creation over a decade ago, PDF format has become the standard for web documentation. His ability to combine different elements of any type and protection against any change in its structure led him to be one of favorite format among users, who wanted to protect their text files. Such popularity has revealed many applications such as PDF editors and PDF converters. These are the tools that most people use to create documents in this format, but it is not the only (and not the best). In this tutorial I will show you a simple way to create PDF documents with just one application.
Process of creating PDF documents:
Step 1: First, you must download BullZip PDF Printer from this link, an application that works as a virtual printer and will carry out the conversion process from any program that have “Print” function.
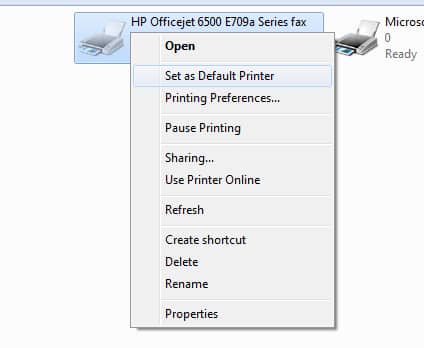
Step 2: Once you install the software click Start menu and then choose Devices and Printers. Here you can see that the virtual printer BullZip was selected by default.
Step 3: If you do not want that and you want that your physical printer be a default one, then right-click on its icon and from context menu select Set as Default Printer. If you do not want to make this change, simply close the window.
Step 4: Now you’re ready to start using the program. For this you need to open any documentt in an application that has the Print option. This means you can work with Word, Excel, PowerPoint, Photoshop, Illustrator, InDesign and many other applications.
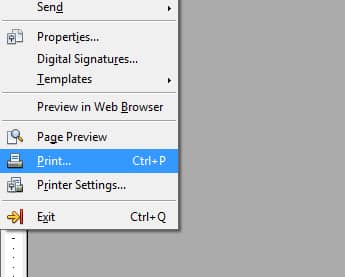
Step 5: Once you open the document and all it contains, you are ready to create the PDF. You will need to access the print menu of the program. This varies from software to software (usually it is in the menu “File” menu). For example if you are using Microsoft Word, click File and then Print.
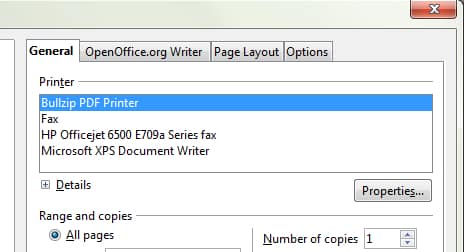
Step 6: Once you access print menu, you will see that there is an option to choose BullZip PDF Printer as your printer. Make sure you select it and click Print.
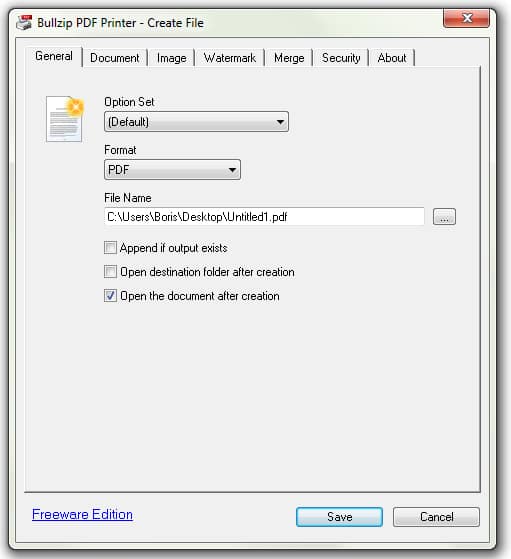
Step 7: The BullZip dialog window will open up where you can define other specific configurations for your PDF. You can choose location where to save it, level of compatibility, password and combination with other PDF documents, etc… In addition, you can also insert some custom metadata.
Step 8: Once everything is OK, just click Save button. An icon appears in your task bar indicating the progress and once it ends you can see the results immediately.
[ttjad]



![Read more about the article [Tutorial] How To Create And Use QR Codes](https://thetechjournal.com/wp-content/uploads/2012/03/qr-code-512x288.jpg)
![Read more about the article [Tutorial] How To Enable Spotify’s New Web Player](https://thetechjournal.com/wp-content/uploads/2012/11/respotify-profile-name-asd.jpg)