If you have multiple computers at your home or work and you need to have access to printer from each of those computers you may consider sharing your printer with other computers which will help you save on cost and for convenience. In this tutorial we will show you how to configure Windows 7 and your printer and share it in your network with all computers.
Note: To perform this procedure and to make it work, you must have authorized access to your computer over the network. Where client that wish to print with your shared printer must use a username and password. Go to the Network and Sharing Center to modify and adjust your sharing settings.
Step 1: Click Start menu and choose Control Panel
Step 2: From Control Panel window choose Devices and Printers (If you dont see Devices and Printers inside Control Pane make sure you Control Panel View by is set to Large icons).
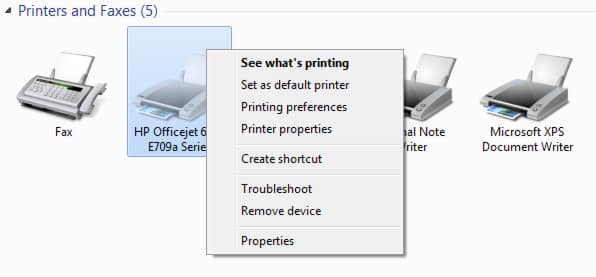
Step 3: Right-click on the desired printer and select Printer Properties.
Step 4: Then go to the Sharing tab.
Step 4: Check the Share this printer and inside Share name add a name if you wish. Also make sure that the box Render print jobs on client computers is checked. Click OK to save changes.
Your printer is now shared and accessible to other users in the network!


![Read more about the article [Tips] How To Buy A Good Router](https://thetechjournal.com/wp-content/uploads/2012/10/install-guest-addtion-as8d7987ewreer.jpg)
![Read more about the article [Tutorial] How To Unlock Android 4.2 Daydream Feature Called BeanFlinger](https://thetechjournal.com/wp-content/uploads/2012/11/about-phone-as5d498e7rw.jpg)
![Read more about the article [Tutorial] How To Upload Videos From Flip Video Camera To Facebook From Your Mac](https://thetechjournal.com/wp-content/uploads/2012/03/flip-to-facebook-512x256.jpg)