iPad is providing huge amount of facilities to the users. In this discussion, we are presenting the best way to take a good screenshot in iPad. This method is usable to iPhone, iPod touch and iPad. So, keep your concentration in this below steps.
To get started follow below steps
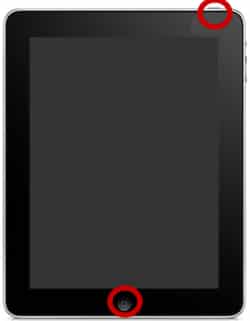
Step 1: At the first step, you need to tap in the power switch which is located on the right corner of your iPhone, iPad or iPod touch and while holding it down, click in the iPad Button.
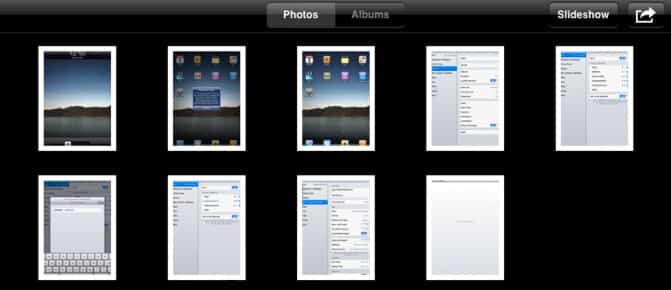
Step 2: At the second step, you will see the display ”flash” white and will hear a clicking sound then you need to open your photo application in your iPod touch or iPhone or in your iPad.
Step 3: In this step, you need to select the thumbnail of your screenshot. From the lots of thumbnails, you can select according to your wish or which you like most but it is better to select according to the similarity of the screenshot.
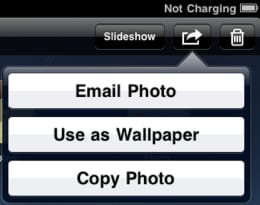
Step 4: The simplest method to move a screenshot to your Mac or PC is to message it to yourself. In order to do this, click the “arrow” key on the top-right side of the display while you are screening the screenshot.
Step 5: In this step, you need to click in Email Photo. It is situated in the right corner of your iPads screen.
Step 6: Message will ultimately open along with the photo attached to a mail. You need to fill the address to whom you want to send this email message. It is better to give an exact message subject and any other information you want to write in the main body of the email message.
Step 7: At the last step, you need to click in send button. It is situated on the top right corner of your iPad display and that’s it.
[ttjad keyword=”ipad”]


![Read more about the article [Tutorial] How To Schedule Windows 7 To Automatically Clean Your Hard Disk](https://thetechjournal.com/wp-content/uploads/2012/03/task-schedule-512x226.jpg)
![Read more about the article [Tutorial] How To Show Administrative Settings In Windows 8 Start Screen In Groups](https://thetechjournal.com/wp-content/uploads/2012/07/tiles-a56sd48sa7g23h1.jpg)