iPhone Dev Team already released pwnage tool 4.1.2 with a little update of bug fixing.If you want to update and jailbreak your iPhone with iOS 4.1 follow the step step guideline which has given below.But remember if you are a new iPhone users read the article which has posted here before jailbreaking.
![]()
Some Important Keynotes:
* This guide is only for iPhone 4, iPhone 3GS and iPhone 3G users.
* PwnageTool is only supported on Mac OS X and is not supported on Microsoft Windows. Windows users should wait for Sn0wbreeze that is expected to be released shortly.
If you meet the requirements mentioned above then you can proceed with the step-by-step instructions to jailbreak your iPhone using PwnageTool.
Here’s are the instructions:
Step 1: Download PwnageTool 4.1.2 and save it on your Mac desktop by creating a folder named “Pwnage”.
Also download iOS 4.1 firmware file:
iPhone 4 users download – iPhone3,1_4.1_8B117_Restore.ipsw
iPhone 3GS users download – iPhone2,1_4.1_8B117_Restore.ipsw
iPhone 3G users download – iPhone1,2_4.1_8B117_Restore.ipsw
Download the file using Firefox.
Step 2: Launch Pwnage tool by double click which will create a PwnageTool icon that you can click and drag into the Pwnage folder.
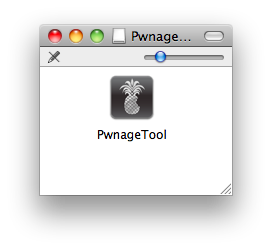
Step 3: Double click on the PwnageTool icon to launch the application. You will be presented with a warning. Click ‘OK’ to proceed.
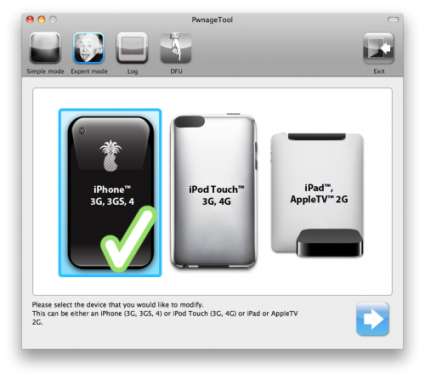
Step 4: The PwnageTool window will now open. On the top menu bar, click on the Einstein icon to select “Expert mode”.
Now jailbreak your iPhone.
Step 5: You will also need to select your device from the next screen. Click on the iPhone 3G, 3GS, 4 picture to select the model. Click the blue arrow button at the bottom-right side of the window to continue.
Step 6: The application will now ask you to “Browse for IPSW”. If the application does not automatically pick the appropriate IPSW, you may click on the ‘Browse for IPSW’ link and select the IPSW file that you have saved on your desktop Pwnage folder. Click on the blue arrow button to proceed.
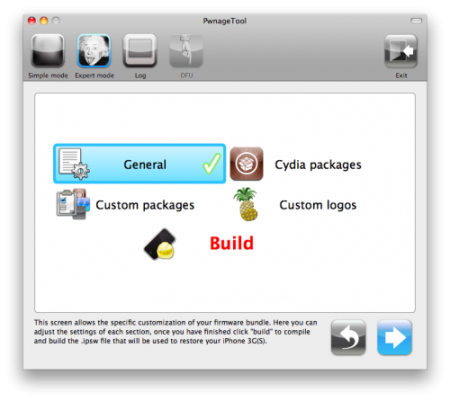
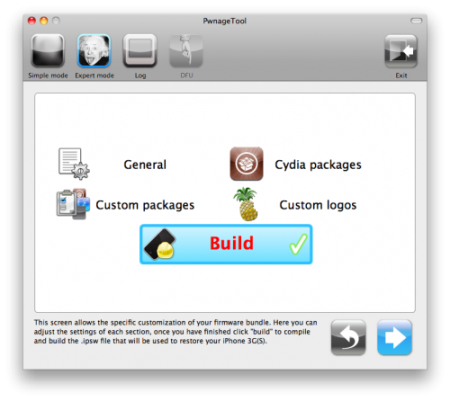
Step 7: You will now be shown the Firmware bundle customization page. Click on ‘General’ and press the blue arrow button to continue as shown below.
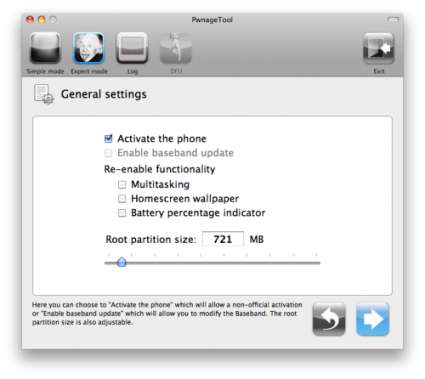
Step 8: In ‘General Settings’, you will find an option that reads ‘Activate the phone’. Check this option if you are NOT using an official iPhone carrier. Deselect the option if you are with an official network carrier. Press the blue arrow to proceed. Here you can also enable the multitasking, custom Home screen wallpaper, battery percentage indicator that officially not supported in iOS 4.1 for iPhone 3G.
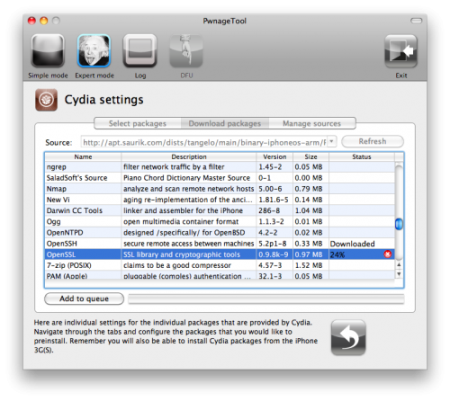
Step 9: In the ‘Cydia Settings’ window, click on the ‘Download packages’ tab and press ‘Refresh’. This will display all the available packages. Select the ones you want (OpenSSH and OpenSSL) and then click on the blue arrow button as shown below.
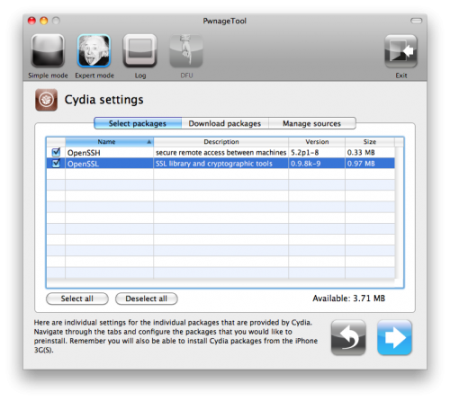
Step 10: Now click on the ‘Select Packages’ tab. You will see the selected packages displayed here. Press ‘Select All’ and click on the blue arrow button to continue.
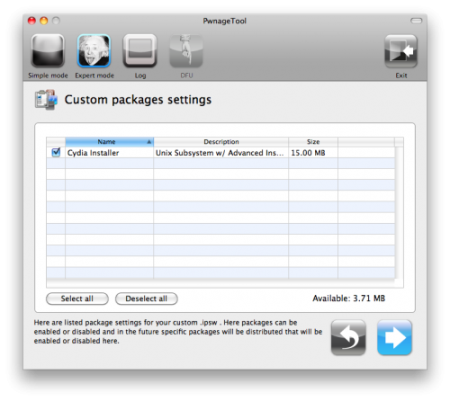
Step 11: The ‘Custom Packages Settings’ window will list package settings for your custom .ipsw. Click on the blue arrow button to move to the next step.
Step 12: Here you have the option to change logos for Boot and Recovery. You can choose the default images or click on browse to provide your own logos. Do note that the images need to be in grayscale/RGB with a maximum dimension of 320×480. Once selected, press the blue arrow button to continue.

Step 13: You are now ready to start the Pwnage process. Click on the Build button to select it and then click on the blue arrow to start the Pwnage process.
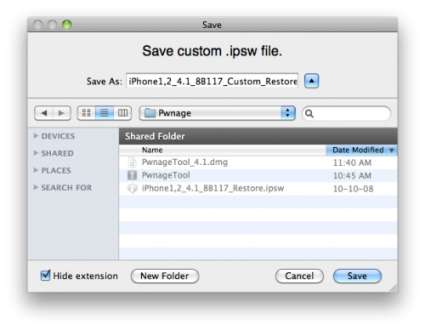
Step 14: The application will now prompt you to save your custom .ipsw file. Save the file in the Pwnage folder on your desktop. Save the file with a suffix Custom_Restore so that you can easily identify it. The IPSW file will take close to ten minutes to be completely built.

Step 15: You will be prompted to enter your administrator credentials. Enter the details and click ‘OK’.
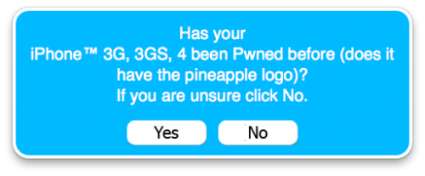
Step 16: You will then be prompted if your iPhone has been Pwned before, click on “No”.
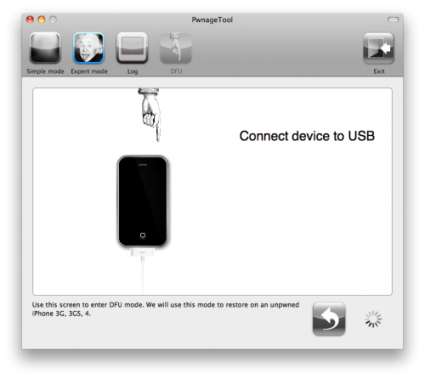
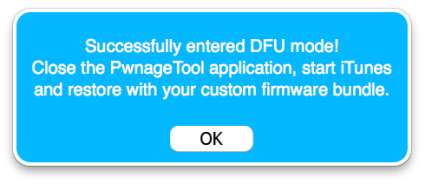
Step 17: After the custom ipsw has been built you will be asked to connect your iPhone to the computer. Once it detects your device PwnageTool will guide your through the steps to putting your iPhone into DFU mode.
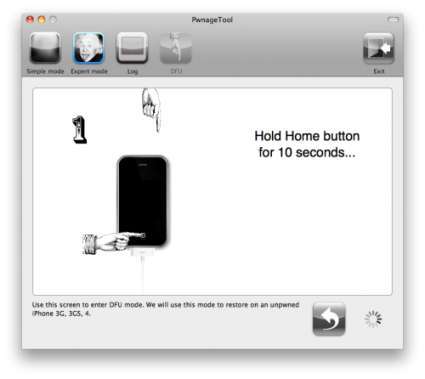
Press and hold the power and home buttons for 10 seconds.

Then release the power button and continue holding the home button for 10 seconds.
Once your iPhone is successfully in DFU mode, PwnageTool will prompt you to launch iTunes.
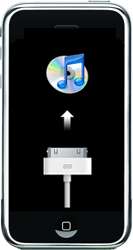
Step 18: iTunes will now prompt you with a message that reads “iTunes has detected an iPhone in recovery mode”. Press OK. Your iPhone is now in recovery mode.
Step 19: While on the iTunes window, hold the Alt/Option key and click on the ‘Restore’ button. (This is a VERY IMPORTANT STEP as just pressing the “Restore” button will result in restoring your iPhone with the latest firmware, which is iOS 4.1 firmware currently, by holding down Alt/Option button, allows you choose the custom iPhone firmware file).
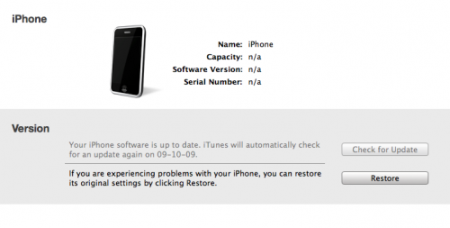
Step 20: Navigate to the Pwnage folder on your desktop and select the custom IPSW file (REMEMBER the custom firmware file with Custome_Restore suffix) that was just built (and NOT the original firmware file). Click on the ‘Choose’ button to proceed.
Step 21: iTunes will now restore the custom firmware on your iPhone 3G. The process will take up to 10 minutes. Once it is completed, your iPhone will reboot and should be updated with iOS 4.1. It should also be successfully jailbroken.
That’s all.I think this tutorial will helpful to all of you.
Thanks
Click On Adds To Buy iPhones
![Read more about the article iTunes 10.2 for Windows and Mac Has Released[Download]](https://thetechjournal.com/wp-content/uploads/2011/03/iunes-10.2-release-290x300.png)
Pingback: How To Jailbreak iPad On iOS 4.2.1 Using PwnageTool | TheTechJournal.com
Pingback: How To Jailbreak iPad On iOS 4.2.1 Using PwnageTool | TheTechJournal.com