iTunes Library might take up the majority of your Device’s storage. That’s an issue when you neither have the option of increasing Device Space nor the will to increase iCloud capacity.
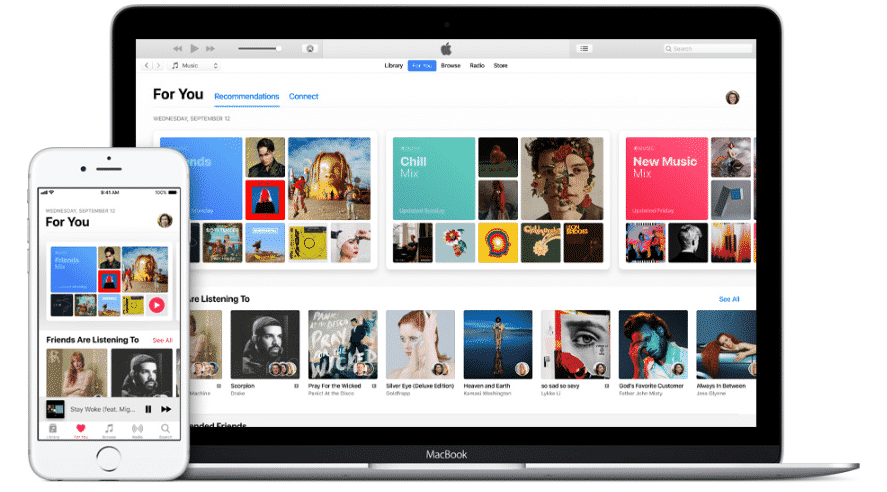
If your iTunes Library is taking up too much of your storage and you are worried about it, you can transfer your iTunes files to an External Hard-Drive. But before you do that remember, you are the owner of your iTunes music files. That is why you can export them to an external Hard-Drive. On the other hand, Apple Music works on a Subscription basis, so it isn’t possible to transfer media files from that.
What You Need To Make The Transfer
Now you might be wondering what elements do you need to make a successful transfer. Firstly you need the device, most probably your laptop, that you use to sign into your iTunes. Secondly, you need an External Hard-Drive. And the last thing you need is a USB Cable to transfer the files from your iTunes to your Hard Drive.
Consolidate Your Library
Now the first step involves consolidating all the files on your iTunes Library, otherwise, you might need to both download and transfer them individually.
- Open the iTunes app.
- Open iTunes Menu Bar and navigate to File>Library>>Organize Library.
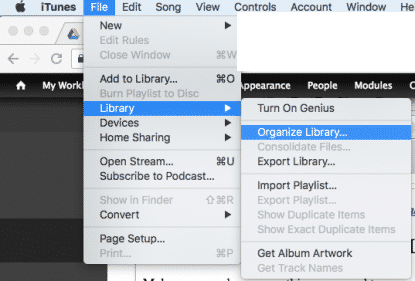
- Select Consolidate Files from the pop-up and hit OK.
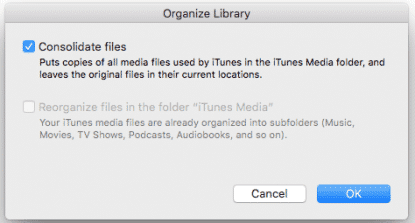
Now, your music files will be compiled into iTunes Media folder, ready to be transferred to external storage.
Copy the Backup to your External Hard-Drive
- Connect your Laptop with the External Hard-Drive.
- Minimize iTunes and launch Finder.
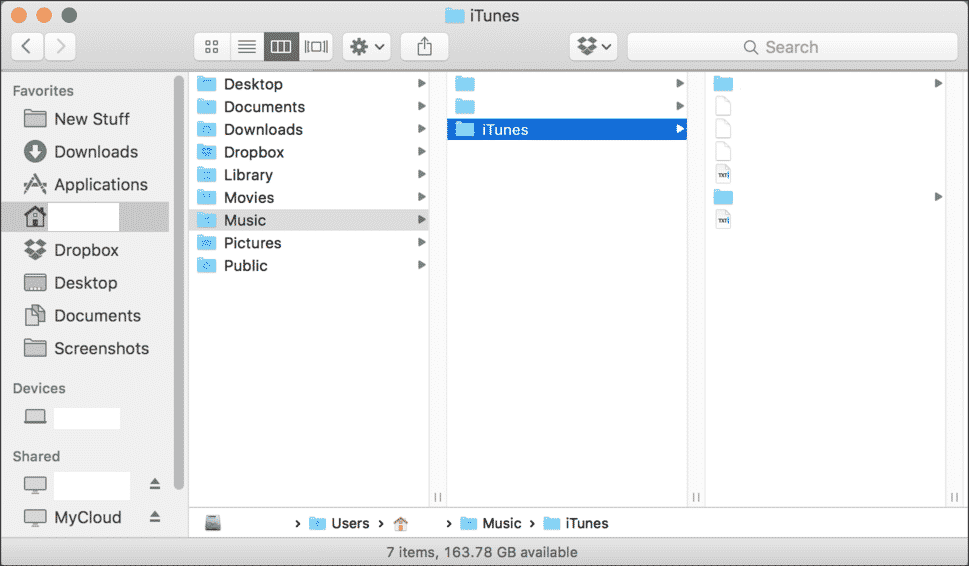
- Once Finder has launched, hit Go>>Home.
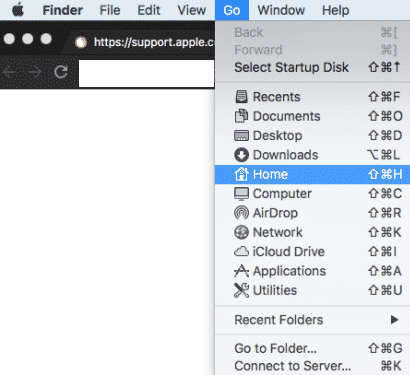
- This will take you to a place where all your Folders are stored.
- Double Click the Music Folder.
- You will find the iTunes Media Folder within the Music Folder.
- Now Drag the Folder and drop it inside the Hard-Drive. You Hard-Drive should be listed under the Devices section in Finder.
- The transfer will start.
Now all you need to do is wait until the transfer is done. The transfer might take more than a minute to complete. Actually, it depends on the size of your iTunes Music Folder.
Wrapping Up!
Now moving your iTunes Library is a great way to have access to your Music Library regardless of not being connected to the internet. You might even want your iTunes player to play music from the Hard-Drive storage rather than streaming them. But you need to tell the iTunes Application that you are changing the iTunes Library. In order to do that, click on the Options button as iTunes is open. Then click on the Choose Library option. Select the Hard-Drive listed under the Finder Sidebar. Click on iTunes from the Under Name in your iTunes and hit Open. Now iTunes will play your iTunes Music from the External Hard-Drive.