Personal computer has become a repository of important data: scanned documents, family photos, bank files, emails… and beside the fact you need to protect your files from other people you also need to make regular backups in case of system failure. There are plenty of Windows backup tools out there, some of them are free some are not; but you also have the option to use integrated Windows features which will certainly do its job and help you to easily backup your data. In this Tutorial we will show you how to backup your files and folders using Windows 7 Backup and Restore Tool.
To get started follow below steps:
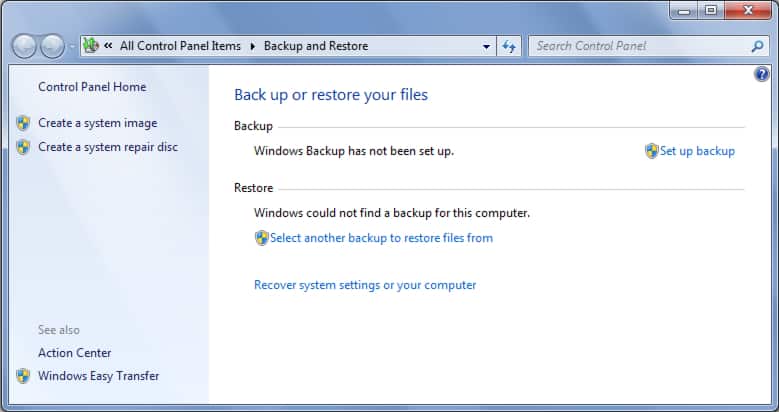
Step 1: Start by opening the Start menu type backup and press Enter.
Step 2: New window opens. Click the link Set up backup on the right side.
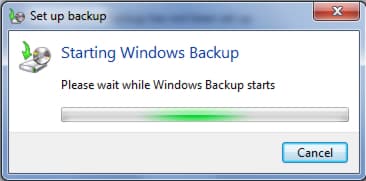
Step 3: Wait a few seconds, while Windows 7 prepares backup tools.
Step 4: Inside the wizard that appears select the external hard drive and the partition that will store a copy of your data.
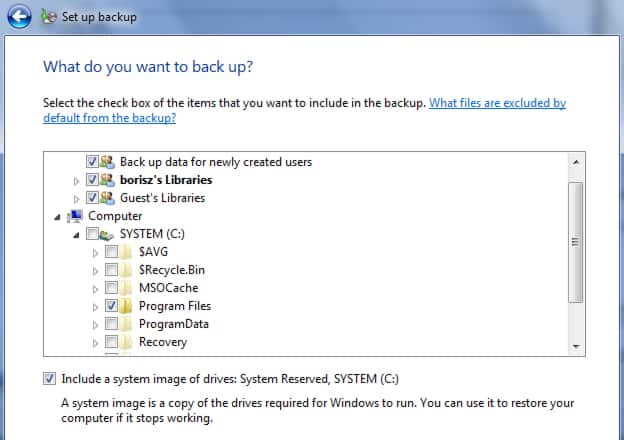
Step 5: Now that we have indicated the device on which we want to backup our data, we need to tell Windows exactly what we want to backup.
Two options are available:
- Let Windows choose (recommended): Windows will backup data files saved in libraries, on the desktop, and in default windows folders. Windows will also create a system image, which can be used to restore your computer if it stops working. These items will be backed up on a regular schedule.
- Let me choose: you can select libraries and folders and whether to include a system image in the backup. The items you choose will be backed up on a regular schedule.
Step 6: I suggest you to choose the second solution which leaves us more freedom when it comes to which files and folders we want to backup. So check it and click Next.
Step 7: Now from the list choose files and folders you want to backup. You can also generate an image of your system partition that contains Windows, to do that check following box “Include a system image of drives: System Reserved“. You can use this image to restore your computer if it stops working.
Step 8: When you are ready, click the Next button.
Step 9: Windows informs you that you will need to have Windows 7 installation DVD to be able to restore the system image in case of trouble. If you do not have Windows 7 installation DVD, you may create a system repair disc.
Step 10: By clicking Change schedule link you can set how often you want to system make automatic backups. My suggest is to disable the schedule and choose to perform backups only when you think its necessary. To do this, uncheck Run backup on a schedule and then press OK.
Step 11: To finalize the process, click Save settings and run backup.
Your files and folders are now. Make sure you do these backups only when you think it’s necessary and avoid Automatic backups since they can slow down you system.
[ttjad keyword=”windows-tablet”]


![Read more about the article [Tutorial] How To Login Into Windows 7 With Your Biometric Fingerprints](https://thetechjournal.com/wp-content/uploads/2012/02/fingerprints.jpg)