DHCP stands for Dynamic Host Configuration Protocol and its used to automatically assign dynamic IP address to your Windows 8 computer from DHCP server. In this tutorial I will show you how to turn on DHCP in your Windows 8.
![]()
To get started follow steps below:
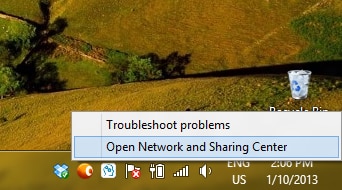
Step 1: From your Desktop, right mouse click on Network icon located in bottom right corner of your screen (system tray) and from context menu choose Open Network and Sharing Center.
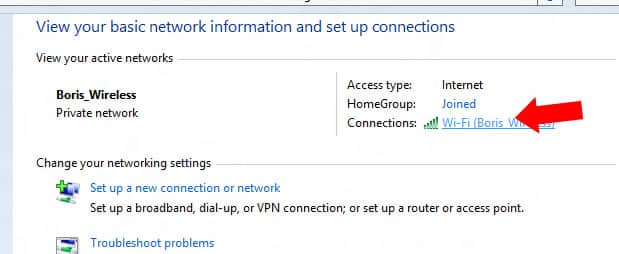
Step 2: Now under Connections: click on your active connection and a Connection status window will open up.
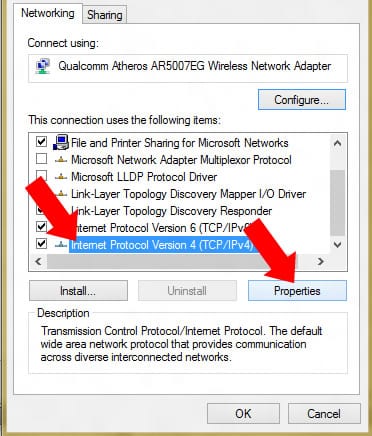
Step 3: Inside this new window click on Properties button located in bottom left.

Step 4: Highlight Internet Protocol Version 4 (TCP/IPv4) option and then click on Properties button.
Step 5: In new window, select radio button in front of Obtain an IP address automatically and Obtain DNS server address automatically.
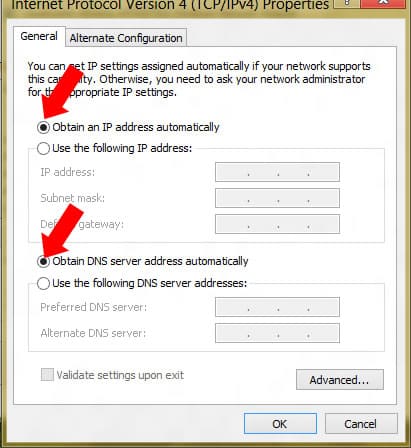
Step 6: Click OK to save your changes and you have successfully activated DHCP on your Windows 8 computer.
[ttjad keyword=”wireless-router”]
![Read more about the article [Tutorial] How To Change Default Music Player On Android](https://thetechjournal.com/wp-content/uploads/2015/01/CMP_1-432x768.png)