
As screens are getting higher and higher resolutions, or those of you that don’t unnecessarily have great eyes sight and don’t unnecessary like to squint at a small text on a screen may not know that you can actually increase or decrease font size system wide so it’s not that difficult to read a text. In this tutorial we are gone show you how you can increase or decrease the font size in Windows 7 with just few mouse clicks.
To get started follow steps below:
Step 1: Click Start menu and choose Control Panel
Step 2: In new window click Appearance and Personalization and then click Display
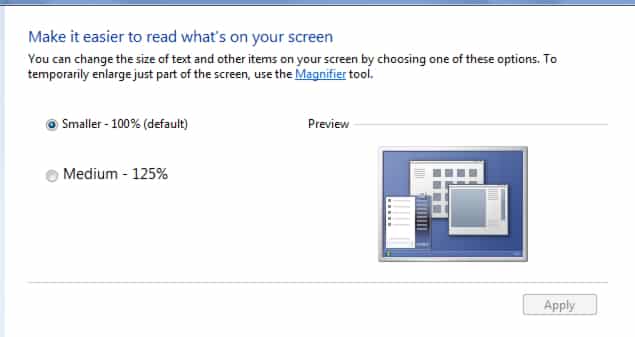
Step 3: In next window you will see three different options for your font size
- Smaller – 100% (default). This keeps text and other items at normal size.
- Medium – 125%. This sets text and other items to 125% of normal size.
- Larger – 150%. This sets text and other items to 150% of normal size. This option appears only if your monitor supports a resolution of at least 1200 x 900 pixels.
or you can set a custom size by clicking Set custom text size (DPI) and then choose the font and save changes by clicking OK
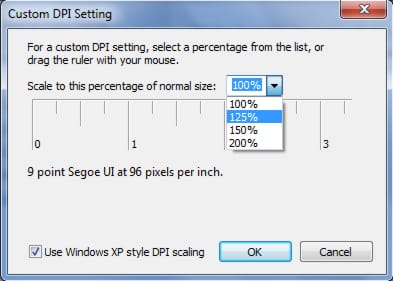
Step 4: Once you set the desired font size click Apply button.
Step 5: Then Windows will prompt you to logoff and then logon on your computer
Step 6: Once you reboot your computer you will have larger or smaller font size system wide.
[ttjad keyword=”all-in-one-desktops”]

![Read more about the article [Tutorial] How To Create Safepoint On Your WD MyBookLive](https://thetechjournal.com/wp-content/uploads/2012/10/login-mybooklive-s8d7a9s87d6sdf31y32rt132t1u.webp)
![Read more about the article [Tutorial] How To Turn Off Location In Facebook Messenger In Android](https://thetechjournal.com/wp-content/uploads/2014/11/FBM.webp)
![Read more about the article [Tutorial] How To Disable All Sounds In Skype Or Add Your Own Ringtone](https://thetechjournal.com/wp-content/uploads/2012/02/skype-sounds-change.webp)