Before making WordPress web site live, many of web designers and web developers decide to develop their themes, plugins, or content offline/localhost and then, once they are satisfied with the final results upload them to live server. But if you are new to this and you have decided to move your WordPress blog from localhost to live server and don’t know how, I will show you in this tutorial.
Before proceeding to below steps let me note that for this purpose I will be working under Uniform server at my local, However if you are using a different one e.g. WampServer, don’t worry because there are not too much differences in steps that you need to follow.
Step 1: First go to the location where you have installed WordPress on your computer. This location on my computer is D:\uniformserver\udrive\www\ but if you are using Wamp this location will be D:\wamp\www\.
Step 2: Now use Winzip or Winrar and compress all files located inside WWW folder to a zip file.
Step 3: Login into your cPanel at your hosting provider, open File Manager and then upload your .zip archive to \public_html\.
Step 4: Next extract your .zip archive at this same location \public_html\.
Note: You can skip above steps and use your FTP client and then upload all files using him, the choice is yours.
Step 5: Now when we have all WordPress files upload to our live server we need to transfer our WordPress database because all settings, posts, created page are in here.
Step 6: Lunch your Uniform or Wamp server. Open your web browser and go to http://localhost/apanel/phpmyadmin for Uniform server or http://localhost/phpmyadmin/ for Wamp server.
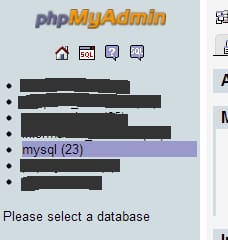
Step 7: From the left pane click on your WordPress database name.
Step 8: In the right pane click on Export tab. Then do the following things:
Step 9: Under Export click Select all link to select all your WordPress tables.
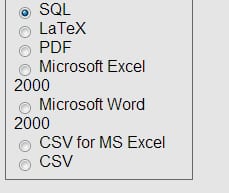
Step 10: Select SQL.
Step 11: At bottom of the window check field Save as file and click Go button.
Step 12: Now again, go back to your cPanel at your hosting provider web site and login into phpMyAdmin.
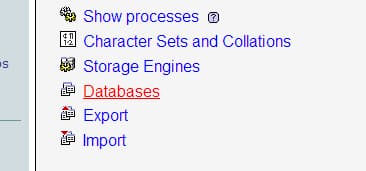
Step 13: Click Databases tab or Databases link and create a new database.
Step 14: Once the database is created select it from left pane and from right pane select Import tab.
Step 15: Now locate the database which you downloaded in Step 9 and click Open. You WordPress is now successfully uploaded to your live server.
Step 16: Now we need to edit a file which connect your WordPress blog to the database. If you are using PHP editor open file wp-config.php who’s usually located in your WordPress root.
Step 17: Scroll down file a little bit until your rich below section:
define(‘DB_USER’, ‘user‘);/** MySQL database password */
define(‘DB_PASSWORD’, ‘password‘);/** MySQL hostname */
define(‘DB_HOST’, ‘localhost’);
As you can see from above code sample you only need to change things marked with red that correspond to your server and database.
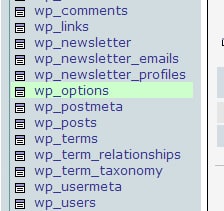
Step 18: Go back to phpMyAdmin at your live server and from left pane select wp_options database field.
Step 19: From right pane select Browse tab.
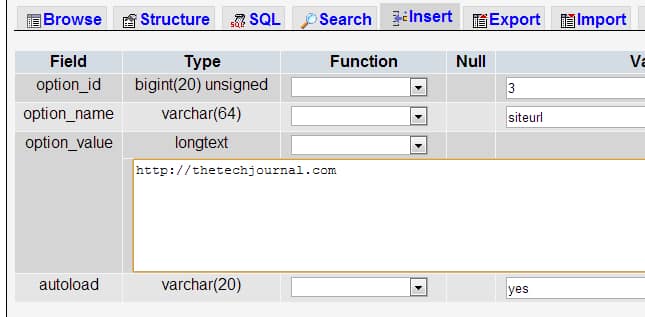
Step 20: Now locate the option_name labeled siteurl and click Edit next to its name.
Step 21: Under option_value field replace http://localhost/ with your web site url (in our case it will be http://thetechjournal.com) and click Go button.
It’s all done! Now its time to test your WordPress blog and see if everything works fine. If you notice error message about database connection, you should go back to Step 15 and closely retype necessary information’s Also make sure you check for WordPress newer versions and plugin updates because you probably didn’t make updates while it was located on your localhost. If you have any questions or want to share your experience leave them in comment section below.
[ttjad keyword=”cloud-storage-drive”]









![Read more about the article [Tutorial] How To Add Vertical Mozilla Firefox Bookmarks Bar](https://thetechjournal.com/wp-content/uploads/2012/05/ff-option-addons.jpg)
![Read more about the article [Tutorial] Install Android Lollipop 5.0.2 On Windows](https://thetechjournal.com/wp-content/uploads/2015/08/android-1-512x226.jpg)
![Read more about the article [Tutorial] How To Organize Multiple Inboxes In Gmail](https://thetechjournal.com/wp-content/uploads/2012/03/gear-icon.jpg)