Hard Drive Defragmenting needs to be performed regularly. The files will be loaded faster and the overall performance of your PC will be improved. Disk Defragmenter rearranges fragmented data so as to optimize the operation of your hard drive. There are many third party application which will help you to defragment your hard drive however there is no need to install them since Windows XP, Windows Vista or Windows 7 have built in tool for this purpose and in this tutorial we will show you how to use them to defragment your hard drive.
To defrag your Hard Drive in Windows 7 follow steps below.
Step 1: Click Start menu, inside search field type disk defragmenter and press Enter
Step 2: The main Disk Defragmenter screen will show up. From here you can manage all your defragmentation tasks. In middle of this window you can see the list of all hard drives attached to your system that can be defragmented.
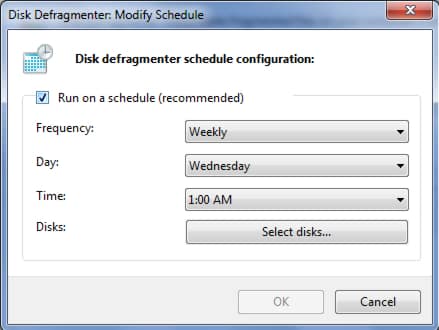
Step 3: To set automatic defragmentation click on Configure schedule. New window will open from where you can schedule how frequently to defragment and what time of day. Once you set automatic defragment click OK.
Step 4: I suggest that you set your defragmentation on automatic rather than manually because it can happen that you forget.
Step 5: If you want to defragment you hard drive manually simply select any drive in the list to highlight it and then click Analyze disk to determine if it need to be defragment. Microsoft recommends defragmenting any disk that has more than 10% fragmentation. If your hard drive has more than 10% fragmentation then click Defragment disk button and wait until defragmentation is finished.
Step 6: You can stop the defragmentation at any time, without damaging your disks in any way, by clicking Stop operation during a defrag.
[ttjad keyword=”all-in-one-desktops”]


![Read more about the article [Tutorial] How To Completely Silent Your iPad](https://thetechjournal.com/wp-content/uploads/2012/04/sound-ipad.jpg)
![Read more about the article [Tutorial] How To Downgrade Your iPad 2 From iOS 6.x to iOS 5.x](https://thetechjournal.com/wp-content/uploads/2013/01/ios6-ios5-ipad-2-ttj-logo-512x211.jpg)