Email is one of the best ways for communication and to most people, Gmail is the preferable choice. But it’s been found that many people, especially students or who are at the beginning level, are deprived of using Gmail properly due to insufficient guideline or lack of knowledge. Therefore, today we have come up with a complete guideline.
Basic Version of Gmail
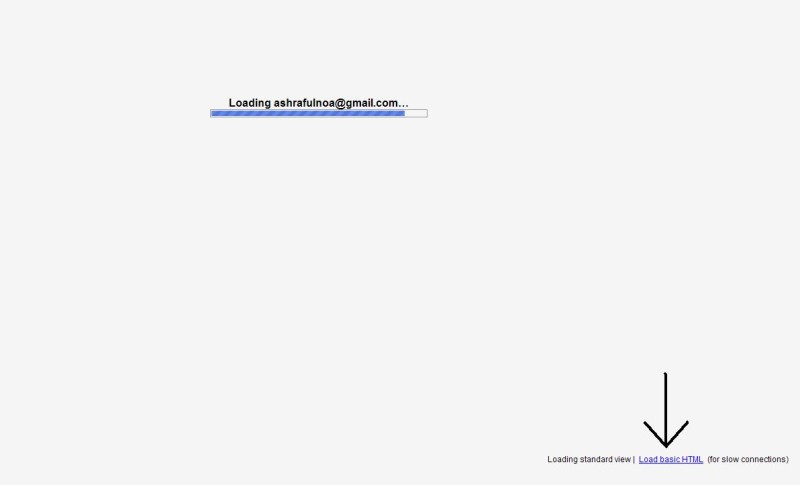
Over a slow internet connection, Gmail takes a few minutes to load. But you can load Gmail promptly by switching to a basic version of Gmail. You will find the basic version of Gmail written as “Load basic HTML” at the bottom right while your standard Gmail account is being loaded.
Or else, you can access basic Gmail version by simply adding “?ui=html” to the standard Gmail URL. The URL should be like this – https://mail.google.com/mail/?ui=html. Here’s how the basic Gmail interface looks.
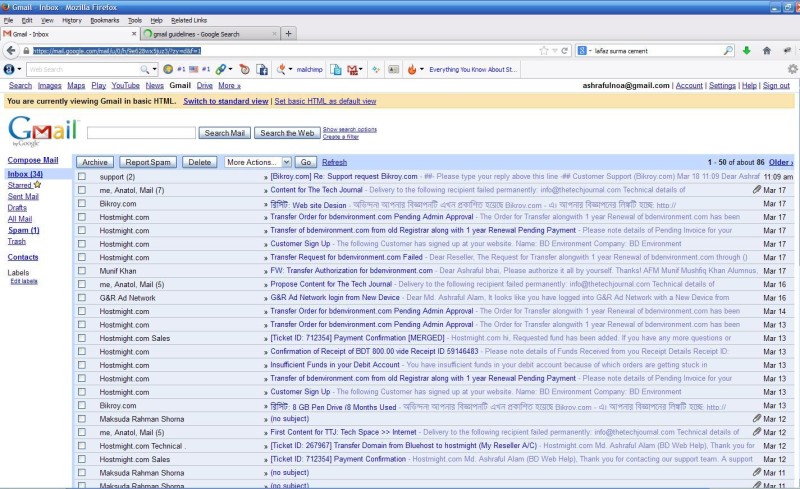
You will find all labels are placed at the left sidebar and actions are available on the buttons at the top of the list of messages. You can apply labels to your messages in the basic view. But the problem is you can’t move messages into folders.
Track Who Sent You Email
Using an alias to your Gmail address will help you keep track of who sent you an email. For example, when you sign up for a free Job site newsletter, you can create an alias of your email, “your.email+free.joobs@gmail.com.” All messages sent to the alias will be delivered to your main email address, “your.email@gmail.com.” You will be able to understand from where emails have come and whether or not your email address is being sold to other sites.
You can also setup filters to automatically delete unexpected messages, apply labels to them, skip the inbox and move them directly to labels. On the other hand, you can forward them to another email account. Besides, Gmail also allows you to create multiple versions of your email address. For example, if Ashraful Alam’s main account is ashraful@gmail.com, emails will be sent to “ashraful@gmail.com” and “a.ashraful@gmail.com” (the latter is the email of the original email) will also receive the same emails.
Get Important Emails with Desktop Notifications
To see notifications from Gmail account, you must be signed into Gmail and have Gmail open in your browser, which can be minimized.

You must turn on “Desktop Notifications”. And after that, whenever emails arrive to your account, you will get “desktop notifications.”
Turn on Hidden Notifications
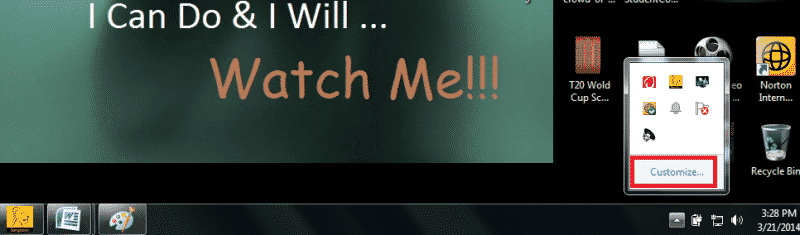
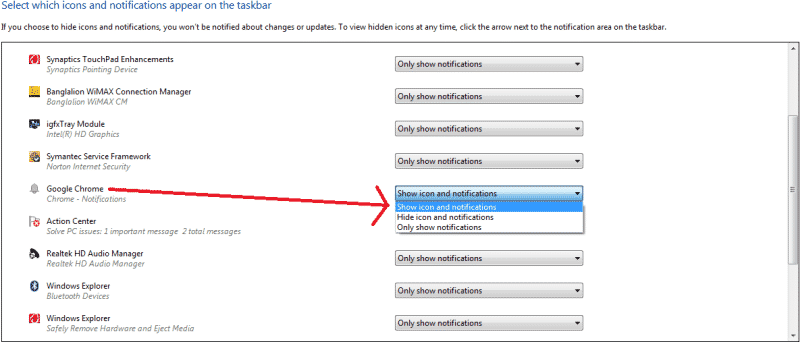
Some notifications are hidden by default; you may have to change the setting for notifications in Chrome browser in the Windows Notifications Area. To unhide notifications in Chrome, click the “Show hidden icons” up arrow on the Taskbar and click “Customize” on the popup box.
On the “Notification Area Icons” dialog box, scroll down to “Google Chrome,” select “Show icon and notifications” from the drop-down menu list to the right. Click to OK to accept the change and thus your notification system will be on.
Enable Gmail Desktop Notifications
When new messages arrive in your Gmail inbox without an active browser window open all the time, just click on the “Settings” gear button and select “Settings” from the drop-down menu. Select “New mail notifications on” to receive notifications when any new email messages enter in your inbox. To be notified only when the messages enters in are marked as important, select “Important mail notifications on”.
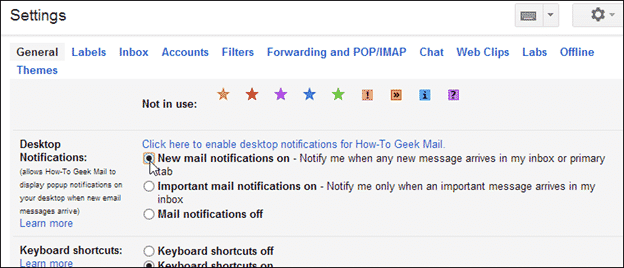
Scroll down to the bottom of the “Settings” option and click “Save Changes”.

Whenever you work in another tab, or, your browser is minimized, you will receive a discrete toast notification in the system tray.
[ttjad keyword=”all-in-one-desktops”]

![Read more about the article [Tutorial] How To Change Home Button Click Speed On Your iDevice Running iOS 6](https://thetechjournal.com/wp-content/uploads/2012/11/general-settings-ios-6-a6s5d4a687e98we.webp)
![Read more about the article [Tutorial] How To Show Extensions For Known File Types In Windows 8](https://thetechjournal.com/wp-content/uploads/2012/07/search-win-exolorer-a65s4das1d.webp)