With so many devices that support Bluetooth connectivity especially headphones, mouse’s, keyboards it is unthinkable to don’t know how to connect/add your Bluetooth device in Windows 7. Adding of Bluetooth device in Windows 7 is different than the one in Windows Vista so we will show you the entire process of adding the device as well as give you some advices to watch out for so that the process runs smoothly.
To find out how to add your Bluetooth device follow steps below:
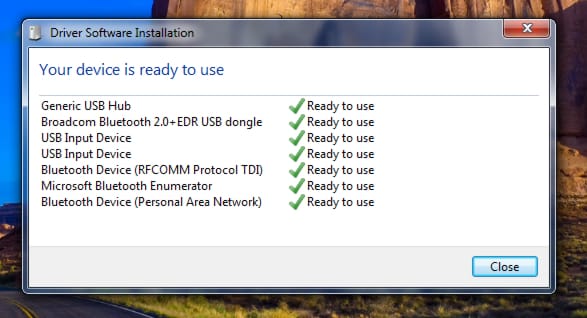
Step 1: Plugin your USB Bluetooth dongle into your computer. After you have plugged in your Bluetooth Windows 7 will automatically recognize it and install necessary drivers. As you can see from below image our Bluetooth was successfully recognized and installed.
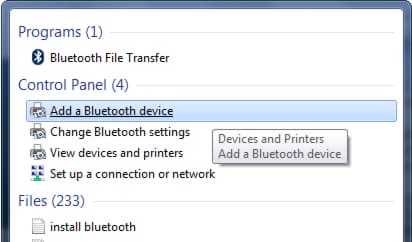
Step 2: Now we need to add our Bluetooth device so Windows can recognize it and prepare it for use. To do that go to Start menu, inside search field type Bluetooth and from search results choose Add a Bluetooth Device.
Step 3: Make sure you headphones, mouse, keyboard or any other Bluetooth device you want to install is powered on.
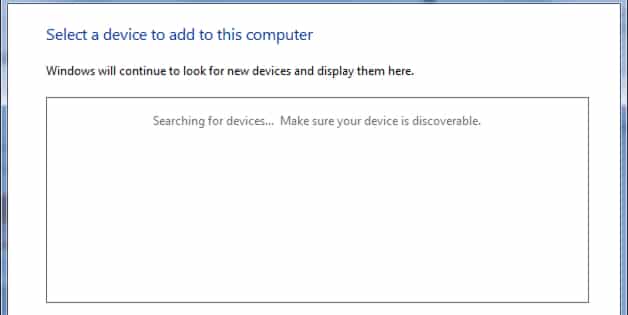
Step 4: Once you open Add a Device window, Windows will automatically search for your device. If you followed above advices you device should be listed in this window.
Note: For certain devices you will be asked to add a pass code. For most devices this pass code is 0000, if this code does not work check your device user manual.
Step 5: After this your device is ready for use. However by going to Start Menu -> Control Panel -> Devices and Printers -> Bluetooth Devices you will be able to find, test and configure your Bluetooth device.
[ttjad keyword=”all-in-one-desktops”]


![Read more about the article [Tutorial] How To Change The Number Of Rows On The Windows 8 Home Screen](https://thetechjournal.com/wp-content/uploads/2012/11/win-8-home-screen-number-tiles-ttj-logo-512x267.jpg)
![Read more about the article [Tutorial] How To Enable Sleep Mode On WD MyBookLive](https://thetechjournal.com/wp-content/uploads/2012/10/mybooklive-system-tray-a8s7e9w87r9w87t98wre.jpg)
![Read more about the article [Tutorial] How To Attach a VHD or VHDX in Disk Management In Windows 8](https://thetechjournal.com/wp-content/uploads/2012/10/attach-vhd-as5d46a5s4d654sa.jpg)
Pingback: 1groundwork