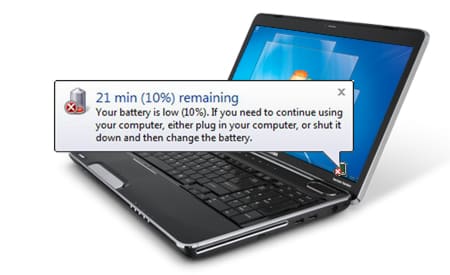
If you use Windows 7 on your laptop you probably notice that every time when you laptop have lower than 5% of energy left you receive a warnings message and your laptop goes into sleep mode. This can be very useful because it will because he will save current work, but in most cases that 5% converted in time is around 15 minutes, still enough of time for you to finish certain project you are working on and turn off your laptop manually. In this tutorial I will show you how to disable this 5% low battery warning with just few changes inside your Windows 7 Control Panel.
To get started follow steps below
Step 1: First thing what we need to do is check in what power saving mode your laptop is working. To do that click Start menu and then chose Control Panel
Step 2: Choose Category view and then click on System and Security
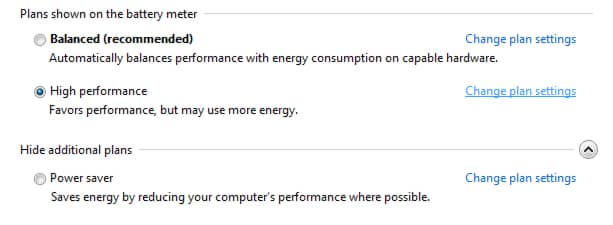
Step 3: Now choose Power Options and in new window select Change plan settings for the power plan you want to change
Step 4: In my case I choose High performance plan and when new window appear choose Change advanced power settings
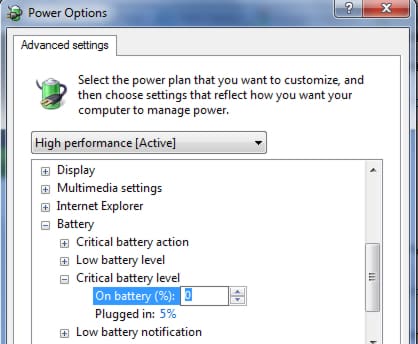
Step 5: In small window that opens you will see an expandable menus and this is where you can change settings for different parts of your Windows 7 operating system and hardware for your power plan
Step 6: In our case we will expand Battery -> Critical Battery Level
Step 7: To disable 5% warnings message simply replace 5% with 0%.
Step 8: Now simply save all changes by clicking OK and repeat above steps for all power saving modes you want.
[ttjad keyword=”laptop-lenovo”]


![Read more about the article [Tutorial] How To Connect Your TV With Computer Via Bluetooth](https://thetechjournal.com/wp-content/uploads/2012/04/tv-bluetooth-connect.jpg)
![Read more about the article [Tutorial] How To Enable Remote Desktop In Windows 8](https://thetechjournal.com/wp-content/uploads/2012/11/system-and-settings-windows-8-a65s4d65e498we79w.jpg)
![Read more about the article [Tutorial] How To Upload Videos From Flip Video Camera To Facebook From Your Mac](https://thetechjournal.com/wp-content/uploads/2012/03/flip-to-facebook-512x256.jpg)