Monitoring Systems and computer performance is very important especially with Windows. To avoid problems with system crash and loosing of data you always need to be careful. Hard drives, graphic cards, processor, RAM Memory everything is a subject of overheating or lack of power supply. So, to avoid these kinds of problems you need a quality tools that will help you to monitor your system performance in Windows 7. We will suggest you the tools that already exist in Windows 7 and how to use them but also we will suggest some other gadgets that does not exist in Windows and that can be installed.
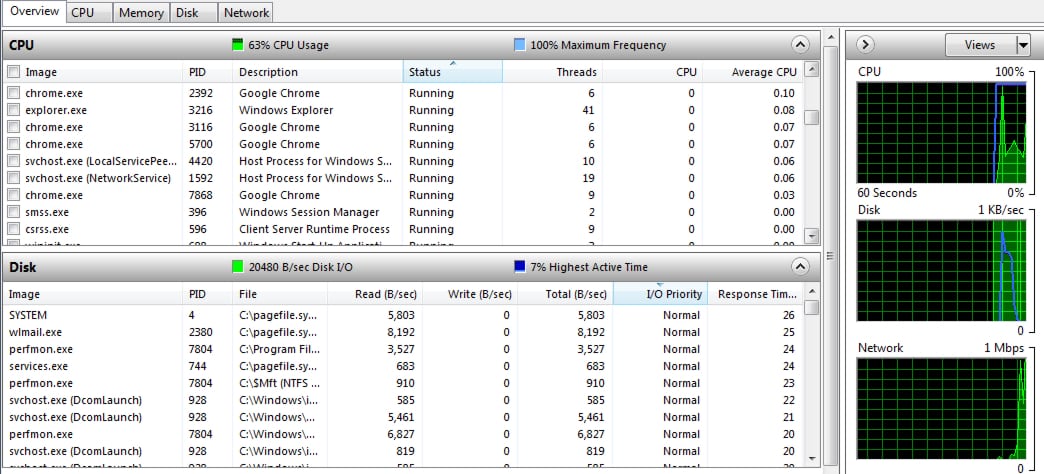
Windows 7 has two built-in tools that can help you monitor you system – Resource Monitor and Performance Monitor. With Resource Monitor you can get a quick overall summary of CPU, hard disk, network and memory resources. Performance Monitor however lets you examine large number of counters for specific system processes and services.
Resource Monitor
With Resource Monitor you can see which programs and services are consuming most of Windows system resources but it can also be a good troubleshooting tool if you face with certain system or programs errors.
To access and use a Resource Monitor do following:
Step 1: Click Start menu and in search field type resource monitor and press Enter.
Step 2: Default Resource Monitor window will open with overview tab which shows a CPU, network, disk and memory resources.
Step 3: CPU tab will be already open with its resources. To see network, disk or memory resources simply click on its header bar.
Step 4: For much more details you can click specific resource tab along the top of the Resource Monitor window.
Performance Monitor
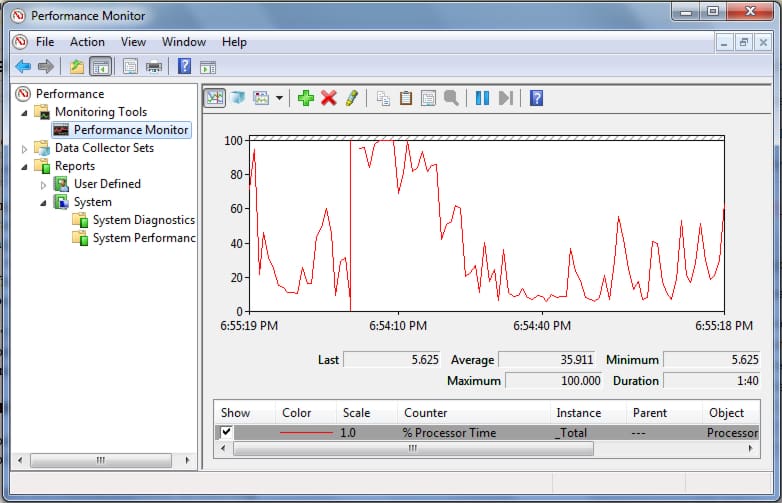
When it comes to Performance Monitor you will be able to view performance data in real time or trough a collection of data inside log files. Because Windows 7 has hundreds of counters which are related to Processor/CPU, memory, network or disk, Performance Monitor is able to collect performance data based on counters which are measurements of system activity. To access Performance Monitor simply following below steps:
Step 1: Open Start menu, inside search field type performance monitor and press Enter
Step 2: In new window that appears you will be able to see graph which is showing counters information’s and statistics right below the graph field. From here you can also view each counter individually, or group of counters all at once.
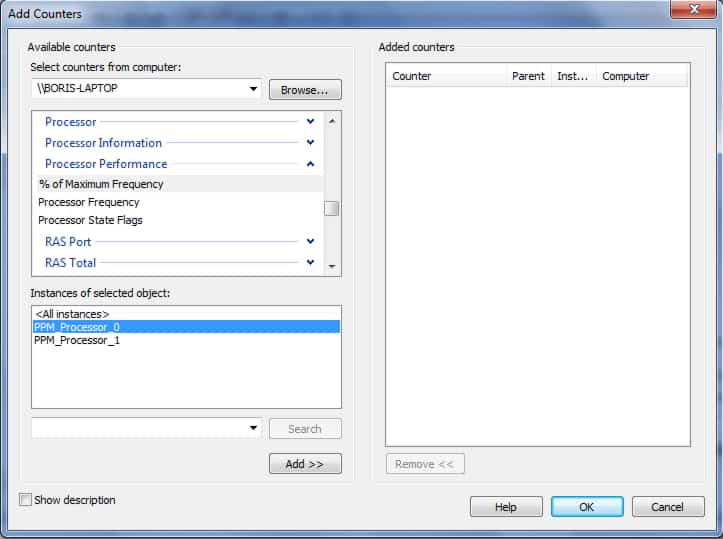
Step 3: If you want to add a new counter you can right click on the graphic field and choose Add Counters… or click on green plus button which is located inside the toolbar at the top of the screen.
Step 4: Once Add Counters dialog box appear you can scroll trough available counters and by clicking on Add button you can add new counters.
Step 5: Click OK to save changes and return to main window. Previously added counters will appear in the graph field with data updated continuously
Performance Monitor also allows you to run system diagnostic tools. Once you run this tool you will get instant report on system performance issues or possible problems if there are any. To access this tool do following:
Step 1: From left Performance Monitor frame choose Reports -> System -> System Diagnostics -> Choose a PC for which you want a report.
Step 2: The report will be displayed in the right frame/main panel
As you can see Microsoft did a pretty good job and gave us a lot of quality system monitoring tools within Windows 7. However some of you may ask more statistics and quality results, and for those of you who are looking for that you may try some of below suggested applications by simply installing them in your system.
[ttjad keyword=”all-in-one-desktops”]


![Read more about the article [Tutorial] How To Automate Your Android Device With Microsoft on{X} App](https://thetechjournal.com/wp-content/uploads/2012/06/recipes-android-device.jpg)
![Read more about the article [Tutorial] How To Send SMS From Your PC Through Your Android Device](https://thetechjournal.com/wp-content/uploads/2012/11/might-text-android-ttj-logo-512x196.jpg)