In our previous tutorial I showed how to create VHD or VHDX in your Windows 8. Now once you are familiar with that part lets see how you can mount either a VHD or VHDX file as a drive in the computer for all active users in Windows 8. Let me also note that you need to be signed in as an administrator in order to access these options.
To get started follow steps below:
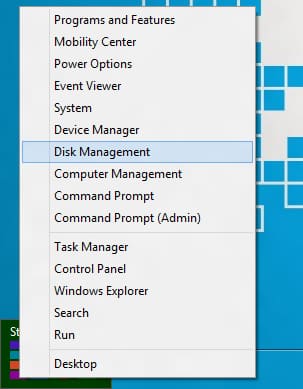
Step 1: Move your mouse to bottom left corner of your screen and right mouse click in there.
Step 2: From context menu that appears choose Disk Management. If you are prompted by UMC, click on Yes button.
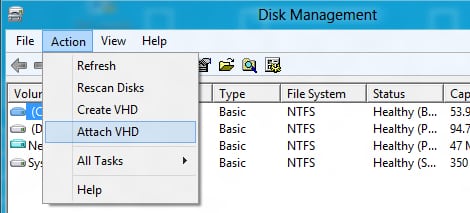
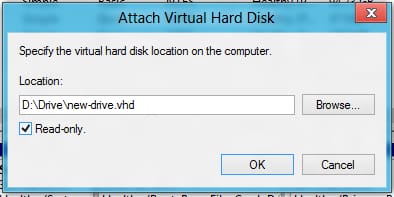
Step 3: Inside Disk Management window click on Action menu and from drop down menu select Attach VHD.
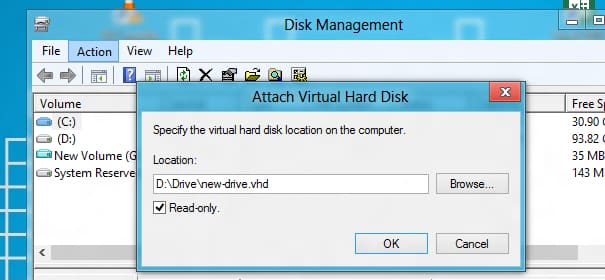
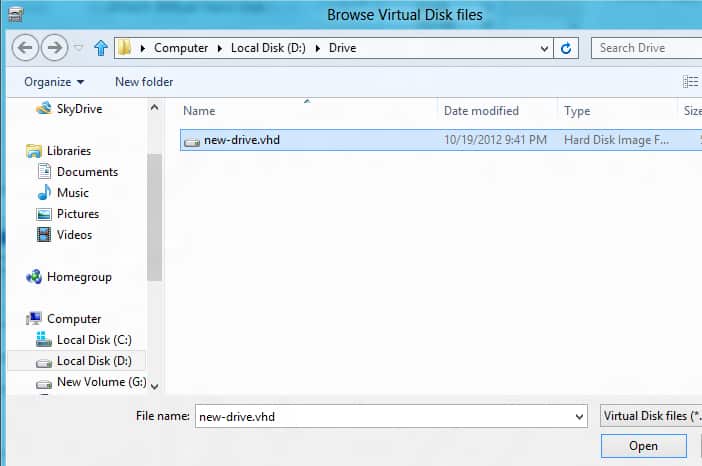
Step 4: New window will appear, click Browse, navigate and select .vhd or .vhdx file that you wish to mount.
Step 5: If you want to make the mounted .vhd or .vhdx file to be Read Only make sure you select Read Only checkbox.
Step 6: Click Ok to continue.
Step 7: The .vhd or .vhdx file is mounted and attached as drive in your computer.
[ttjad keyword=”cloud-storage-drive”]

![Read more about the article [Tutorial] How To Upload Videos From Flip Video Camera To Facebook From Your Mac](https://thetechjournal.com/wp-content/uploads/2012/03/flip-to-facebook-512x256.jpg)
![Read more about the article [Tutorial] How To Connect Gmail With Outlook.com](https://thetechjournal.com/wp-content/uploads/2012/08/sending-reciving-ad7asda67sd9a.jpg)
