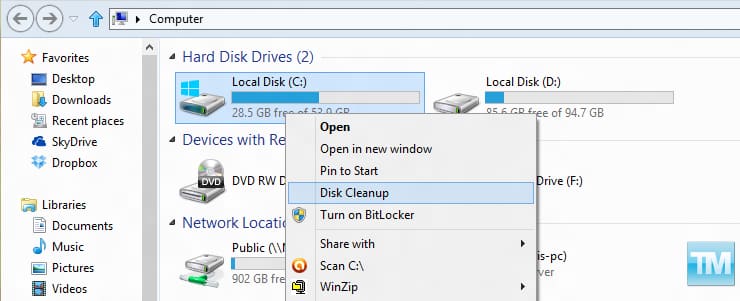
If you cleaning up your hard drive on regular basis, this tutorial will help you to make your cleaning process a bit faster and more accessible by adding Disk Cleanup tool inside context menu when you do a right mouse click on Disk Drive.
To get started follow steps below:
Step 1: On your keyboard press Win+Q buttons in order to access Windows App search option.
Step 2: Inside search field type regedit and then press Enter.
Step 3: If you got prompted by UAC warning press Yes to continue.
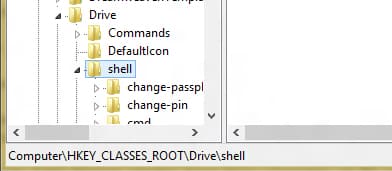
Step 4: Inside registry window follow this path HKEY_CLASSES_ROOT\Drive\shell inside left pane.
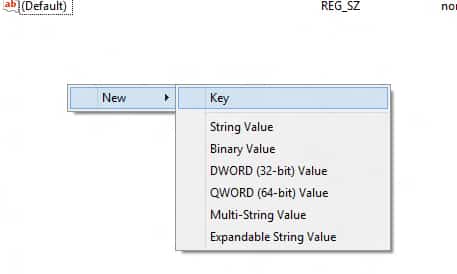
Step 5: With shell selected, right mouse click inside right panel empty space and then choose New -> Key.
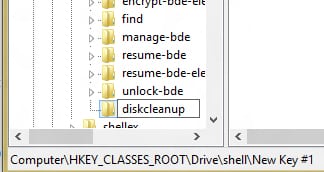
Step 6: For this new key add following name diskcleanup and confirm the change.
Step 7: You should see a new key diskcleanup located under shell tree.
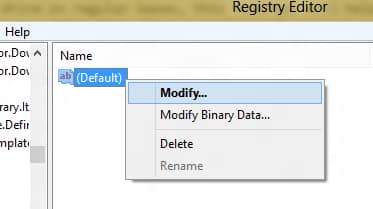
Step 8: Select this newly created key and again inside its right pane, right mouse click on (Default) and from context menu choose Modify option.
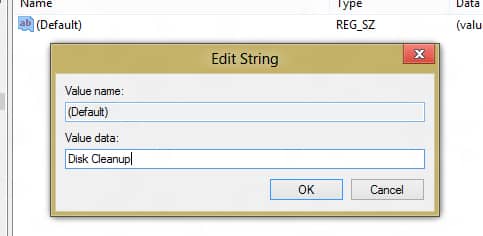
Step 9: Inside new small window that opens up, for Value data type Disk Cleanup and click OK to save your changes.
Step 10: Now right mouse click on empty space under diskcleanup right pane and choose New -> Key.
Step 11: Name this new key command.
Step 12: Under diskcleanup tree you should see new key called command. Select it and right mouse on (Default) value located inside its right pane. From context menu choose Modify.
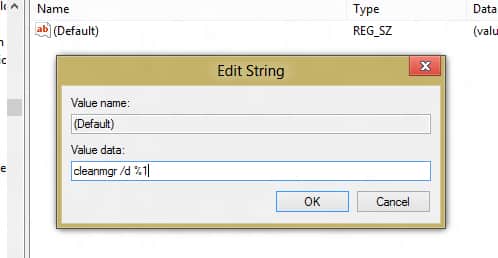
Step 13: Inside Edit String window type this cleanmgr /d %1 and click OK to save your changes.
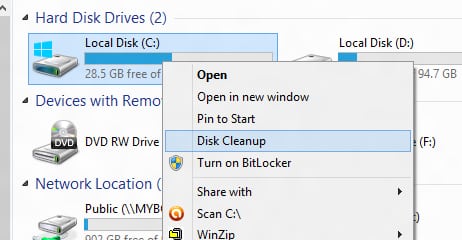
Step 14: Now when you right mouse click on any disk drive, you should see Disk Cleanup option available inside context menu.
[ttjad keyword=”all-in-one-desktops”]



![Read more about the article [Tutorial] How To Download Beautiful Bing Backgrounds As Your Wallpaper](https://thetechjournal.com/wp-content/uploads/2012/11/love-todays-bing-ass5d64a68r7ew897r.jpg)
![Read more about the article [Tutorial] How To Create A Panorama With Your Photos](https://thetechjournal.com/wp-content/uploads/2012/05/edit-options.jpg)