In my previous tutorial, I showed you how to take control of your files and folder in Windows 8. This tutorial will follow the same path, but this time we will see on how to that with Windows 8 registry key. You will need to know how to perform this procedure, because one of our next tutorials will require from you to perform this change.
To get started follow the steps below.
Step 1: From your desktop press Win+R on your keyboard.
Step 2: Inside the Run window that opens up type regedit, and press Enter on your keyboard.
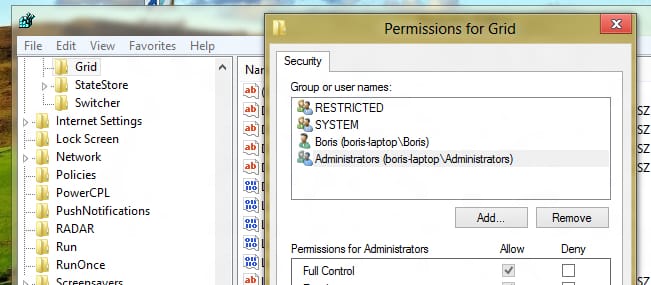
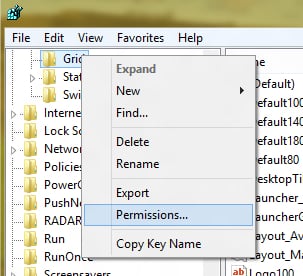
Step 3: When Windows Registry Editor window opens up, inside left pane go to the desired registry key, right mouse click on it and from context menu that appears choose Permissions.
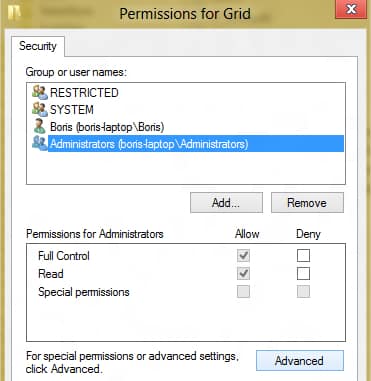
Step 4: New dialog window will open. Click on Advanced button located in bottom right.
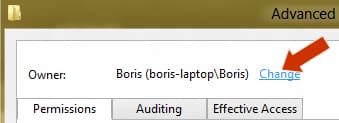
Step 5: Under Owner, click on Change button.
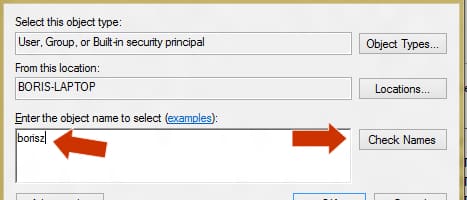
Step 6: Type in your username and click on Check Names button. It will automatically convert your username into the correct format.
Step 7: Click OK to save your changes.
Step 8: From Permissions and Display window, select your username and then check Allow checkbox under Full Control row.
Step 9: Again click OK to save your changes, and you will now have full permissions on chosen registry key.
Visit our Windows 8 tutorial section for more tips and tricks.
[ttjad keyword=”laptop-asus”]



![Read more about the article [Tutorial] How To Use Keyboard Shortcuts With Hotmail](https://thetechjournal.com/wp-content/uploads/2012/03/hotmail-shortcuts-512x171.jpg)
![Read more about the article [Tutorial] How To Add Google Public DNS In Windows 7 – Speed Up Web Browsing](https://thetechjournal.com/wp-content/uploads/2012/03/dns-google-logo-512x263.jpg)
![Read more about the article [Tutorial] How To Personalize Command Prompt In Windows 7](https://thetechjournal.com/wp-content/uploads/2012/04/command-prompt-green-logo-512x256.jpg)