Are you a Student? Do you need to prepare Term-Papers every semester with Word?
If so, learning how to change Page Orientation in Word document is undoubtedly worthwhile. Similarly, if you are a professional who is tasked with preparing reports with Word, learning this simple trick will go a long way.

Word lets you adjust the Page Orientation with very simple steps. Similarly, you will never feel limited to the options available to you. This blog will teach you how you can change the Page Orientation for a specific text string, followed by doing the same to an entire page.
Setting Landscape Orientation
By default, the page orientation is set to Portrait. However, you might need extra space for some specific section in a Word document. The need for more space is highly felt when working with a table with multiple entries. As a writer you want the table to be neat and presentable. If you use Portrait orientation, you might fail to fit the entire table on a single page.
To solve this problem, you can select the table and set the orientation to Landscape for that part only.
Follow the below steps to set Landscape Orientation
- Highlight the part of your document you want to display in a Landscape orientation.
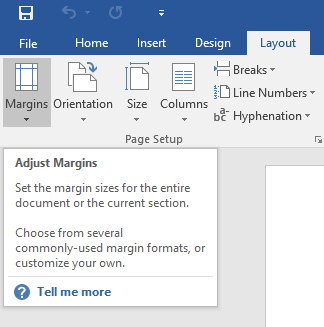
- Go to the Layout tab, and from the Page Setup group click on Margin.

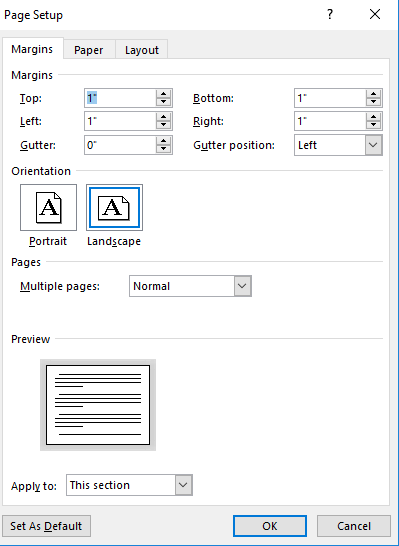
- Select the last option from the list-Custom Margin. This will open the Page Setup Popup.
- From the Page Setup Popup select Landscape as Orientation.
- Now from the Apply to Drop Down choose Selected Text. Note that, if you open the popup without highlighting a section, you will have a different option in the drop-down menu.
- Click Ok to confirm the settings.
Bonus!
How to Change Orientation of One Page in MS Word
There is another way to Change Page Orientation of a Single Page in Word document. Suppose you have 3 pages in a document. Let’s name the pages Page 01, Page 02 and Page 03.
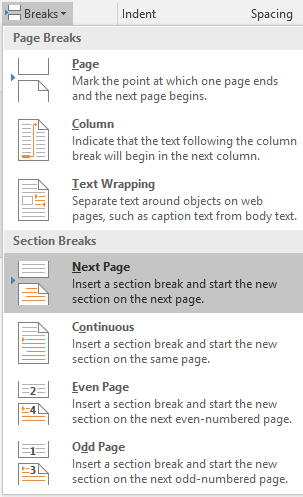
Place your mouse on Page 01 and navigate to Page Layouts. Now from the Page Setup Group open the Breaks Drop-Down menu and select Next Page. Do the same on Page 02. Remember in this example, we want to change the Page Orientation on Page 02.
Now that we have set the Section Breaks for Page 01 and Page 02, the next step is to set the Page Orientation to Landscape. Start off by placing your mouse on Page 02. Afterward, follow the below-mentioned instructions.
- Go to Layout>Page Setup>Margins.
- From the Margins drop-down select Custom Margins. This will open the Page Setup Popup.
- From the Page Setup Popup, select Landscape.
- Select the Landscape Orientation and Click OK.
Want to learn more? Did you know you can create Virtual Desktops in Windows 10? Then make sure you read this tutorial blog Windows 10 Hacks- Manage Multiple Windows Like A Pro.


