If you’re playing a game for the very first time and you haven’t tweaked your graphics setting for the game beforehand, chances are you’re not getting the most out of your graphics card. Whether you use built-in graphics or a separate card in a PCI Express slot, your video driver has a control panel that allows you to improve the look of your games, if you know how to. The helpful people at PC World have published such a how to column this week, detailing the ways you can tweak your card for the optimized gaming experience.
These control panels, unfortunately, are not easy to work with. Over the years, AMD, nVidia, and Intel have improved the user interfaces–but the underlying technology has also become more complex, and the control panels have gained many more settings to manage.
If your system is powerful enough to run a typical 3D title above 90 or 100 frames per second, then it has excess GPU horsepower that you could use to improve the image quality of the game. Getting your machine to hit 60 frames per second while pumping up the graphics eye candy will make your overall gaming experience much better.
The hard part is using trial and error–you change a setting, then play the game, then change again–to find the sweet spot, especially since every game and every system is a little different. My goal here is to give you some general guidelines for obtaining good image quality, as well as for finding the right blend of image quality and performance.
Note that all of the following examples work with Windows 7. They’ll likely work with Windows Vista too. Windows XP users, however, may see differences–and some capabilities (namely, features specific to DirectX 10 and 11) simply aren’t available in XP.
Before we dive into the intricacies of in-game settings and graphics control panels, it’s worth discussing a few rules of thumb for prioritizing which settings to enable.
Start With the In-Game Control Panel

Pump Up Texture Detail and Anisotropy First
You may be tempted to start by cranking up the antialiasing. Sure, antialiasing removes annoying jaggies, but if you turn it on while the texture detail remains low, you’ll end up with a muddy mess. Low-resolution textures will still look ugly with antialiasing turned on.
Anisotropic filtering with modern graphics cards can go as high as 16X with only a modest decrease in performance. Yet anisotropic filtering makes a huge impact in the look of the game as you move through the world, particularly with objects or textures that recede in the distance as you view them–you’ll see less image popping, and long hallways and receding terrain will look smoother and more accurate.
Increase Resolution Before Antialiasing
Sometimes, bumping up antialiasing will actually reduce the detail you see in the game. Antialiasing tends to soften what you see on screen slightly, and running antialiasing at relatively low resolutions can often produce a game world that looks a little blurry. That’s a result of the color blending needed to create good antialiasing effects.
If you’re running a game at, say, 1440 by 900 with antialiasing, consider turning off antialiasing and bumping the resolution up to 1680 by 1050. The performance hit will be roughly the same, but you might see a little more game detail.
Don’t Turn Up Shadow Detail
When you’re playing a game, you’re always in motion, and you probably won’t stop to gaze at the scenery. High shadow levels can seem very immersive–if you’re standing still. If you’re constantly on the move, you may notice an absence of shadows, but you’ll often not see the difference between medium shadows and high shadows. Maxing out shadow levels can often cause a huge decrease in performance. Turn up this setting only after you’ve pumped up other image-quality settings and are still running at high frame rates.
Avoid DirectX 10 and DirectX 11 With Low-Cost Graphics Cards
Don’t get me wrong: DX10 and DX11 can offer substantial increases in 3D graphics image quality. And due to improved multithreading in the DirectX libraries and drivers, installing DirectX 11 can boost performance over DirectX 10 even if the game was developed prior to DirectX 11.
However, graphics board companies do buyers a disservice by advertising cheap versions of cards as being able to run the latest graphics APIs (application programming interfaces). Technically, a Radeon HD 5450 can run DirectX 11 games in DirectX 11 mode–but the results will look like a slideshow. Revert to DirectX 9 modes if you have a low-end GPU, and you’ll be pleasantly surprised by higher frame rates.
Usually you can use the in-game control panel to change the mode, but sometimes you’ll need a different executable or shortcut, such as with Tom Clancy’s H.A.W.X. And with some games, the way to alter the mode is not always obvious. For example, in Crysis, you enable the DirectX 9 mode by reducing the global detail settings to ‘high’ instead of ‘very high’.
Experiment With Antialiasing Settings
Even if the game offers merely the usual 2X/4X/8X multisampling antialiasing schemes, those aren’t your only choices. Here’s a case where using the Windows graphics card control panel may be more useful, because you can fool around with transparency antialiasing or other modes.
You can also turn on antialiasing modes that aren’t available in-game, such as nVidia’s CSAA (coverage sample antialiasing), which can offer good image quality with less of a performance hit than standard multisampling antialiasing. I’ll talk about those modes in the nVidia control panel section.
If your game provides more than the usual settings, experiment with them. You may find that 8X CSAA on nVidia cards looks just as good as 4X multisampling antialiasing but offers better performance.
How to Use the In-Game Controls
Now that we’ve looked at a few rules of thumb, let’s explore in-game settings and the graphics control panels.
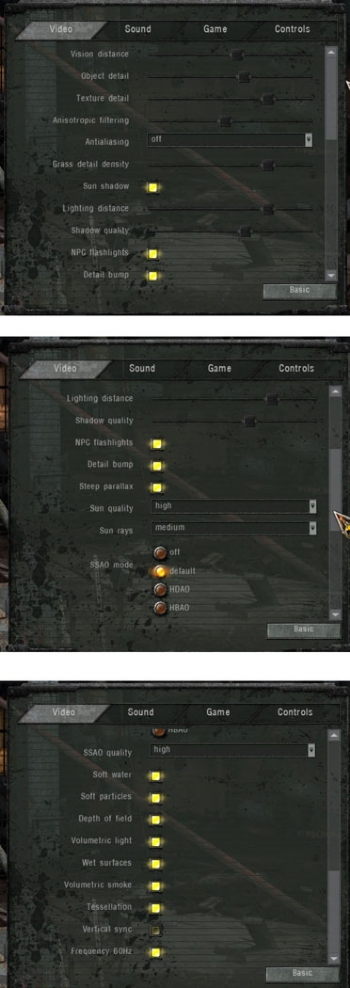
Most modern PC games come with a wealth of graphics options.Below I’ve used the recent S.T.A.L.K.E.R.: Call of Pripyat as an example, because it has assorted settings that take advantage of the latest DirectX 11 graphics cards.
Of course, if you don’t have DirectX 11-capable graphics hardware, you can’t enable some of these features, like tessellation, a technique that creates more-detailed geometry from a base set of geometry defined within the game.
Each additional setting you dial up or turn on can adversely affect performance. You need to determine which settings will give you the most image-quality bang for the buck, and then decide which of those to enable. The key is to remember that you’re always in motion in a 3D game; you’re rarely standing around and enjoying the environment.
Games that give you a wide assortment of adjustments for detail levels are terrific, and allow you to experiment to your heart’s content. Since the graphics control panels from AMD and nVidia don’t really let you change shadow or ambient occlusion (SSAO) settings, you have to use in-game settings if you want to balance image quality and performance.
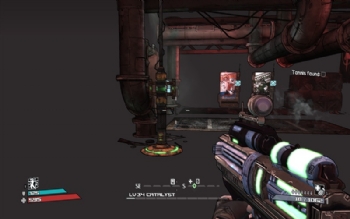
Unfortunately, not every game gives you that much control over graphics settings. Many titles based on the Unreal Technology engine (BioShock 2 and Borderlands, for example) don’t allow you to set antialiasing, one of the most basic image-quality improvements.
You can edit configuration files manually, but that might result in what programmers euphemistically call “unpredictable results”–namely game crashes, weird image-quality flaws, and more.
nVidia Control Panels
Now let’s take a look at the nVidia and AMD control panels. If you have an nVidia graphics board, open the nVidia graphics control panel by right-clicking on the desktop and selecting nVidia Control Panel from the context menu.
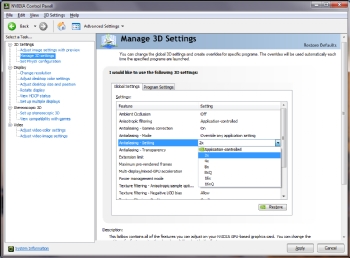
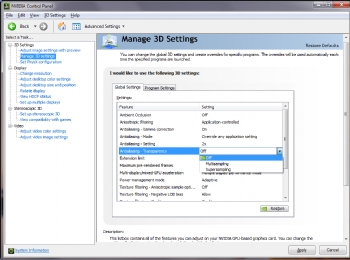
You should use the Windows control panel only if the game doesn’t offer the appropriate built-in settings–which happens often with antialiasing. nVidia’s control panel has two different antialiasing settings, one for standard multisampling antialiasing and the other for transparency antialiasing.
Though you can enable them separately, there’s really no point to turning on transparency antialiasing if you don’t have standard antialiasing enabled.
One interesting option in Antialiasing Mode is the ‘Enhance the application setting’ mode. What this does is turn on CSAA for games that support multisampling antialiasing but don’t have explicit settings for CSAA. If that seems a little confusing, it is.
CSAA essentially allows you to add an antialiasing level (say, 8X) over the in-game level, and to obtain that level of image quality without the performance hit of full 8X multisampling antialiasing (MSAA). It’s a little arcane, but it’s worth experimenting with if you have the time and inclination.
Transparency antialiasing reduces jaggies for transparent textures. Frequently, when you turn on standard antialiasing, textures that include transparent elements–a chain-link fence, for example–may reduce those jagged effects for distant objects, but the fence will still have jagged edges.
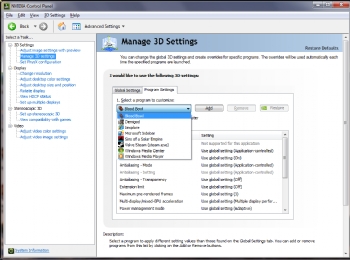
nVidia also allows you to set game profiles explicitly. Click the Program Settings tab, and you’ll be greeted with a drop-down menu that permits you to set parameters for specific titles. What you can do here is leave the global settings for stuff like anisotropic filtering and antialiasing to Application controlled, and then set overrides for specific game titles.
It’s like having an in-game control panel, only you set it in the nVidia panel. This approach is especially useful if you want to set aggressive image-quality settings for older titles that are very fast on your system while allowing newer titles to be managed by their in-game settings.
This screen is a little confusing at first–everything seems to read ‘Use global setting’ or ‘Not supported for this application’. However, each setting that is supported is actually a drop-down box that allows you to change the setting. When you run the game, nVidia’s driver enables that setting for that game only.
AMD Graphics Control Panel
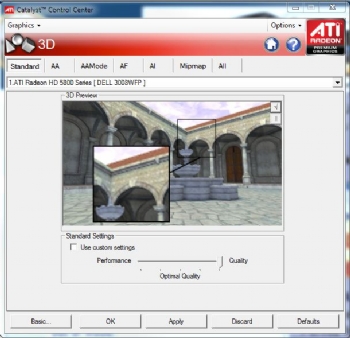
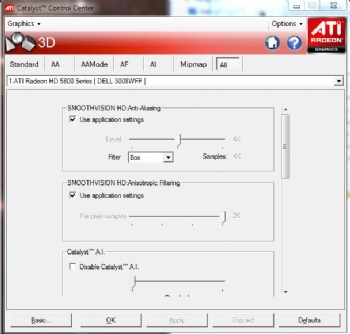
For an AMD ATI card, you bring up the AMD graphics control panel, known as the Catalyst Control Center, by right-clicking on the desktop and selecting Catalyst Control Center from the context menu. Fire up CCC for the first time, and you’ll be prompted to choose between a ‘basic’ and ‘advanced’ control panel. The basic control panel is really too simple for your needs, so select the advanced one.
Next you’ll see a fairly pedestrian-looking screen that appears to be mostly an ad. Welcome to the, er, welcome screen. This is a fairly useless screen, so uncheck Show this page on startup. Once that’s done, you’ll always return to the last page you viewed when you run CCC.
Catalyst Control Center offers a fairly rich array of controls, though not quite as many as nVidia’s control panels do. It has no concept of individual game profiles, for example.
Instead, AMD offers Catalyst AI, which attempts to auto-optimize settings for known game titles. In fact, AMD does have game profiles embedded in its drivers, and will try to auto-optimize performance for individual games, though it won’t override in-game settings.
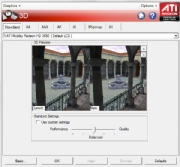
Since you need to focus on 3D image quality and performance, select the Graphics drop-down on the upper left and click on 3D. You’ll encounter a series of tabs that include mini-previews, both animated and still, of your settings changes.
Catalyst AI is most useful if you have a dual-GPU CrossFire setup, but it sometimes works poorly with newer games. For example, in Gearbox’s game Borderlands, you’d see missing textures (gray or white boxes) with Catalyst AI enabled in the Catalyst 9.11 drivers. In general, the safest thing to do is turn off Catalyst AI.
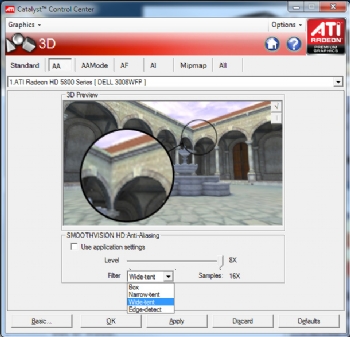
If you want to make some manual changes, first check the Use custom settings box. Then you can move to the other tabs to make changes to antialiasing, anisotropic filtering, and so on, all with slightly different and mildly useful animated previews. The antialiasing screen even allows you to pick a filter type–actually a sample pattern and depth–which will improve antialiasing quality at the expense of performance.
Generally, you can leave it on the default ‘Box’ filter, but feel free to experiment. Even if you leave the antialiasing level on ‘Application Settings’, you can still change the filter type.
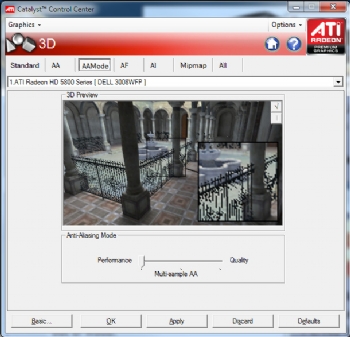
The AAMode tab is AMD’s way of letting you alter antialiasing with transparent textures. The ‘Performance’ setting has little effect, while the maximum-quality ‘Supersampling’ setting produces the biggest performance hit.
If you don’t care about the mini-previews, the simplest screen to navigate is the ‘All’ tab, which lists every setting in a single, scrollable window.
Remember, it’s generally better to use in-game settings to make the most of your image quality; use the graphics board maker’s control panels only for settings that games don’t have available within their options screens.
Troubleshooting
Whether you use in-game settings or the graphics board control panels, you’ll run into problems. Graphics drivers and 3D games are complex pieces of software, and the interactions between them are often unpredictable. Let’s take a look at several typical issues and solutions.
Lack of Feature Support
I’ve already mentioned how games using the Unreal Engine often don’t support antialiasing. In a few games, such as Borderlands and Mass Effect 2, you can’t even override the lack of in-game antialiasing with the control panels. Certain rendering techniques in games, like deferred lighting or render-to-texture, can also interfere with multisampling antialiasing.
Some tricks are available, such as downloading third-party utilities like RivaTuner, but many of them are old and don’t work under Windows 7 64-bit. Occasionally, driver updates will permit you to force a feature such as antialiasing or anisotropic filtering, or the game will be updated to allow that feature, but the only thing you can do is wait for the update.
In other cases, one particular feature in the game may prevent another from working. For example, some games won’t work properly with antialiasing and high dynamic range (HDR) lighting, even though both features may show up in the game settings. Try them out for yourself, and if you run into extreme performance degradation or image-quality issues, just disable one of the conflicting features.
Driver Problems
Earlier, I mentioned how Catalyst AI would result in missing textures in Borderlands. It’s not uncommon for new games to have problems with existing 3D-card drivers. All drivers make heavy use of optimizations, and sometimes that will cause a problem with a new game that may use the latest build of DirectX.
These issues may manifest as image corruption, game crashes, or very low frame rates. In such cases, one tactic is to go to a very basic driver level and disable certain advanced features in-game. For help, check the various online forums or do a Web search combining the game name and your graphics card model.
On rare occasions, you may even have to wait for driver updates before playing a particular game–thankfully, both nVidia and AMD are good about issuing driver “hotfixes” for popular new titles that may encounter problems.
One other tactic that may seem counterintuitive is to roll back to an earlier driver. Sometimes compatibility issues are accidentally introduced in newer driver releases, meaning that if something breaks you’ll have to uninstall the new driver and reinstall the old one (which is usually still available from the manufacturer’s Website).
Game Bugs
Sometimes you may encounter obscure bugs in a game that cause graphics issues. Given the large array of hardware, PC game developers can’t always test for all possible combinations.
For example, I’ve seen SSAO (screen space ambient occlusion) allowed as a setting on graphics hardware that can’t possibly support it. The result may be image corruption, a game crash, or, if you’re lucky, nothing happening aside from the feature not working.
Driver Residue

If you’ve been installing new drivers over older versions, you’ll likely encounter game crashes and severe image-quality problems. One solution is to download Driver Cleaner. Though it used to be free, Driver Cleaner is now a $10 download–but it’s worth it.
You’re in Control
You may care about frame rate above all else, or be the kind of person to tweak every available setting for the best possible image quality. Either way, don’t forget to check both the in-game graphics settings and your graphics card’s control panel. Just a few tweaks can result in a much more immersive and satisfying experience.
Source: PC World.


Pingback: http://www.k-popgirls.com
thanks a lot!!