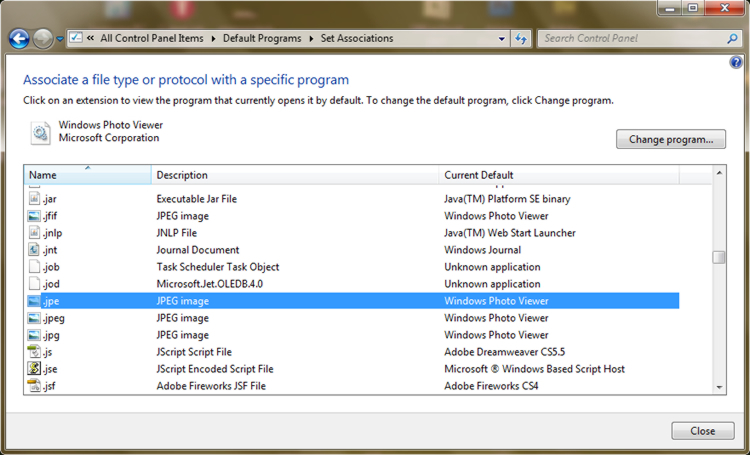
Associating a file extension to an application is a simple procedure that can save you valuable time. In fact you can automatically open files with particular software depending on their extensions. This is what we gone explain in this How-To guide. Note that the procedure is performed under Windows 7, but it also runs under Windows Vista.
Here is the easy process:
Step 1: Go to Start menu then choose Control Panel and Default Programs.
Step 2: Then select “Associate a file type or protocol with a program“. This takes you to all the extensions offered by Windows and the associated program to open. Some programs are offered by default. If your application is missing from the list, you will be able to specify the path to its location later on.
Step 3: To change or add a program, double click on the extension of your choice and change the default program in the menu.
Step 4: If program of your choice is not located in Recommended Program list click on Browse button and locate the program location. Once you add new program, he will be visible in Other Program list.
From now on, your files will open automatically with your favorite software!
[ttjad keyword=”microsoft”]


![Read more about the article [Tutorial] How To Fix Galaxy Note 2 Wi-Fi Problems](https://thetechjournal.com/wp-content/uploads/2013/01/wifi-note-2-fix-ttj-logo-512x245.jpg)
![Read more about the article [Tutorial] How To Print Faster In Windows](https://thetechjournal.com/wp-content/uploads/2012/07/printer-double-click.jpg)
![Read more about the article [Tips] How To Lower Battery Usage On Your Apple iDevices Under iOS 5](https://thetechjournal.com/wp-content/uploads/2012/03/idevice-battery-save-512x246.jpg)