MKV format is widely used and it can hold an unlimited number of video, audio, picture or subtitle tracks in one file. To be able to play this video format you must have the appropriate equipment to read it, a media player or a TV with support for recent MKV. To be sure you can play your movie; you can convert it to DVD and burn to a disc. You can then view your movie on any DVD player and computer. In this tutorial I will show you how to use the free application called DVD Flick for this conversion. You can even choose audio tracks and subtitles to integrate into DVD. Note that the operation requires re-encoding the video and sound to convert them to DVD format whose quality can be worse than your original video if it was in full HD.
To get started follow steps below
Step 1: Download and install DVD Flick on your computer
Step 2: Once you have successfully installed DVD Flick on your computer you will now be able to choose the method of burning your DVD. For that double click on DVD Flick icon on your desktop
Step 3: When first window show up click the Close button.
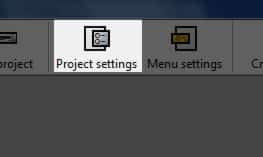
Step 4: On top of your screen click on click the Project settings option.
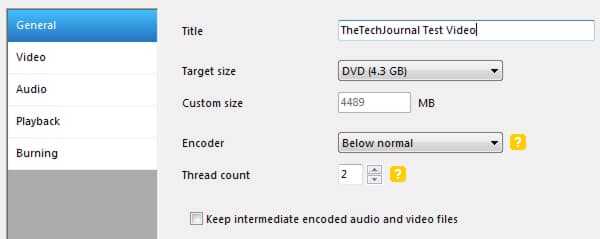
Step 5: Under General tab give a title to your DVD.
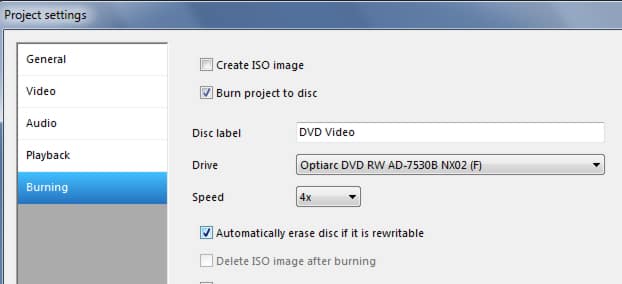
Step 6: Then click the tab Burning. In here you have the choice to burn the DVD disc or create ISO image from your DVD. Check the box Burn Project to Disc to burn a disc. Check the box Create ISO image to create a DVD ISO image.
Step 7: Once you have selected the option you want click on Accept.
Step 8: Now you will now be able to select the video which you want to convert from MKV to DVD. For that in the right pane, click the Add title button.
Step 9: On your hard drive locate and select your MKV file and click Open. The video is added to your project.
Step 10: At the bottom right of the window, click Browse.
Step 11: Select a temporary folder on your hard drive to be used in DVD Flick to convert MKV video to DVD before burning it to disc. Note that the path must not contain accent. For example, create a folder to the root of drive C: or D: and then click OK.
Step 12: The last step is to extract the MKV video, convert to DVD and then burn it on disk. For that from top options menu click Create DVD
Step 13: Insert your blank DVD into your DVD burner and click OK.
Step 14: DVD creation begins. The MKV video and audio portion is first extracted and then encoded to DVD format. The film is then burned to a disc. Note that this may take several hours, depending on the power of your processor.
Step 15: When entire process is completed and you DVD is burned on disk click Close.
Your DVD is ready. It is playable on a home player or computer.
Follow us on Twitter or be a Fan on Facebook or Subscribe On our News Feed for free to get regular update.
[ttjad]


![Read more about the article [Tutorial] Two Possible Ways to Delete All Facebook Chat Messages](https://thetechjournal.com/wp-content/uploads/2012/10/facebook-ttj-messages-logo-512x193.jpg)
![Read more about the article [Tutorial] How To Find Out If Your Computer Is Compatible With Windows 8](https://thetechjournal.com/wp-content/uploads/2012/11/run-win8-upgrade-avisor-as5d6465w4r6e4wer-512x305.jpg)
![Read more about the article [Tutorial] How To Use iCloud On Windows 7](https://thetechjournal.com/wp-content/uploads/2012/03/icloud-windows-logo-512x223.jpg)