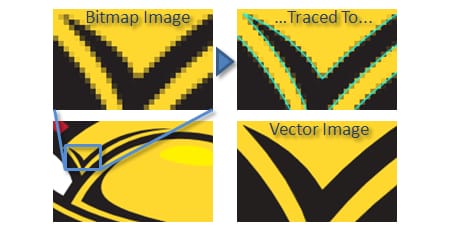
Two main categories of images exist: bitmap and vector images. The images you manipulate and see most often are bitmap images. They consist of a set of dots (pixels), each of these dots have one or more values describing its color. Thus, the photos you take with your digital camera or download on the Internet are bitmap images. When you resize them, information is lost: the definition of the image decreases and its components are less accurate. In contrast, vector images are composed of simple geometric objects (arcs, polygons, line segments, …) represented by mathematical formulas. It is thus possible to apply transformations: rotation, expansion, etc…, without loss of quality. Your computer then recalculates the characteristics of each geometric object. In this tutorial I will show you how to convert any of your bitmap images into vector images using free online tool.
When you are working on layout, a brochure, or report, you may need to resize a desired logos or images without losing quality. Thus, it is much more convenient to work with vector images. Follow below steps to find out how to convert your bitmap image into vector
Submit Your Photo For Conversion
Vector Magic is tool which is available online and is free for 2 images you can work as long as you want. At first, you must submit the photo which you want to convert into vector graphics. Here is what you need to do
Step 1: In your Web browser, go to the address http://www.vectormagic.com.
Step 2: Click the Upload Image To Trace.
Step 3: From your hard drive select the photo you want to convert into vector image and click Open.
Step 4: The file is then uploaded to Vector Magic website.
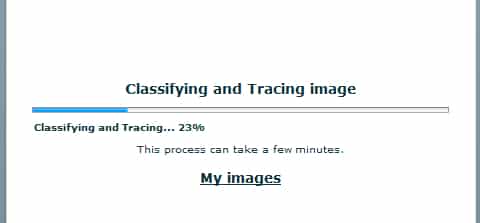
Step 5: Vector Magic will then scan your image to apply vector settings.
Step 6: On the left side you will see your original image and on right side you will see vector converted image
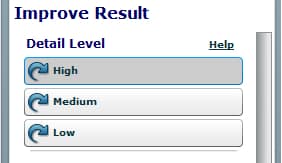
Step 7: You can adjust the settings and improve the result using different commands on the right. If the image has little details, select Medium or Low Level of Detail section.
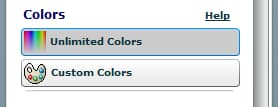
Step 8: You can also indicate a color palette to use. Just click on the button Custom Colors from the Colors section.
Step 9: Then select the palette to use for vector image by double clicking it. Note that you can customize the palettes by adding or removing color.
Step 10: The preview image is vectorised and then again generated.
Download vector image
Now that your image is prepared, you can download it. To do this, you must have an account on Vector Magic. Creating a free account allows you to convert 2 bitmap images to vector. In addition, you must fund your account with tokens (1 token $ 3 allows you to download an image) or create a new account… To download your vector image follow steps below
Step 1: Next to your image, click the Download result button
Step 2: Enter your email in the Email field.
Step 3: Uncheck the boxes to not receive emails to each update of the service and then click I Accept. Create my account.
Step 4: In the email you will receive verification code which you need to enter on their web site.
Step 5: Then enter it in the window of Vector Magic and click the Verify Email.
Step 6: Then click the Enable Download button.
Step 7: Then select the format you wish to download your vector image (EPS, SVG or PDF).
Step 8: Save the vector image on your hard drive.
You are done! You can now use your newly create vector image on any other project.
[ttjad keyword=”all-in-one-desktops”]


![Read more about the article [Tutorial] How To Enable Remote Desktop In Windows 8](https://thetechjournal.com/wp-content/uploads/2012/11/system-and-settings-windows-8-a65s4d65e498we79w.jpg)
![Read more about the article [Tutorial] How To Insert YouTube Videos Inside PowerPoint 2013 Presentations](https://thetechjournal.com/wp-content/uploads/2013/01/insert-as56d4e6r4we48.jpg)
![Read more about the article [Tutorial] How To Remove Dead Links From Your Firefox Bookmarks](https://thetechjournal.com/wp-content/uploads/2012/05/firefox-bookmarks-dead-logo-512x252.jpg)