Microsoft giving us the ability to play poker and the folks over at Poker Listings made use of the open-source Kinect software available out there with the use of some macros, configured the Kinect to recognize the gestures to play online poker………..
Kinect truly is an impressive piece of technology, the games made for it are childish at best. Luckily many hackers around the world have spent the time to create drivers and applications allowing you to use the Kinect hardware to interface with a windows PC and from there it was just a short jump to all-out gesture-controlled online poker!This article gives you all the information you need to set this homebrew poker controller up for yourself, but first take a look at the video demonstration of how it all works:
Just like the drum kit controller pokerlistings mapping movement into a keyboard keystroke and mapping that keystroke to a poker action using macros. The first step is getting the Kinect hardware installed and functioning on your system.Getting the Kinect hardware to work involves three programs and one set of drivers. Everything you’re about to read for this section is taken directly from the guys who made the software over at the University of Southern California. If you want more information on this part of the project you can find it on their webpage here:http://projects.ict.usc.edu/mxr/faast/.
The first program to install is OpenNI:
- Go to the download page: http://www.openni.org/downloadfiles/openni-binaries/20-latest-unstable
- Scroll down until you see OpenNI Unstable Build for Windows x86 (32-bit) v1.1.0.41 Redist Edition. Click on the download button, and install the program.
After OpenNI you need PrimeSense NITE:
- Go to the download page: http://www.openni.org/downloadfiles/openni-compliant-middleware-binaries/33-latest-unstable
- Scroll down until you see PrimeSense NITE Unstable Build for Windows x86 (32-bit) v1.3.1.5 Redist Edition. Click on the download button and run the installer.
- When prompted use the license key: 0KOIk2JeIBYClPWVnMoRKn5cdY4=
Download the Kinect drivers:
- Go to the download page here:https://github.com/avin2/SensorKinect/blob/28738dc12c7d653f45cec1ceba4ad1d30c5df2ce/Bin/SensorKinect-Win-OpenSource32-5.0.1.msi
- Click on the Downloads button on the right side of the page.
- Choose Download.zip
- Unzip the file
- In the Bin directory run the file: SensorKinect-Win-OpenSource32-5.0.1.msi
Finally, download the actual FAAST 0.07 software:
- Click on this link and download the software: http://projects.ict.usc.edu/mxr/wp-content/uploads/2011/03/FAAST-0.07.zipUnzip the software
You’re just about ready to use your Kinect with your computer. You need to plug the Kinect power into the wall and the USB into your computer.
Windows should install your Kinect automatically. If it doesn’t choose to install the driver manually (choosing the location of the files) and browse to the drivers folder you just unzipped. You should find the drivers under platform\windows32\driver.Once it’s installed successfully you can start up the FAAST.exe program. Configure the program with the following settings:
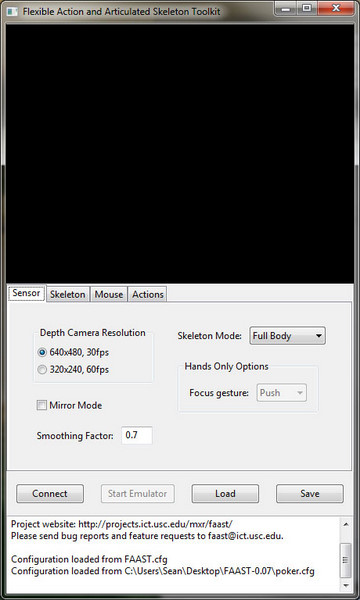
Firstly, do not change the depth camera resolution; doing so will prohibit the application of connecting to your Kinect.
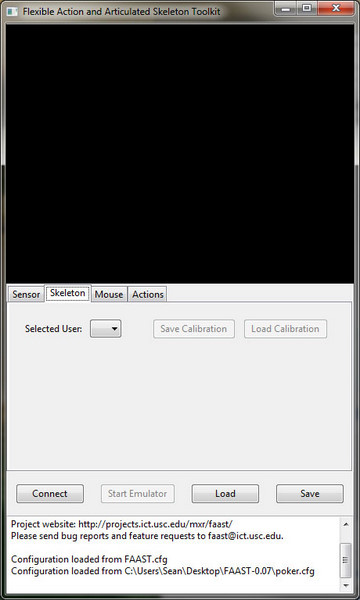
Don’t change anything on this screen.
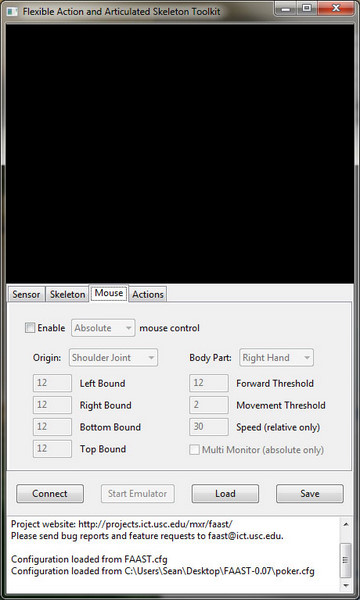
Disabled the mouse control. Having this enabled allows you to control the mouse by moving your right hand. It’s pretty rad, but extremely choppy at times.
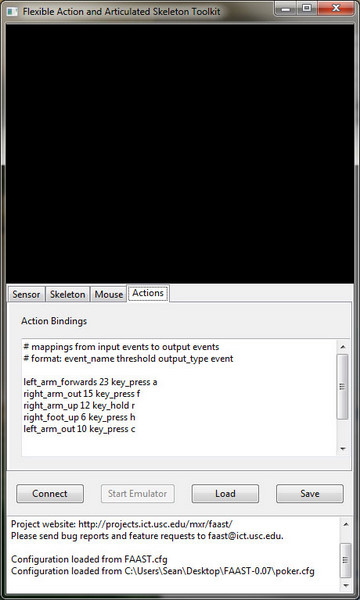
This is where you map your motions to keystrokes. If you want to use my movements you can simply copy my list directly into this box and be on your way:
left_arm_forwards 23 key_press a
right_arm_out 15 key_press f
right_arm_up 12 key_hold r
right_foot_up 6 key_press h
left_arm_out 10 key_press c
If you’d like to create your own movements you’re setting up with the formula: [body part_direction] [how far it has to move] [action] [what key or button to press]
So for the first example, if I move my left arm forwards 23 inches it will press key a. I use this for my “all-in” movement.
Here’s the full list of actions and events. Again this is taken directly from the FAAST software homepage.
Action List
| Action Name | Type | Threshold |
|---|---|---|
| lean_left | skeleton | angular body lean left (degrees) |
| lean_right | skeleton | angular body lean right(degrees) |
| lean_forwards | skeleton | angualr body lean forwards (degrees) |
| lean_backwards | skeleton | angular body lean back (degrees) |
| turn_left | skeleton | angular amount of left body turn (degrees) |
| turn_right | skeleton | angular amount of right body turn(degrees) |
| left_arm_forwards | skeleton | forward distance from left hand to shoulder (inches) |
| left_arm_down | skeleton | downward distance from left hand to shoulder (inches) |
| left_arm_up | skeleton | upward distance from left hand to shoulder (inches) |
| left_arm_out | skeleton | sideways distance from left hand to shoulder (inches) |
| left_arm_across | skeleton | sideways distance from left hand across body to shoulder (inches) |
| right_arm_forwards | skeleton | forward distance from right hand to shoulder (inches) |
| right_arm_down | skeleton | downward distance from right hand to shoulder (inches) |
| right_arm_up | skeleton | upward distance from right hand to shoulder (inches) |
| right_arm_out | skeleton | sideways distance from right hand to shoulder (inches) |
| right_arm_across | skeleton | sideways distance from right hand across body to shoulder (inches) |
| left_foot_forwards | skeleton | forward distance from left hip to foot (inches) |
| left_foot_sideways | skeleton | sideways distance from left hip to foot (inches) |
| left_foot_backwards | skeleton | backwards distance from left hip to foot (inches) |
| left_foot_up | skeleton | height of left foot above other foot on ground (inches) |
| right_foot_forwards | skeleton | forward distance from right hip to foot (inches) |
| right_foot_sideways | skeleton | sideways distance from right hip to foot (inches) |
| right_foot_backwards | skeleton | backwards distance from right hip to foot (inches) |
| right_foot_up | skeleton | height of right foot above other foot on ground (inches) |
| jump | skeleton | height of both feet above ground (inches) |
| crouch | skeleton | crouch distance, calculated as current height subtracted from standing height (inches) |
| walk | skeleton | height of each step above ground when walking in place (inches) |
| push | NITE | velocity (inches/sec.) |
| swipe_up | NITE | velocity (inches/sec.) |
| swipe_down | NITE | velocity (inches/sec.) |
| swipe_left | NITE | velocity (inches/sec.) |
| swipe_right | NITE | velocity (inches/sec.) |
| circle | NITE | radius (inches) |
| wave | NITE | n/a (leave at 0) |
Event List
| Virtual Event Type | Virtual Event Name |
|---|---|
| key_press | key to press when the action is first detected (either a single character or a special key from the table below) |
| key_hold | key to hold down while the action is performed (either a single character or a special key from the table below) |
| key_type | a string of characters to type into the active window (no spaces allowed) |
| mouse_click | mouse button to click when the action is first detected (left_button, right_button, or middle_button) |
| mouse_double_click | mouse button to double click when the action is first detected (left_button, right_button, or middle_button) |
| mouse_hold | mouse button to hold down while the action is performed (left_button, right_button, or middle_button) |
| faast | input emulator control event (pause, resume, or stop) |
Now that you have your Kinect working with your computer, you need to map the keys pressed by your actions to button clicks on your poker client.
Using Macros to Control your Poker Client:
You can use any macro program you like which allows for mouse clicks. While TableNinja would be the best for this, it only works with Full Tilt and Poker Stars, which isn’t of much help to most of you. So you’re going to have to use a generic macro program you find online.The software I’m using is EZ Macros. Unfortunately it’s not free, but you will get a free 30 day trial after downloading it. You can find the program here:http://www.americansys.com/download.htm.Start your macro program, load up your poker client and create a new macro for each button press, making sure those macros are activated by a hotkey, the same key you’ve set to use in the FAAST Kinect application.
In EZ Macros just choose “Add” and follow the instructions. You’re looking to “remember mouse and keyboard events”. Once you choose for the macro to launch on a hotkey, enter the key used with the connect movement. When you hit record it records everything you do, so quickly click on the appropriate poker button for the action, and end the recording by hitting the Pause/Break button on your keyboard.Set the playback speed as fast as it will go and save the macro. Repeat for all other movements.You’ll notice in the video my check action didn’t work, that’s because I forgot to create a macro which launches when the letter “h” is pressed. Don’t be like me and make sure you set up one macro per action.
You’ll also notice that the EZ Macro software records the entire mouse event, including moving the pointer. Many macro programs will only remember the absolute (or relative to the active window) location of the mouse when the event (click) occurs. That would be preferable as with EZ Macros you need to set the playback speed as fast as possible to reduce any lag from making the action, to the button being clicked on your poker client.It’s very important to understand how your macro program works. With EZ Macros it remembers the movements in absolute terms. Meaning if you move the poker table window somewhere else on the screen, your macro will continue trying to click where the buttons used to be.Make sure your poker window is always in the same place at the same size. The easiest way to do that is to set up the macros and play with the screen maximized, that way it can never move.
Once your macros are set up, activate the hotkeys.Bring up the FAAST application and click Connect. Once it connects click on Start Emulation.Open the poker client, open a poker table and get it positioned correctly for your macros.Sit in, buy in, automatically post blinds and step back until you can see your body in the FAAST display window.
Calibrate your Body with the Kinect Image:
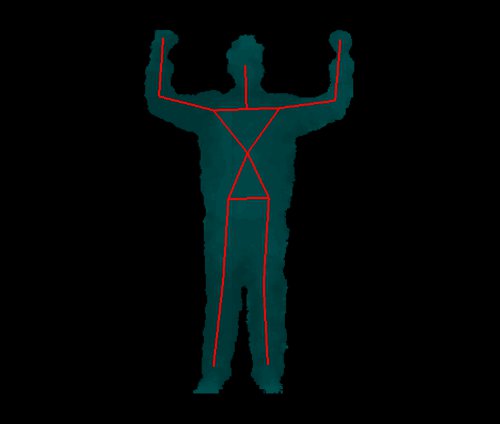
The last step is calibrating your body with the colorful image of your body on the FAAST screen. You do this by standing still with your hands raised (head level) like you’re about to be arrested:
When you see the stickman lines attached to your body, you’re ready to go. Just be sure to do this before it’s your turn to act, or as soon as it’s calibrated it will make you raise (since your arms are raised in the air).
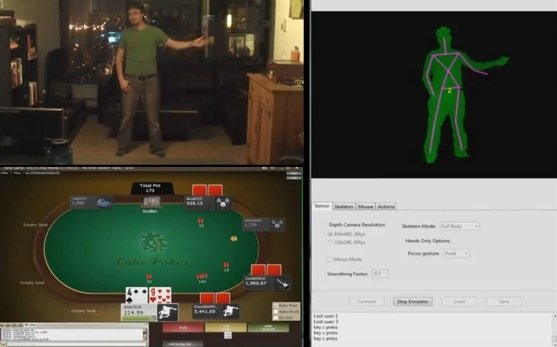
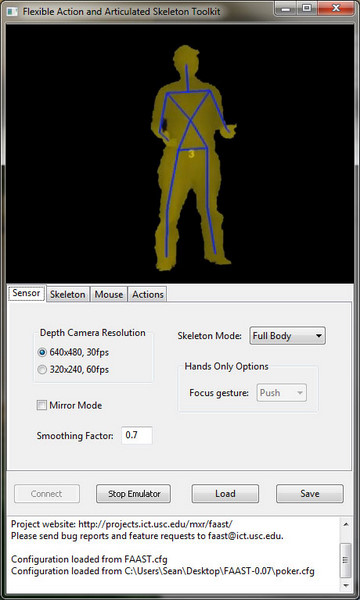
When it’s all set up properly your FAAST screen should look something like this:
And there you have it; you’re now set up to play online poker using your XBOX Kinect.
[ttjad keyword=”xbox-360″]

![Read more about the article [Game Preview] Call of Duty: Black Ops 2 – The War Will Begin Again](https://thetechjournal.com/wp-content/uploads/2012/09/black-ops-2-512x287.jpg)
