If you having problems starting your computer with Windows XP because it won’t boot at all, there could be plenty of reason for that to happen. In this tutorial I will cover some of most frequent techniques you can use in order to fix your Windows XP or in some cases even newer versions and make your Windows boot and start again without any kind of problems.
Even after newer version of Windows such as Windows Vista, Windows 7 and upcoming Windows 8, there are still plenty of users that are using Windows XP on their computers. This is one of the reason I decided to address some of those users too, and give them some of tips how to fix their Windows XP if problems with booting happen. To get started follow steps below
Return To A Stable Configuration
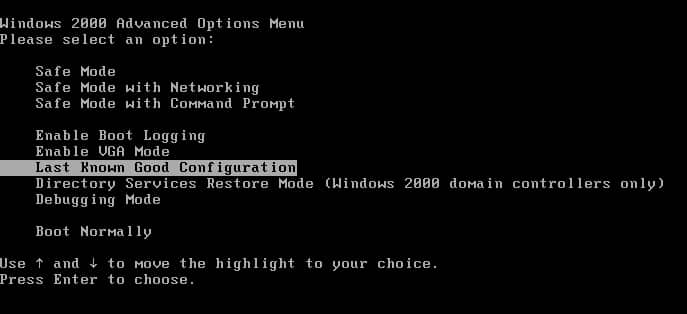
If your computer is unbootable, you can restore the registry information and driver settings that were in effect the last time the computer was started successfully.
Step 1: First turn on your machine.
Step 2: Press the F8 key on your keyboard just after the startup beep sound.
Step 3: In the menu that appears, select Last Known Good Configuration with the arrow keys and confirm with Enter.
Step 4: Your last operational parameters are now effective and replace all your other settings. Note that software installed since it last started will lost its functionality and you must reinstall them.
Use Safe Mode
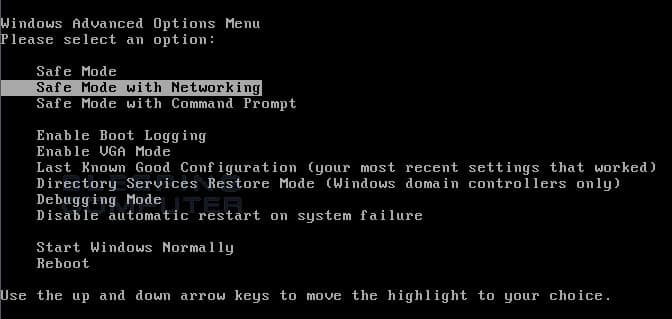
If Windows still does not start, you can try safe mode. This allows you to boot the system by loading the minimum device drivers.
Step 1: To achieve this, restart your computer and press F8 on your keyboard right after the beep sound.
Step 2: Select Safe Mode with Networking and press Enter.
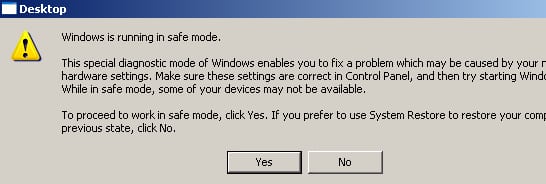
Step 3: After logging in, a dialog box appears to tell you that Windows is currently running in safe mode. Click Yes to continue.
Step 4: Do not be surprised if the display is highly degraded, this is perfectly normal because the video driver was not loaded to avoid conflicts.
Step 5: You can then uninstall software that cause the problem, return to the previous version of a driver, scan your computer against viruses, etc…
Step 6: Restart Windows normally when finished by clicking the Start button, click Turn off Computer and click Restart.
Use the Recovery Console
With the Recovery Console, you’ll be able to fix the Windows boot loader.
Step 1: Insert your Windows XP CD into the appropriate drive and boot it. For this you need to change the boot order in the BIOS of your computer. Often, by simply pressing the F12 key will be enough to display a menu where you can choose the media with which you want to boot. Otherwise, you must open the BIOS by pressing the Delete key (or F1, F2 depending on your computer). But I highly suggest your to read your motherboard manual where you can find more details information’s about this.
Step 2: Once the Windows from your installation disk loads press any key and installation program starts.
Step 3: Then press F10 or press R to start Recovery Console.
Step 4: Enter the number corresponding to your installation of Windows, in most cases you will need to enter number 1 and press Enter on your keyboard
Step 5: Then enter the Administrator password as prompted and then hit Enter.
Repair the Bootloader
If, on a computer running Windows XP you have installed another operating system, e.g. Linux, a black screen or the NTLDR missing error message may appear. This is just a malfunction in the boot sector.
Step 1: To repair this area, open the Recovery Console as described on steps above.
Step 2: Enter the command fixboot and hit Enter.
Step 3: Confirm the operation by pressing o and then press Enter.
Step 4: Then return to your root partition by typing command cd \ and hit Enter.
Step 5: Then enter the following commands (each time by validating input with Enter):
attrib -h ntldr
attrib -s ntldr
attrib -r ntldr
attrib -h ntdetect.com
attrib -s ntdetect.com
attrib -r ntdetect.com
Step 6: Enter the map command, then hit Enter.
Step 7: Note the letter of your CD-Rom which corresponds to the element Device\CDRom0 or \Device\cdrom1 if you have multiple optical drives. Here, the drive letter is E.
Step 8: Then run the following commands, replacing the E of E:\ with the drive letter that contains your Windows XP CD and confirm by o.
copy e:\i386\ntldr c:\
copy e:\i386\ntdetect.com c:\
Step 9: Your boot loader should be fixed now and error message is gone. You just have to restart your computer by typing exit and then validate with Enter.
Reinstall the system
Sometimes the only way to repair Windows XP, when it will not boot is to request an automatic repair. All the software you have installed, your documents and settings will remain. Here’s what you need to do
Step 1: Turn off your machine and then restart when booting the Windows XP CD.
Step 2: Press any key when prompted. At the Welcome screen, press Enter.
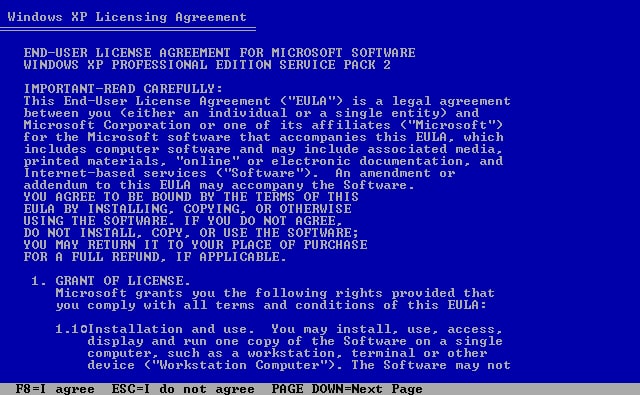
Step 3: Press F8 to continue.
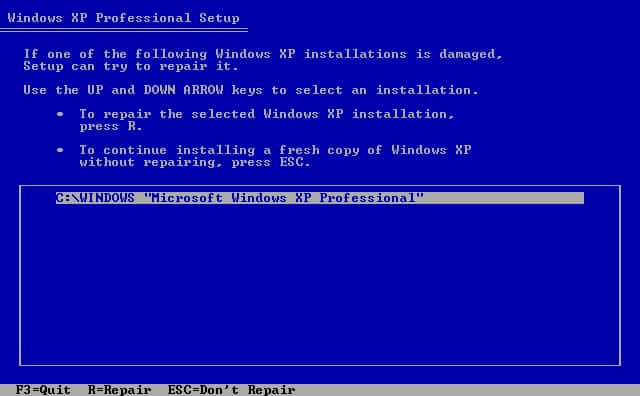
Step 4: Select your Windows installation and press R to repair it
Step 5: The files required for installing Windows are copied to your hard drive.
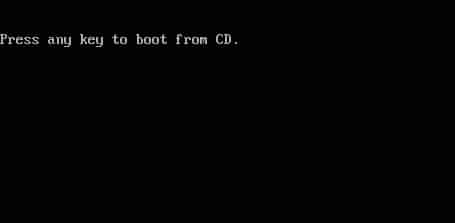
Step 6: When your computer restarts to continue installation, he will try again to boot the Windows XP CD. When the message Press any key to boot from the CD appears, do nothing and wait a few seconds (usually around 20 seconds)
Step 7: Windows XP startup screen is displayed, then it is followed by the graphical installation program that makes reinstalling Windows.
Step 8: Follow the instructions on the screen, then restart Windows normally.
You are done! If you face with any kind for problems regarding Windows XP boot and you follow some of above advices you should fix it without any problems. If you have few extra tips that some of our Windows XP readers may use regarding this kind of errors leave your suggestions in comment section below.
[ttjad keyword=”mac”]




![Read more about the article [Tutorial] How To Fix ‘android.process.acore’ Error In Android](https://thetechjournal.com/wp-content/uploads/2013/01/sorry-error-android-as564d654e6wr46wer-512x222.jpg)
![Read more about the article [Tutorial] How To Safely Un-mount Android SD Card Before Removing It](https://thetechjournal.com/wp-content/uploads/2012/10/android-settings-asd78a9s7d9a8s7d98sa.jpg)
![Read more about the article [Tutorial] How To Show Your Downloads On Windows 7 Start Menu](https://thetechjournal.com/wp-content/uploads/2012/02/start-menu-downloads-512x306.jpg)