For everyone who passed from Microsoft Word 2007 onto Word 2010 probably noticed that 2010 version longer includes translation tools and invites you to subscribe to paid services to translate your documents. However by making few small tricks inside Word 2007 it is possible to use the free translation service from Windows Live and in this tutorial I will show you how to do that.
To get started follow steps below
Step 1: Open Microsoft Word 2010 and then go to Review tab where you need to click Research option
Step 2: In the right pane that opens, at the bottom click on Research Options.
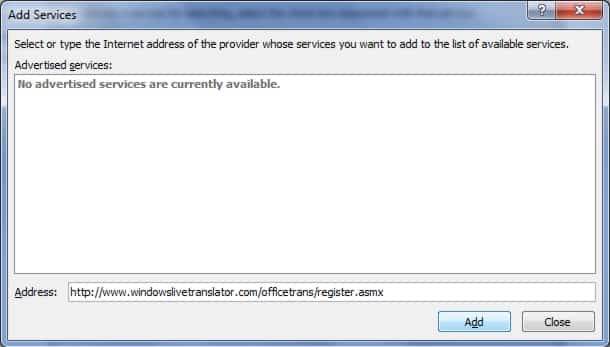
Step 3: Click Add Services.
Step 4: In the Address field, enter the address http://www.windowslivetranslator.com/officetrans/register.asmx and click Add.
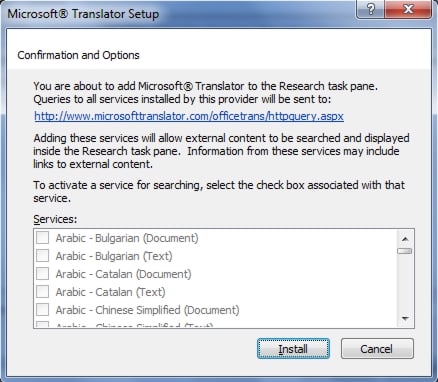
Step 5: On the Microsoft Translator Setup window that opens, click Continue.
Step 6: All boxes are grayed out which is normal and you don’t need to change anything in here. Click Install to continue.
Step 7: Click OK twice.
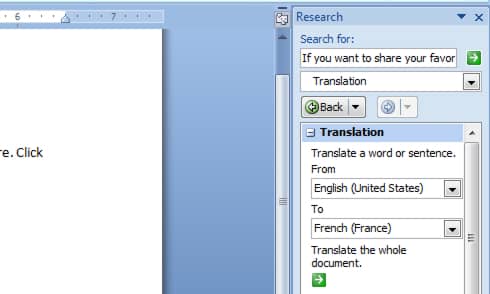
Step 8: The translation module is now installed and allows you to translate words, phrases or all of your documents. In the Research pane on the right, scroll down the list All references and click Translation.
Step 9: Enter the word to be translated, the language and validated for the translation.
Pretty cool and useful if you don’t want to spend money on similar service.
[ttjad keyword=”microsoft”]


![Read more about the article [Tutorial] How To Create Safepoint On Your WD MyBookLive](https://thetechjournal.com/wp-content/uploads/2012/10/login-mybooklive-s8d7a9s87d6sdf31y32rt132t1u-512x240.jpg)
![Read more about the article [Tutorial] How To Share A YouTube Playlist](https://thetechjournal.com/wp-content/uploads/2012/04/eminem-search-field-512x98.jpg)
![Read more about the article [Tutorial] How To Install Android On PC With VMWare?](https://thetechjournal.com/wp-content/uploads/2012/11/create-new-virtual-machine-asd48979w87er89e.jpg)