With Windows Media Player 12, which is built into Windows 7 allow you to automatically extract files into MP3 from Audio CD’s that you read. You can easily create your digital library on your computer and in this tutorial I will show you how to do that.
To get started follow steps below:
Step 1: Run the Windows Media Player.
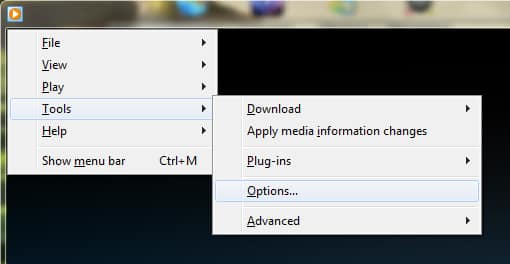
Step 2: Press the Alt key on your keyboard to display the menu bar and then from dropdown menu click the Tools menu and click Options.
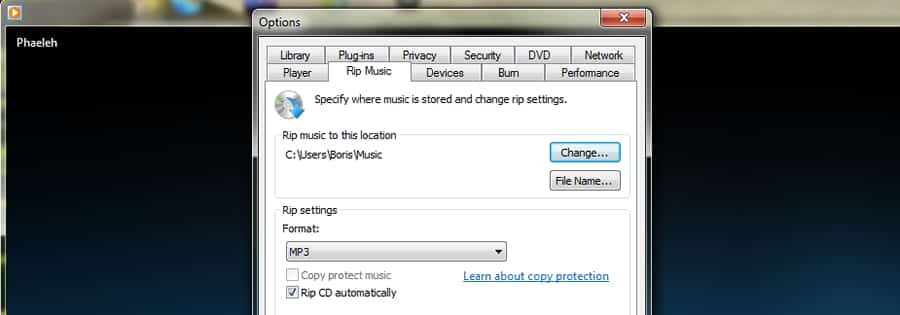
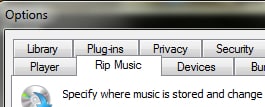
Step 3: Open the Rip Music tab.
Step 4: By default, the audio CD will be in the MP3 folder C:\Users\[Username]\My Music\. Click the Change button to define a new location.
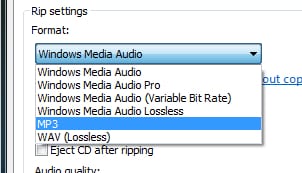
Step 5: In the Rip Settings section, under Format drop down menu select the file format you want to create, MP3 for example.
Step 6: Check the box in front of Rip CD automatically.
Step 7: Move the Audio quality slider to Best Quality sound to encode your MP3 with a sampling rate of 320 kbits/s and thus minimize losses due to compression.
Step 8: Check the Eject CD after ripping so that the disc is automatically ejected at the end of the extraction to MP3.
Step 9: Then click the Apply button and then OK.
Step 10: Now, when you insert a new CD Audio, it will automatically be converted to MP3 and uploaded to a location which you have specified in Step 4.
Step 11: It is then automatically added to your library. You no longer need the CD to play that music.
[ttjad keyword=”headphones”]


![Read more about the article [Tutorial] How To Repair Windows 7 Boot](https://thetechjournal.com/wp-content/uploads/2012/02/starting-windows-7-512x284.jpg)
![Read more about the article [Tutorial] How To Remove Dead Links From Your Firefox Bookmarks](https://thetechjournal.com/wp-content/uploads/2012/05/firefox-bookmarks-dead-logo-512x252.jpg)
![Read more about the article [Tutorial] How To Disable Proxy Server In Google Chrome Browser?](https://thetechjournal.com/wp-content/uploads/2012/10/propertiese-g-chrome-asd54sa65465e4r89wer31er5ew498.jpg)