Windows 8 have built-in feature called File History, which can be configured for recovery of important files from folders, that can include Favorites, Contacts, Libraries, etc… This feature is not enabled by default inside Windows 8, because backup location needs to be selected before user enable it. This backup location is usually considered as an external hard drive or network location. This tutorial will show you how to enable it first, and then configure this feature to back up our data.
![]()
First we have to enable File History:
Step 1: First you need to connect your computer with USB drive on which you want to save your backups.
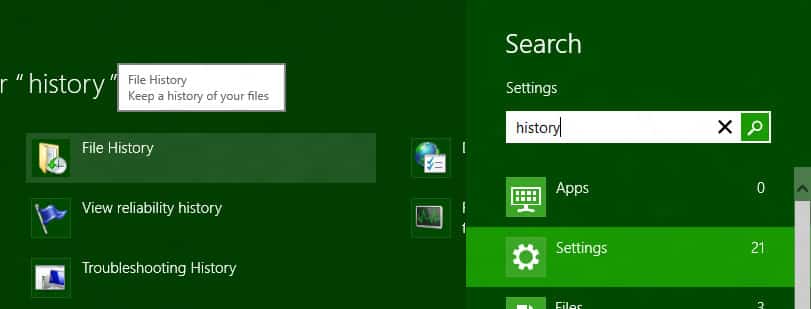
Step 2: From your desktop press Win+W on your keyboard to open Settings search. Inside search field type history and from left pane open File History.
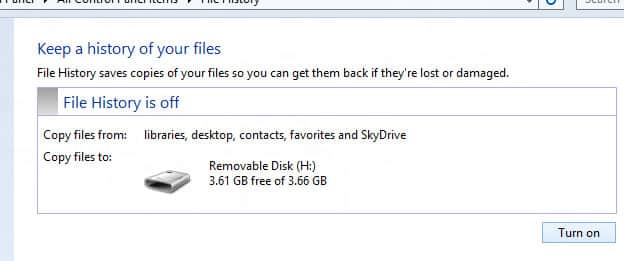
Step 3: From File History main window, click on Turn on button located in bottom right and close the window.
Step 4: If you click on Select drive located in left navigation you can choose a another drive or network location.
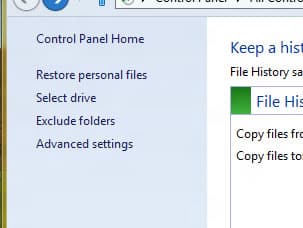

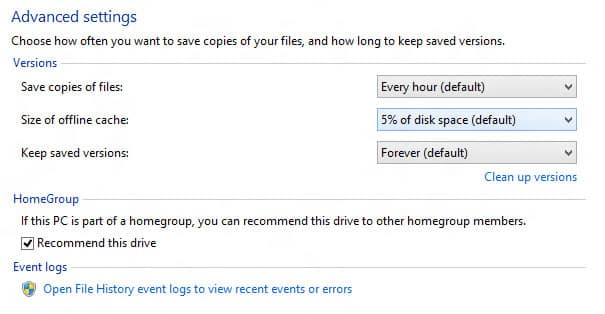
Step 5: By clicking on Advanced settings option from left navigation you can change how often you want to create backups, choose the size of offline cache etc…
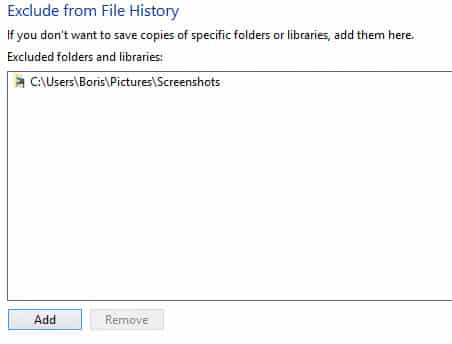
Step 6: If you click on Exclude folders, you can specify a group of folders which you don’t want to back up. For example you can exclude Pictures library or Music library since they can take a lot of space on your drive and may not contain documents that are important for your business.
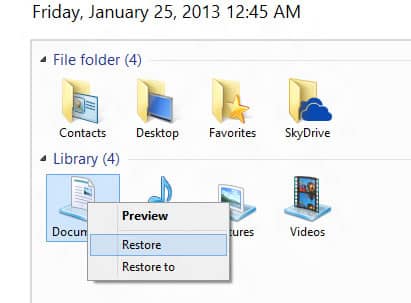
Step 7: If you wish to recover any deleted file from your computer, from left navigation click on Restore personal files link.
Step 8: Select all the files you want to restore by pressing Ctrl on your keyboard and left mouse click on any folder or file. Then right mouse click on any of those files and from context menu that appears choose Restore (it will restore it to the original location) or Restore to (or choose the new location).
This feature will certainly help you keep your documents and files secure in case of system failure so make sure you keep it running in the background.
[ttjad keyword=”all-in-one-desktops”]
![Read more about the article [Tutorial] How To Take Screenshots Of Webpage Easily In Firefox](https://thetechjournal.com/wp-content/uploads/2013/01/tools-a65s4d65e55e.webp)
![Read more about the article [Tutorial] How To Send Contacts From One iPhone To Another](https://thetechjournal.com/wp-content/uploads/2012/03/iphone-contacts-share.webp)
