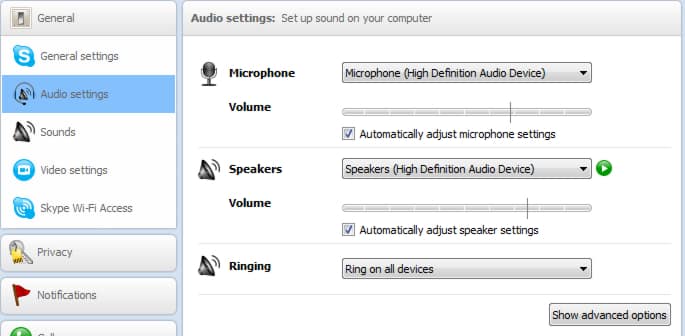
Skype is a software that allows users to make phone calls from the internet but also to make video calls through webcam. If these settings are not adjusted properly you probably won’t be satisfied with the results, so that’s why, I will show you where you can locate these settings in Skype and how to adjust them to get the best possible results.
Note: You can find all these settings at startup of Skype, after installing the software.
Step 1: Open Skype. From top navigation click Tools then choose Options,
Step 2: Go to General tab and then choose Audio Settings.
Step 3: Here you can configure Microphone and Speakers Volume and output device. However if you are familiar with this you can simply check the field Automatically detect adjust speaker settings and Automatically adjust microphone settings and then click Save button
Step 4: If you want to get more advanced settings simply click on Show Advanced Options
Note the option Make a free test call, which will allow you to test your settings in real time.
Step 5: To adjust video settings choose Video Settings from left navigation, and set the level of access and sharing of your webcam.
Step 6: Finally, click Webcam Settings to manage the contrast, brightness or sharpness of your camera.
Once your settings are saved, you are ready to use audio and video for Skype!
[ttjad keyword=”microsoft”]


![Read more about the article [Tutorial] How to Transfer Everything From An Old iPad to New iPad](https://thetechjournal.com/wp-content/uploads/2012/03/old-to-new-ipad-512x266.jpg)
![Read more about the article [Tutorial] How To Pin A Web Site In Windows 7 Taskbar From Internet Explorer](https://thetechjournal.com/wp-content/uploads/2012/02/ie-pin-to-win-7-taskbar-512x344.jpg)
![Read more about the article [Tutorial] How To Download Google Docs In Older Office Formats](https://thetechjournal.com/wp-content/uploads/2012/10/google-docs-office-formats-8-ttj-logo-512x244.jpg)