If you keep a lot of important files on your Mac computer and sharing it with friends, family or coworkers this tutorial will show you how to secure most important files by encrypting a folder.
![]()
To get started follow steps below:
Step 1: From your Mac open Disk Utility by going to Applications and then Utilities.
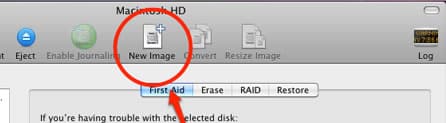
Step 2: From options available at the top of the window click on New Image.
Step 3: Under Save As filed name your encrypted folder as you wish.
Step 4: Below that, under Size choose the size for your encrypted folder. Let me note that 500MB should be more than enough space to keep your important and files inside it.
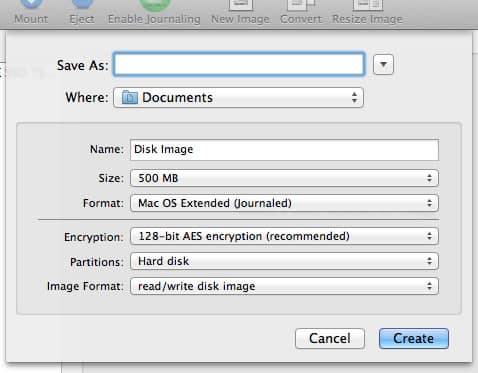
Step 5: Under Encryption choose your desired encryption. 128-bit is more than secure for most of the users, however if you looking for more secure but slower encryption, choose 256-bit.
Step 6: Once you are done with all setups click on Create button.
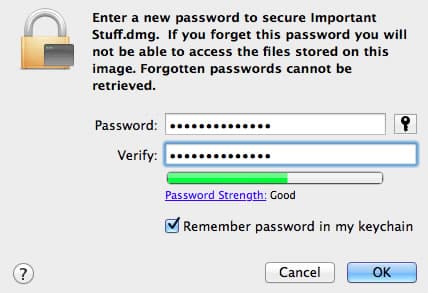
Step 7: A pop-up window will show up asking you to add a password for your encrypted folder. Type it in two times and then click OK.
Step 8: On your desktop you should see a new encrypted folder. Open it and then add all important files inside it.
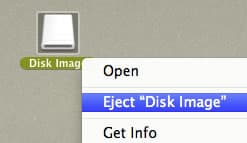
Step 9: Once done, right mouse click on it and from context menu choose Eject “Disk Image”.
Step 10: Next time when you open this encrypted folder you will be asked to enter a password which you have created in Step 7.
[ttjad keyword=”mac”]
![Read more about the article [Tutorial] How To Stream Videos From Sites That Is Blocked From Your Country](https://thetechjournal.com/wp-content/uploads/2012/07/network-as54da65s4d1a32s1d.webp)
![Read more about the article Bypass Activation On Samsung Galaxy Tab[How To]](https://thetechjournal.com/wp-content/uploads/2010/11/samsung-galaxy-tab-android-tablet-hands-on-ifa-berlin-2010-27-660x4954.webp)