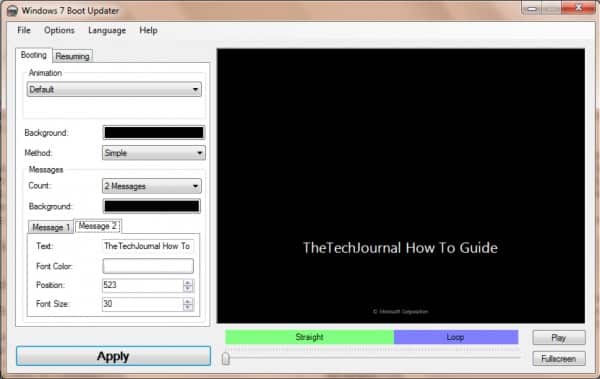
Windows 7 boot screen can be easily customized using software called Windows 7 Boot Updater which we are gone use in this How To guide. You can easily change the boot animation to a graphic file or any other animation you like. Furthermore, Windows 7 Boot Updater allows you to change the text below the animation, its color, size and position. We have a details guide here for our readers.
Here is how to customize Windows 7 Bootscreen:
Step 1: Start by downloading free Windows 7 Boot Updater. No need to install the software as its a portable application that works with all editions of Windows 7 32/64 bit. Simply run downloaded file and you are up and ready.
Step 2: Inside Windows 7 Boot Updater you have to edit the various fields as you like and see the result in the right side. You can make your own animation but it must be a fully activity.bmp or 105 frames in PNG, BMP, GIF or TIF and size of 200 × 200 pixels located in the same folder and named 001-105. The movie plays at 15 frames/second, 4 seconds “normal” + 3 seconds played repeatedly until the start.
Step 4: Once you are satisfied with the result click on Apply button to update the boot files.
Step 5: To test the results, restart your PC.
Restore the original boot file
The software makes a backup of the original files with each change. If it fails to start, restart your PC again and run the Recovery Console (F8 at startup) and enter these lines (assuming C is your system partition, otherwise change the letter accordingly):
C:
cd \Windows\System32
del winload.exe
ren « winload~1.exe » winload.exe
exit
A great tool to customize the entire Windows 7 boot with a great feature that enables you to restore the original boot file if something goes wrong.
[ttjad keyword=”default”]


![Read more about the article [Tutorial] How To Stop Google Talk From Saving Chat Logs [Windows]](https://thetechjournal.com/wp-content/uploads/2012/07/asd798a7sd98as7d.jpg)
![Read more about the article [Tutorial] Guide To Disable Siri/Voice Dial When iPhone Is Locked](https://thetechjournal.com/wp-content/uploads/2016/05/Siri-512x288.png)
![Read more about the article [Tutorial] How To Create A Shared Photo Album On Facebook](https://thetechjournal.com/wp-content/uploads/2013/09/Facebook.jpg)