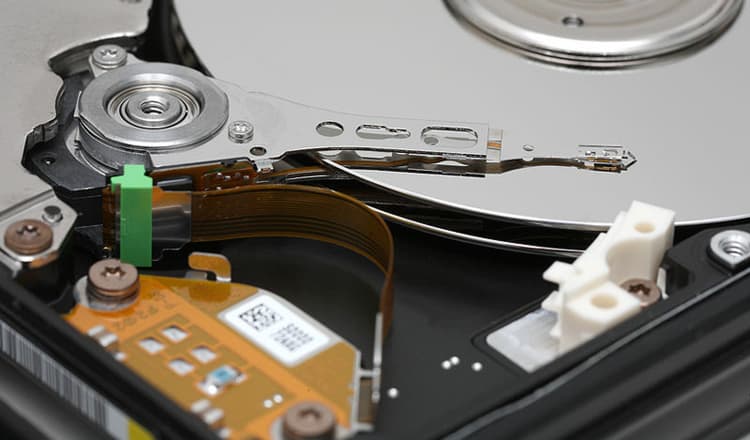
Since the launch of the SATA interface in April 2003, controllers include a new optional mode called AHCI or Advanced Host Controller Interface. This mode allows exploiting the features introduced by SATA interface such as NCQ (Native Command Queuing) or Hot Plug. With NCQ, the drive may receive more than one query entry at a time and decide the best order to perform the operations. This reduces the amount of unnecessary searches of the read heads, and leads to improved performance. By enabling AHCI mode, transfer rate when loading applications or the Windows startup can grow 10 to 20%. In this tutorial, I will show you how to enable AHCI in Windows Vista and Windows 7.
Enabling AHCI Driver In Windows Vista and Windows 7
By default, the AHCI driver is installed but is not enabled on Windows Vista and Windows 7. If you do not activate it before changing the SATA mode, you will receive an error message and you cannot start Windows. Here is the procedure you need to perform to enable AHCI driver in Windows Vista and Windows 7 registry
Step 1: In Windows Vista or Windows 7 click the Start button
Step 2: Inside search field type regedit and hit Enter on your keyboard.
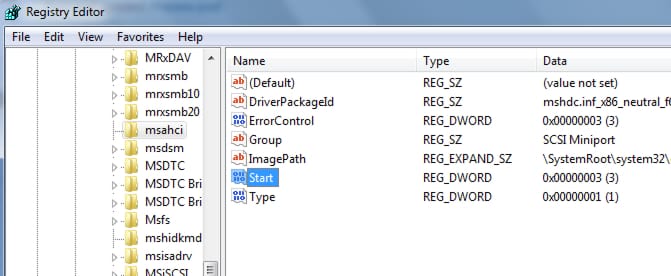
Step 3: Inside registry window follow this path HKEY_LOCAL_MACHINE/System/CurrentControlSet/services/msahci/
Step 4: In the right pane, double-click the Start value.
Step 5: Enter 0 in the Value Data field and click OK.
Step 6: Close the Registry Editor. Your Windows is now ready to use AHCI mode. Restart your computer to switch to AHCI in the BIOS.
Step 7: Configure the hard disks in AHCI by following below steps
Switching To AHCI Mode In BIOS
To switch to SATA AHCI mode, you must change hard drive settings in the BIOS.
Step 1: When you start your computer, press the Delete key to enter the BIOS. Note that this key is different depending on the manufacturer (F1, F2, F10, F12 or Tab).
Step 2: Go to the SATA Configuration using the keyboard arrow keys and press Enter.
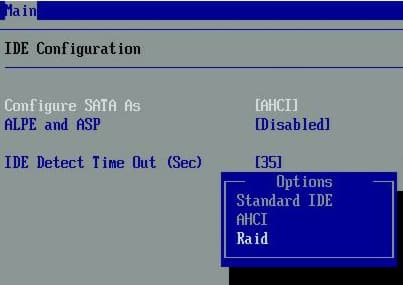
Step 3: Go to Configure SATA as [IDE] and press Enter.
Step 4: Select AHCI and press Enter.
Step 5: Now AHCI mode is enabled in the BIOS.
Step 6: Press F10 and click OK to save changes.
Step 7: Your computer will restart and once Windows loads the AHCI drivers will be installed.
Step 8: Finally, restart your computer again. AHCI mode is then active for your hard drive.
Note: This procedure in BIOS can be slightly different on your computer depending of your motherboard manufacturer so please read your motherboard manual for more details.


![Read more about the article [Tutorial] How To Refine Scrolling Of Web Pages In Mozilla Firefox](https://thetechjournal.com/wp-content/uploads/2012/06/restart-ff-addon-512x256.jpg)
![Read more about the article [Tutorial] How To Enable Remote Desktop In Windows 8](https://thetechjournal.com/wp-content/uploads/2012/11/system-and-settings-windows-8-a65s4d65e498we79w.jpg)