Few days ago Microsoft officially released the Windows 8 Consumer Preview and we on TheTechJournal already did write tutorial on how to install WCP. However if you are using Mac OS X and you want to test this latest Windows edition but don’t know how, in this tutorial I will show you how you can use VirtualBox and install Windows 8 Consumer Preview in Virtual Machine. This tutorial will work the same for those who want to install WCP in Windows version of Virtual Box too, but to avoid any complications I suggestion you to read this tutorial and install WCP using that tutorial.
To get started follow steps below
Step 1: To get started you will need to have two thing, VirtualBox which you can download for free from here and Microsoft Windows 8 Consumer Preview which you can download for free from here (download Windows 8 Consumer Preview in ISO format somewhere on your hard drive).
Step 2: Once you download VirtualBox install it on your Mac computer and lunch it.
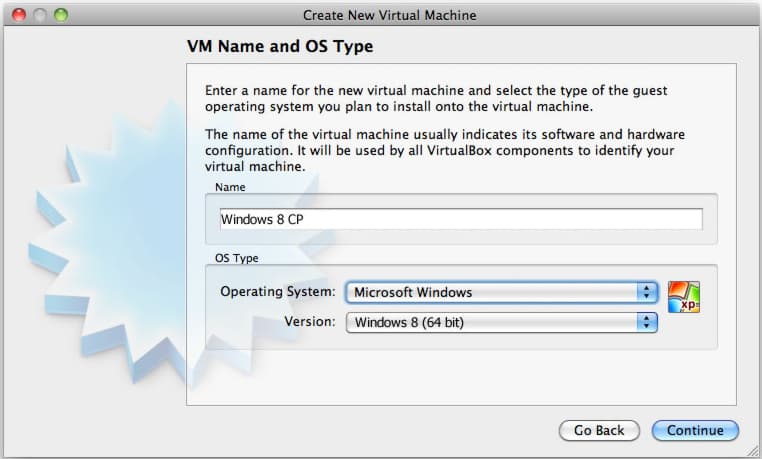
Step 3: Now we need to create a virtual machine by clicking on New button. A wizard window will popup, under Operating System select Microsoft Windows and under Version select Windows 8 (32 or 64 bit). Click Continue to continue your process
Step 4: Now use the scrollbar and move it left or right depending on amount of memory you wish to allocate to the virtual machine. By default VirtualBox will suggest you to choose 1.5 GB (1500 MB) which is exactly what I did choose. Remember to not go too much below 1.5 GB because it may lead to low performance. Once you done click Continue button
Step 5: Now we going to select Create new hard disk and click Continue
Step 6: In next window select VDI (VirtualBox Disk Image) and click Continue
Step 7: Choose Fixed Size and click Continue
Step 8: Now type the name of the new virtual disk or click folder icon to select a different folder to create the file in. Also use below scrollbar to select the size of virtual disk who’s size needs to be around 20GB because that’s the minimum requirements for Windows 8 Consumer Preview. If you want to change this amount, you can only increase it and you can’t go below 20 GB. Once you are done click Continue
Step 9: At the last window verify that the settings are the ones that you desire and click Create button
Step 10: Click Continue. In new window click on folder icon and select/locate the Windows 8 Consumer Preview ISO file which you previously downloaded. Once you are done click Continue
Step 11: If you followed above steps correctly your Windows 8 Consumer Preview installation setup should start.
Step 12: Simply follow the steps suggested by Windows setup wizard and your Windows 8 Consumer Preview installation will be finished within 10-15 minutes. If you need a full Windows 8 Consumer Preview guide please visit this tutorial where I will lead you step by step.
[ttjad keyword=”all-in-one-desktops”]


![Read more about the article [Tutorial] How To Turn Off Facebook Groups Email Notifications](https://thetechjournal.com/wp-content/uploads/2012/02/facebook-groups-logo-512x236.jpg)
![Read more about the article [Tutorial] How To View Network Activity In Windows 7](https://thetechjournal.com/wp-content/uploads/2012/04/wna-logo-512x162.jpg)
![Read more about the article Convert and Watch Movies on Samsung Galaxy Tab[How To]](https://thetechjournal.com/wp-content/uploads/2011/02/Galaxy-Tab.png)