When you listen to Internet radio or listen to streaming music on Spotify, Maestro.fm, Pandora or another site you don’t have the ability to record the songs and save it on your computer. However with the software called AD Sound Recorder, you can record any stream that passes through your sound card and speakers and in this tutorial I will show you how to perform this procedure using AD Sound Recorder.
![]()
Before proceeding to below steps make sure you download AD Sound Recorder from this link and install it on your computer. The installation process is straight forward and once the app is successively installed we will start the configuration where you have to choose the song you want to save, desired format such as MP3, WMA or WAV, and fill in file information such as the artist or title. Then you can listen this song on your computer, your MP3 player or anywhere else.
Step 1: Double click on the AD Sound Recorder icon located on your desktop to launch it.
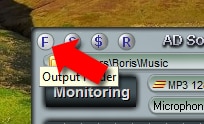
Step 2: Click the button F in the top left corner.
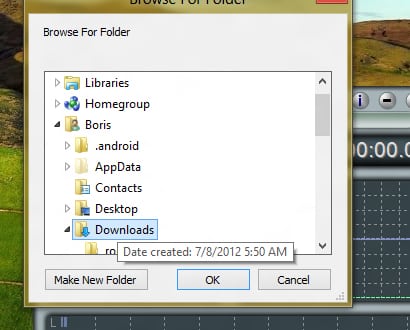
Step 3: Choose the location where you want to save the music and then click OK.
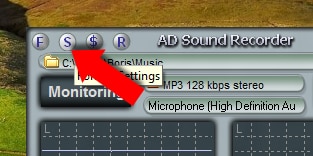
Step 4: Now click S button in the top left corner next to button F.
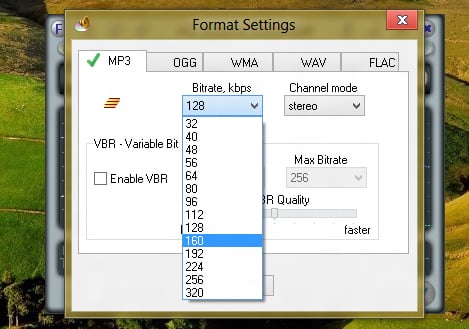
Step 5: By default, the MP3 format is selected. If necessary, change the encoding quality and then click OK.
Step 6: In the main window, click the button under the central field containing information on the recording format.
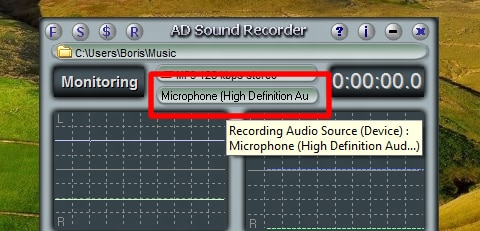
Step 7: In the pop-up window select your Stereo Mix and click Set Default. Confirm with OK.
Step 8: Restart AD Sound Recorder.
Step 9: You are now ready to record the music. To do that visit the website from which you want to record the music.
Step 10: In AD Sound Recorder main window click the Record button (or press F5 on your keyboard).
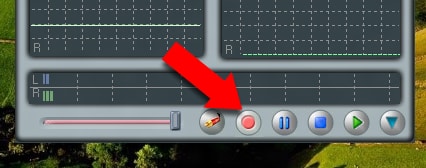
Step 11: Recording begins.
Step 12: Once the song is finished, click the Stop button (or F9 on your keyboard) to stop recording.
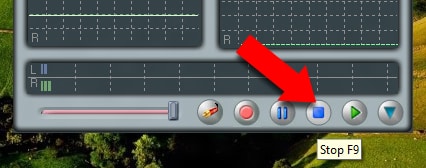
Step 13: The song is available in MP3 format in the folder you have chosen in Step 3.
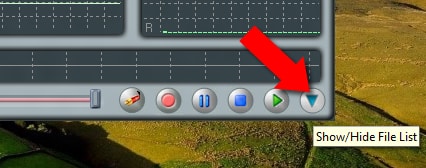
Step 14: By default, recorded files are named recordxxx.mp3. You can rename them to something more explicit. In order to do that, from AD Sound Recorder main window click Show/Hide file list at the bottom right corner of the window.
Step 15: Double click on a file to play it.
Step 16: To rename it, click right mouse button on a file and then from context menu click Rename File.
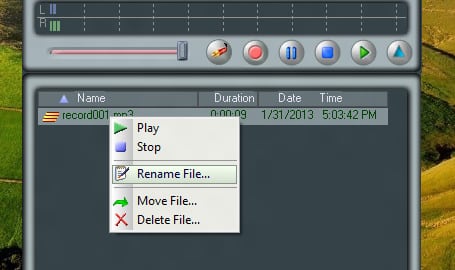
Step 17: Type another name for your music file and click OK to save it.
[ttjad keyword=”headphones”]
![Read more about the article [Tutorial] How To Add RAM To Your Desktop Computer](https://thetechjournal.com/wp-content/uploads/2012/02/ram-memory.webp)
![Read more about the article [Tutorial] How to Create Password Reset Disk In Windows 7](https://thetechjournal.com/wp-content/uploads/2012/04/password-reset.webp)