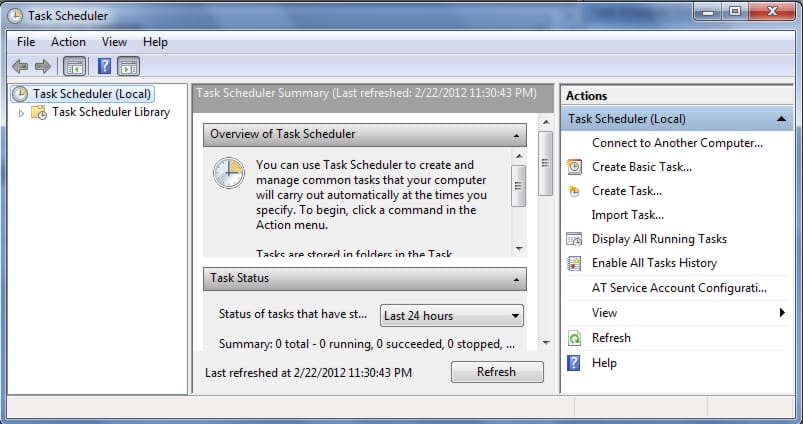
The task scheduler in Windows 7 is an interesting tool allowing you to automate, at regular intervals or continuously certain tasks or functions relating to the operation of Windows. In this tutorial I will show you how to use this tool and schedule a certain tasks in Windows 7.
Before continue to follow below steps you must be logged in as administrator in Windows 7 to perform this procedure.
Step 1: Click Start menu and go to Control Panel
Step 2: From top right corner choose a Large icons view and then open Administrative Tools,
Step 3: In new window double click on Task Scheduler.
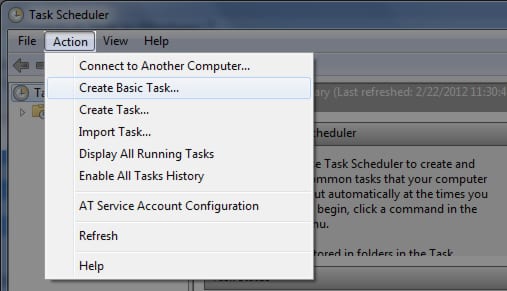
Step 4: Then from top navigation click Action and from drop down menu select Create Basic Task.
Step 5: New window will open where you can quickly schedule a common task. In Name field fill in your task title and in Description write a short description for your task. Once you are finished click Next to continue.
Step 4: Choose the trigger for your task: specific action or regular time intervals. Click Next
Step 5: Finally, select the action which you want that Task scheduler take:
- You can choose to automatically launch a program or a third party application by specifying the path to desired program
- You can send an email to someone
- Or you can display a certain message.
Step 6: Choose the action that you need and click Next and Finish your Task Scheduler.
There you go, now you know how to schedule a task in Windows 7!
[ttjad keyword=”microsoft”]


![Read more about the article [Tutorial] How To Find Out If Your Computer Is Compatible With Windows 8](https://thetechjournal.com/wp-content/uploads/2012/11/run-win8-upgrade-avisor-as5d6465w4r6e4wer-512x305.jpg)
![Read more about the article [Tutorial] How To Turn Off Store App In Windows 8](https://thetechjournal.com/wp-content/uploads/2013/01/store-app-disable-windows-8-ttj-logo-512x210.jpg)
![Read more about the article [Tutorial] How To Install Android On PC With VMWare?](https://thetechjournal.com/wp-content/uploads/2012/11/create-new-virtual-machine-asd48979w87er89e.jpg)