To protect your Google account (Gmail, Calendar, Google+, Documents, etc.) against keyloggers and people who try to steal your password, you can enable validation in two steps. In addition to your regular password, a single-use code sent by SMS to your phone or generated by the Google Authenticator will be required. Without this code you or anyone else wont be able to access your account. With validation in two steps, you have several methods for securing your Google Account. In this complete tutorial I will show you how to setup this service in order to protect your Google account.
There are three possible ways to get this code:
- Get the code by SMS to your mobile phone. So you must have network coverage to receive your code.
- Generate code with the Google Authenticator to your mobile phone or tablet running Android, BlackBerry or IOS. This code is generated locally and an Internet connection or telephone is not required on your phone.
- Print a list of codes for single use. Handy if you need to go abroad or you do not have your cell phone with you.
In order to get started follow steps below
Enable Validation In Two Steps
You can enable validation in two steps in the settings in your Google account.
Step 1: Go to any Google service you use, such as Gmail and login.
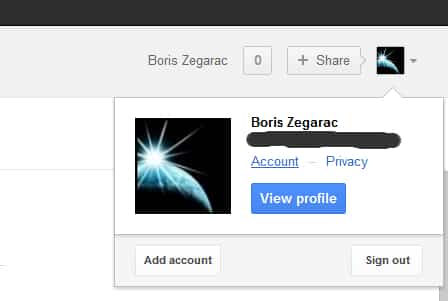
Step 2: Click your email address or your name at the top right of the page and from drop down menu click Account.
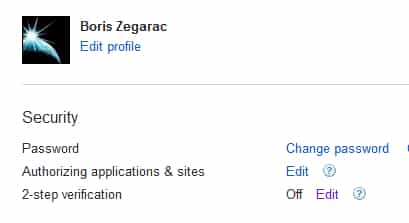
Step 3: In the Security section, click Edit next to the option 2-step verification
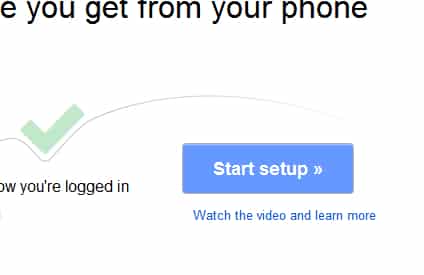
Step 4: Click Start Setup
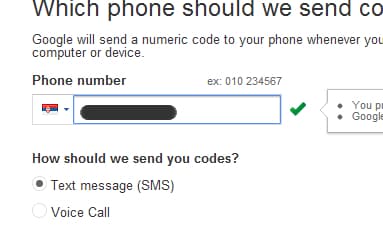
Step 5: Select your country and make sure your mobile phone number is correct. Mark it if it is not already.
Step 6: Select and click Text message (SMS).
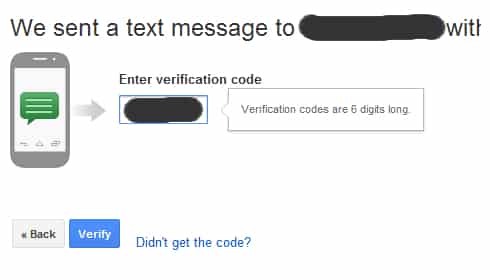
Step 7: You will receive a SMS with a verification code on your phone.
Step 8: Enter the code you received on the configuration page of validation in two steps and click Verify.
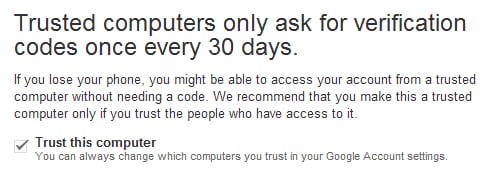
Step 9: The service then asks if you want to store your computer, that is to say, mark it as safe for 30 days. If you do, you will not have to do validation in two steps if you log into your Google account from this computer. However, if you connect from another computer, the validation in two stages will be much effective. Click Next.
Step 10: Finally, click on Confirm to finish setup
Enable Google Authenticator
By default, you receive a SMS with your unique code and temporary when you want to log into your Google account. To avoid not being able to receive code if you do not have network coverage or you are abroad, you can install Google Authenticator on your phone or tablet running Android, BlackBerry or IOS.
Step 1: Log into your Google account.
Step 2: Click your email address or your name at the top right of the page and click Account.
Step 3: In the Security section, click Edit next to the option 2-step verification.
Step 4: In How to receive codes, click the type of mobile device you own, an Android phone for example.
Step 5: Then go on the market of mobile phone and download the Google Authenticator.
Step 6: Once you download and install it, open it.
Step 7: If your phone has a camera, tap a barcode scanner.
Step 8: Install the barcode reader on your phone if you have not already and come back in Google Authenticator.
Step 9: Point bar code on the page.
Step 10: The application gives you a code.
Step 11: Copy it into the page and click OK.
Step 12: Finally, click Save.
Print Rescue Codes
To connect to a Google Account, you will now need your mobile phone to generate a code with Google Authenticator or to receive an SMS if you have uninstalled the software. To avoid not being able to connect without your phone, you can print a list of emergency codes used only once. This is useful if you need to go abroad for example.
Step 1: Log into your Google account.
Step 2: Click your email address or your name at the top right of the page and click Account.
Step 3: In the Security section, click Edit next to the option 2-step verification.
Step 4: Click Show backup codes.
Step 5: Print or save a text file. The important thing is to put them in a safe place.
Step 6: Each code can be used only once. If you run out of codes, click Generate new codes. Please note that the last set of codes supersedes the previous one.
Set Passwords For Applications That Use Your Google Account
Some applications that access your account from your Google phone (Android Market for example), your desktop computer (email software) or other device (such as Gmail for mobile, desktop Picasa or AdWords Editor) are not compatible with the validation codes. To use these applications, you need to enter a password that is specific in the field normally reserved for the password for your account.
Step 1: Log into your Google account.
Step 2: Click your email address or your name at the top right of the page and click Account
Step 3: In the Security section, click Edit next to the option 2-step verification
Step 4: Click Manage application-specific passwords
Step 5: Enter your password and confirm.
Step 6: In the Name field, enter the name of the application for which you want to generate a unique password, for example Android for your Google account on your phone so you can access your mail, calendar and the Market. Click Generate password.
Step 7: A password will be displayed on the screen
Step 8: Enter it in place of your usual password in the application that can access your Google account. Note that spaces do not need to be copied.
Step 9: Confirm. The application has access to your new Google Account.
Connect To Google
You set up the 2-step verification: here’s how your identification with a Google service will now take place.
Step 1: Visit the Google page that you want to open Gmail for example. Enter your username and your usual password. Click Login.
Step 2: Google will ask you a validation code. Launch Google Authenticator to your mobile phone and write down the code you receive
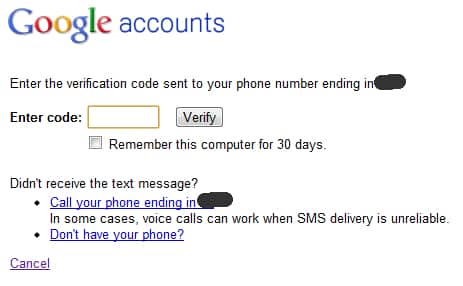
Step 3: Enter it on the login page to Google. If the computer on which you are not safe (it’s not yours for example), uncheck the Remember this computer for 30 days. Click Verify.
Step 4: If you do not have Google Authenticator or phone on hand, click Don’t have your phone?
Step 5: Choose whether you want to receive the code via SMS or use an emergency code that you previously noted. Confirm with OK and enter the code you received or noted.
Step 6: You have access to your Google.
You have successfully enabled Google Authenticator in your account. If you want to share any opinions about this way of protection that Google offers for your account or you have any problems leave your reply in comment section below.
[ttjad keyword=”cloud-storage-drive”]




![Read more about the article [Tutorial] How To Customize The Names Of Ripped Audio Files In Windows Media Player](https://thetechjournal.com/wp-content/uploads/2012/11/tools-options-as5d4e8e8e89w8e-512x242.jpg)
![Read more about the article [Tutorial] How To Disable Pop-Up Blockers](https://thetechjournal.com/wp-content/uploads/2012/02/popup-blockers-disable-512x313.jpg)
![Read more about the article [Tutorial] How to Turn Windows SmartScreen On/Off In Windows 8](https://thetechjournal.com/wp-content/uploads/2012/07/action-cenatr-win-8.jpg)