Hey Firefox users, now you can customize your Firefox browser with persona. Yes www.persona.com is allowed to install add-ons. It’s a theme like add-ons. To install it go to GetPersonas.Com.
![]()
What are Personas?
Personas are easy-to-install, easy-to-use themes that change the look of your Firefox web browser. There are thousands of Personas to choose from, with more added every day. Click here to visit the Personas gallery and start looking for designs that fit your style.
What do I need to use Personas?
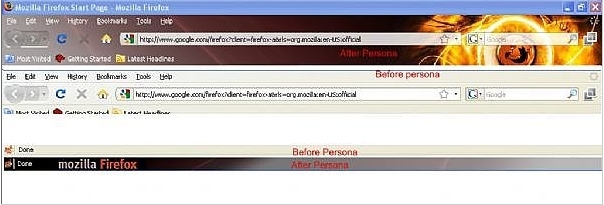
In less than 60 seconds, you can install a Persona and transform the look of your Firefox web browser. Just go here and click the green download button. After installation, you will be asked to quickly restart Firefox. Once Personas is installed, you’ll be able to choose and change your selected Persona any time simply by clicking on the little fox mask in the lower left corner of your browser window or by visiting the gallery and selecting a different design.
How do I undo a Persona design?
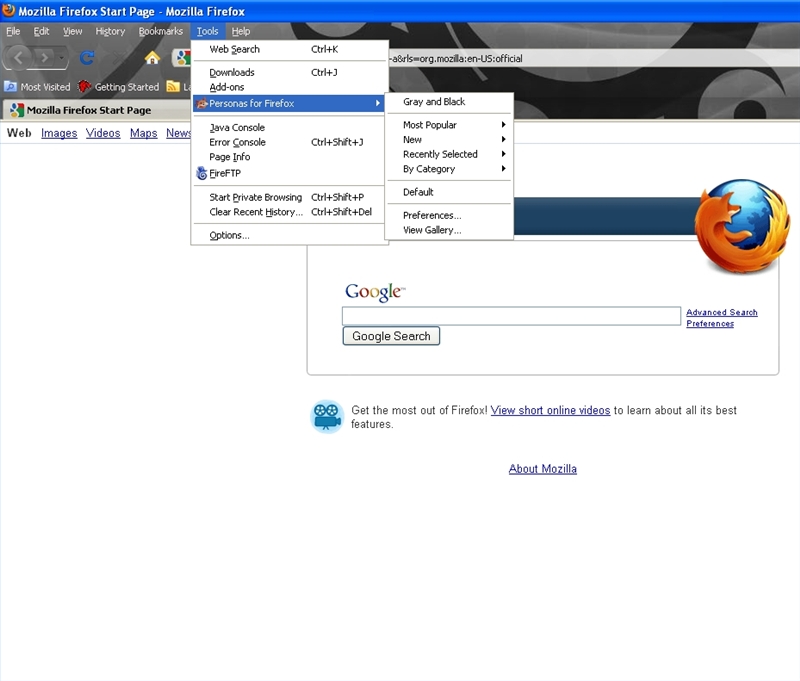
To undo the design you most recently selected, click on the little fox in the bottom left corner of your browser, click on “Recently Selected” and the design you were using before. If you prefer not to have a Persona design (ie, grey chrome), click on the little fox and select “Default.”
How to Create Your Own Persona?
Step 1: Creating a Persona Header Image
The header image is displayed as the background of the top of the browser window, nestling in behind the toolbars, address bar, search bar and the tab strip. It will be anchored to the top-right corner of the browser window. 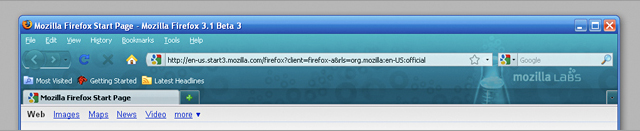

- Dimensions should be 3000px wide x 200px high
- PNG or JPG file format
- subtle, soft contrast images and gradients work best

- highly detailed images will compete with the browser UI
- Firefox may reveal more of the lower portion of the image if it or an extension adds another toolbar or other UI element to the top of the window
- the right-hand side of the image should have the most important information – as a user increases the width of the browser window, the browser reveals more of the left-hand side of the image

- images must be no larger than 300kb in filesize
- images over 3000px x 200px will not be approved
- never use artwork/logos/photography that you do not have the legal rights to use
Step 2: Creating a Persona Footer Image
The footer image is displayed as the background of the bottom of the browser window, behind the status and find bars. It will be anchored to the bottom-left corner of the browser window. 
- Dimensions should be 3000px wide x 100px high
- PNG or JPG file format
- subtle, soft contrast images and gradients work best
- highly detailed images will compete with the browser status bar UI
- Firefox may reveal more of the upper portion of the image if the find bar is open or if an extension adds more height to the bottom of the window
- the right-hand side of the image should have the most important information – as a user increases the width of the browser window, the browser reveals more of the left-hand side of the image
- images must be no larger than 300kb in filesize
- images over 3000px x 100px will not be approved
- never use artwork/logos/photography that you do not have the legal rights to use – you will have to prove you have the rights if the content is questioned
Step 3: Testing your Persona Images
In general, designs that feature rich content areas in the top-right corner of the browser work best. Though that may be true, you should always check to see where the UI elements sit on top of your designs within the different platform versions of Firefox.
This may be a critical step in finalizing your image, depending on the importance of the visual information you are including in your designs.
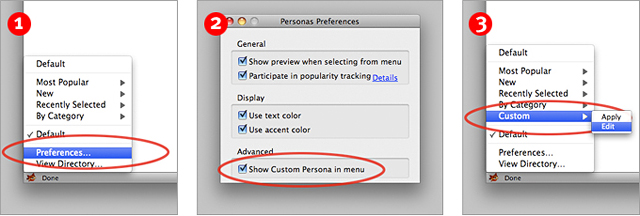
Within the Personas menu in the bottom left of the browser’s status bar, you can enable an “offline” Persona on your own personal computer by enabling a setting within Preferences. In doing this, you can test your Personas before submitting them to the online catalog.
Follow these four steps to get the Custom Personas option up and running in your browser:

- If you have Personas installed, click on the little fox on the bottom left of your computer screen and click on “Preferences”
- Ensure the box “Show Custom Persona in Menu” is checked and close the box.
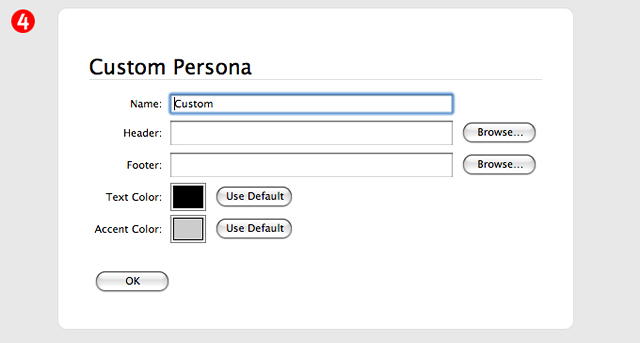
- Click on the little fox again. Mouse over “Custom” in the menu and to the right find and click “Edit”
- Build your Persona using the upload fields and additional settings.
- Once your images are playing nice with the UI for all the OS flavors of Firefox, save final copies (PNG or JPG) – but be sure to check to ensure they don’t exceed 300k in filesize!. (Note: This will only test your Persona on the platform you are currently using)
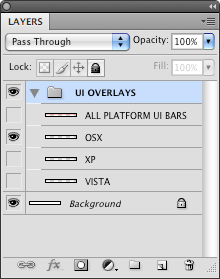
Photoshop overlay layerset
- Once you turn on an OS layer, you will be able to see where the UI elements will sit on top of your designs and you can flag any conflicts that may arise.
- Once your images are playing nice with the UI for all the OS flavors of Firefox, save final copies (PNG or JPG) – but be sure to check to ensure they don’t exceed 300k in filesize!
Step 4: Submit your Persona!
Now that you have finalized the artwork, it is time to share! One thing to note, please do be sure that you have the rights to use whatever image or design you use in your Persona. (We don’t want to get any nasty lawyer letters!)
Instructions: Add Persona
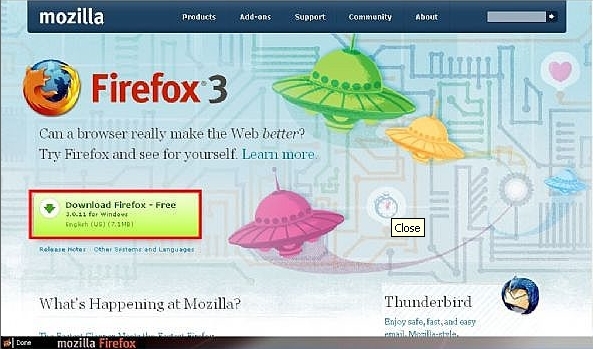
1. The first thing that you have to do is to open Firefox. If you don’t have Firefox go to the resource section and click on “download Firefox”. This link will take you to the official Firefox page. Once you have reach the Firefox website simply click on the download Firefox.
2. Now that you opened Firefox go to the following website http://www.getpersonas.com/ or click on the resource section and click on the ” add personas “. this is an add on which changes the header and the footer of you web browser
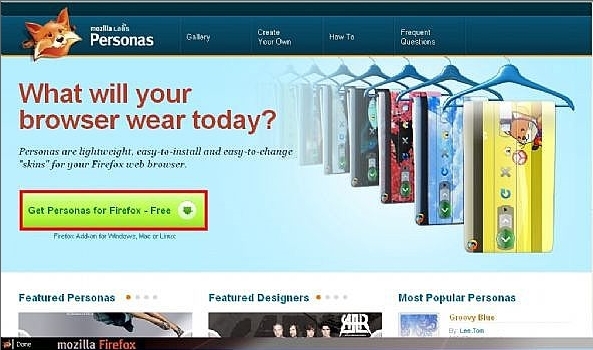
3. Now that you have install personas in Firefox you can change the skin of firefox to any of the skins that are located in the personas website, or you can create your own. if you are going to install a skin From the persona website click on the gallery button and choose which ever you like.
4. If you don’t want to go to the persona webpage every time you want to change you can go to Tools in your firefox browser and then Persona for firefox and from there you can choose the most popular persona.


This is the epetome of exellence shown by the pioneers of web browsing Firefox