Facebook has introduced the feature of shared photo albums where multiple people can upload photos in a single album. After creating a shared photo album, you can add your friends as contributors so that they can add photos, tag people, edit the album as well as they can add other contributors in that particular album. But the album creator has control over the privacy system according to three new and different privacy settings including public, friends of contributors and contributors only.

It only takes a few minutes to create a shared photo album and then you and your friend (selected contributor) can add photos or edit this album. If you want to know how to create shared photo album, just follow these steps.
How To Create A Shared Photo Album
Step 1: Click on “Create Album” button from your photo section. Now you can add photos for your new album.

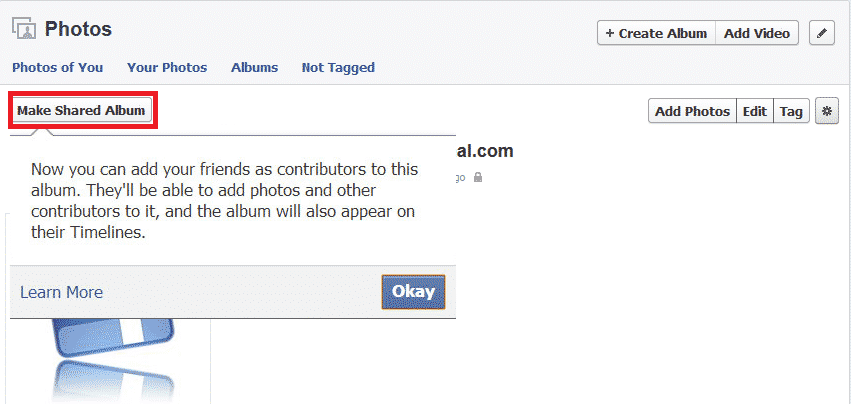
Step 2: After adding photos, it will take you to next screen. Here you will see the “Make Shared Album” button in the upper left corner. Click that button.
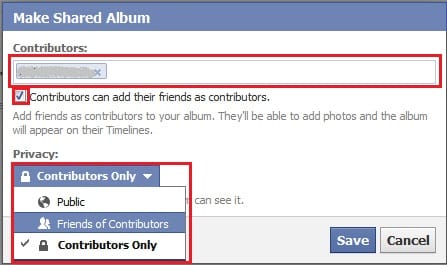
Step 3: Now you can add contributor to your album who will be able to add photos to your album and the same album will also appear on their timelines. You can control your privacy from three different setting to define who will be able to see your shared album. By putting a check-mark on the box, you can choose whether you want to allow contributors to invite others to this shared album. Press the ‘Save‘ button and here you go.
If you have followed all the steps mentioned above, you would be able to create a shared photo album on your Facebook account within few minutes. Now you and your friends can easily upload tour tour, party or event picture in this same album. Happy Sharing!!
[ttjad keyword=”social-media-samrtphones”]
![Read more about the article [Tutorial] How To Run Control Panel Tools Of Windows From DOS Command Prompt (cmd)](https://thetechjournal.com/wp-content/uploads/2012/02/control-panel-commands-cmd.webp)
![Read more about the article [Tutorial] How To Schedule Windows To Sleep And Wake Automatically](https://thetechjournal.com/wp-content/uploads/2012/10/create-task-asd798e7ty6io32p03.webp)