In this tutorial I will show you how to create a USB Repair disk for Windows operating system. You can use it to repair your Windows in case of a system crash. This can be quite useful if you do not have an optical drive on your computer or you don’t have a Windows installation DVD. To create the repair disk you need to have an empty USB drive with at least 256 MB free space.
Before we get started we need to prepare your USB drive for this operation using the Diskpart utility in Windows. This tool will be used to clean your USB key, create a new partition and format it appropriately.
Step 1: Plug your USB stick into your computer.
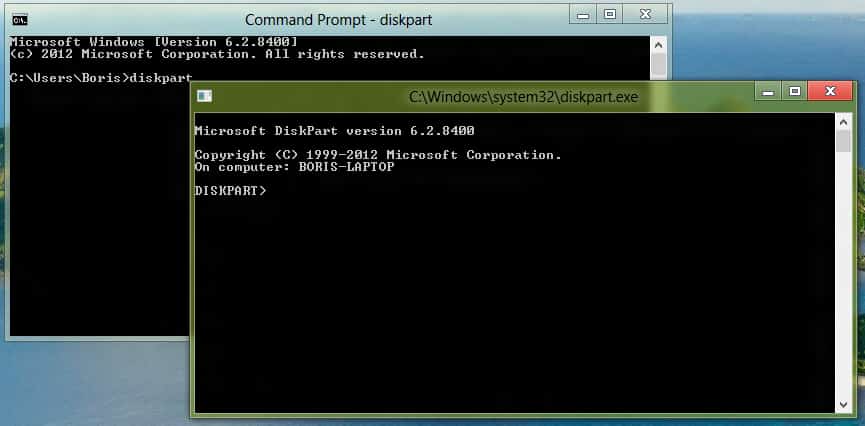
Step 2: Click the Start button (Windows 7) or bring up the Charm bar. In the search field type cmd. Press Enter on your keyboard to open Command Prompt.
Step 3: In the Command Prompt window that opens, type the command diskpart and press Enter.
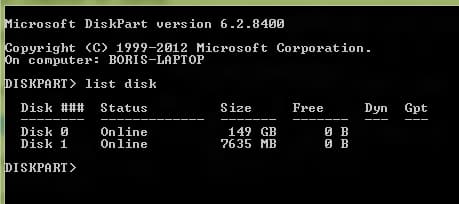
Step 4: The utility then waits for your instructions. Enter the command list disk and press Enter.
Step 5: Using the Size column, identify your USB drive. My USB Drive size is 8 GB so in this list, it is denoted as Disk 1.
Step 6: Enter the command select disk 1 (the disk number may vary in your case). Press Enter on your keyboard. The USB drive is now selected for further operations.
Step 7: Write clean in the Command Prompt and press Enter. Warning, this command will delete all data and partitions on your USB drive. You should backup your USB drive before performing this operation.
Step 8: Write create partition primary in the Command Prompt and press Enter on your keyboard. A new partition will be created.
Step 9: To select the new partition write the command select partition 1 (partition number may vary in your case) and press Enter on your keyboard.
Step 10: Enter the command active and press Enter. The partition is now active.
Step 11: You can now format the partition on your USB drive. For that, write the command format fs=ntfs and press Enter. The operation may take several minutes depending of a size of your USB drive.
Step 12: Once the disk formatting is complete assign a drive to your USB drive. Enter the command assign in the Command Prompt. Windows will now detect your USB drive.
Step 13: You can then exit diskpart by typing exit and pressing the Enter on your keyboard and Command Prompt window will close. Your USB is ready for Windows repair files.
Step 14: Download a copy of the repair disk from Dropbox.
Step 15: Open the downloaded archive and unpack it somewhere on your hard drive.
Step 16: Now open repairdisc32bits.
Step 17: Select all files from that folder and copy them on your formatted USB drive.
You are done now! You have created your USB repair disk for Windows. When something goes wrong with your Windows and you need to repair it, take this USB, plug it into your computer and boot from it. Once you boot from the USB you will have Windows repair options. If you have questions or you want to share your experience with this tool leave it in comment section below.
[ttjad keyword=”ssd”]


![Read more about the article [Tutorial] How To Jailbreak Your iPad on iOS 5.1.1 Using Absinthe 2.0 – Windows](https://thetechjournal.com/wp-content/uploads/2013/01/Using-Absinthe-2.0-1.jpg)
![Read more about the article [Tutorial] How To Share Live Video On Facebook From Android & iOS](https://thetechjournal.com/wp-content/uploads/2016/05/live-reactions-android-512x336.png)
![Read more about the article [Tutorial] How To Free Space In Mac OS X By Deleting Unused Language Files](https://thetechjournal.com/wp-content/uploads/2012/11/select-languages-asd46e87r9w7r98e7r.jpg)