If you own a website and want to give your visitors a widget which will help them track your latest website updates, is there any better way then having your tile inside Windows 8 Start screen? This tutorial will show you how to create your own website tile for Windows 8 without any programming, and by simply using your mouse.
To get started follow the steps below.
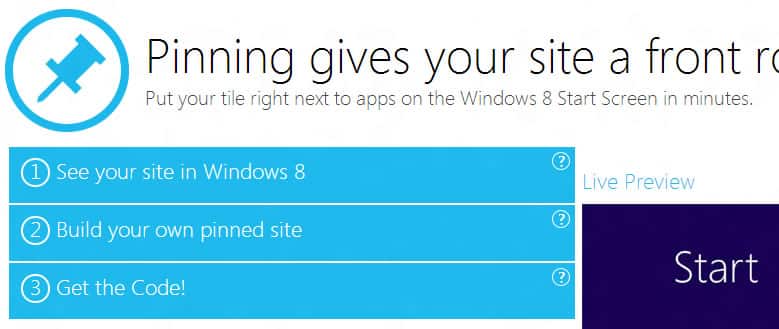
Step 1: From your web browser, visit buildmypinnedsite.com by Microsoft, and when new page opens, under section the “See your site in Windows 8” type in the URL of your website.
Step 2: Now ,click on the Show me! button to see how your tile will look like on Windows 8 Start screen. Your tile will appear inside the improvised Start screen located on the right hand side.
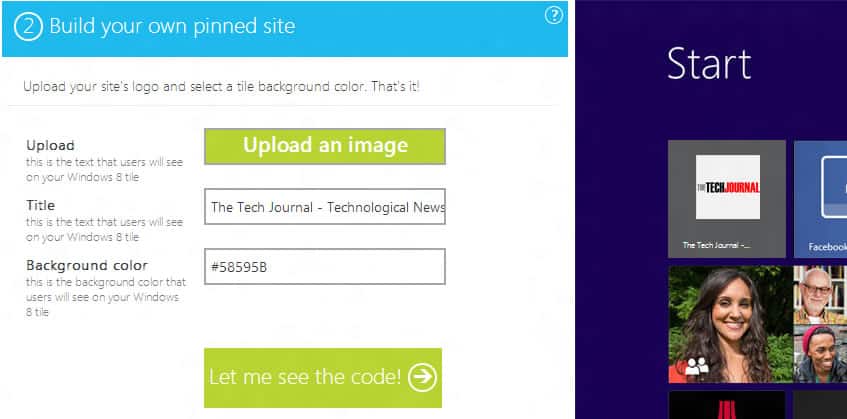
Step 3: Now, expand Build your own pinned site section. In here you can upload an image for your tile, add title and adjust background color. You can instantly see the changes you apply inside the improvised Start screen on the right side. Once you are done with the customization, click on the Let me see the code button.
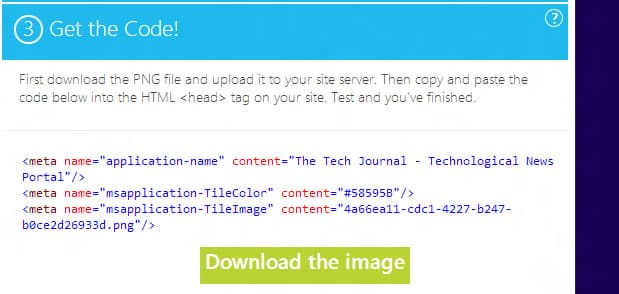
Step 4: As your last step, you need to download the PNG file to your site server. Then copy the code you see under section 3 and paste it inside HTML <head> tag on your website. Note, if the image is not uploaded inside root folder on your server you will need to specify the right path to image by replacing content=”4a66ea11-cdc1-4227-b247-b0ce2d26933d.png” with the right path.
Visit our Windows 8 tutorial section for more tips and tricks.
[ttjad keyword=”windows-tablet”]





![Read more about the article [Tutorial] How To Enable Delete Confirmation Dialog Box In Windows 8](https://thetechjournal.com/wp-content/uploads/2012/11/recycle-bin-propertiese-as56d4987yu64ip34654fd.jpg)