If you use multiple Wi-Fi wireless networks in your PC and saved the settings for automatic login, it may happen that your computer does not automatically connect to your preferred Wi-Fi network all the time. This is usually an issue of priority. Your PC automatically connects to the WLAN that has the highest priority. By changing the priority of wireless networks you can solve this problem easily.
To get started follow the steps below.
Step 1: In the notification area of your system tray, click on the network connection icon.
Step 2: From context menu that appears click on Open Network and Sharing Center.
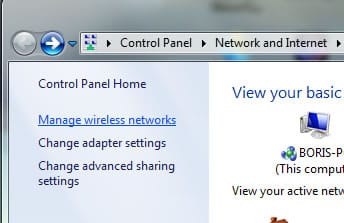
Step 3: In the left column, click on Manage wireless networks.
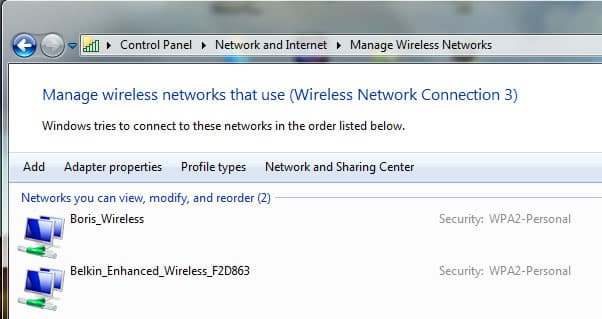
Step 4: A list of your registered network connections is displayed, ranked in order of priority. When multiple wireless networks are in range, those with the highest priority will be used.
Step 5: Click on the connection that you want to give more priority and select Move up. Click on the Move down to decrease the priority of a connection.
Step 6: Once you are done with the changes close the window and reconnect to Wi-Fi network. The connection will complete based on the priority settings.
Hop you found this tutorial helpful. Visit our Windows tutorial section for more.
[ttjad keyword=”all-in-one-desktops”]


![Read more about the article [Tutorial] How To Play Xbox 360 Games On Laptop Or Desktop Computer](https://thetechjournal.com/wp-content/uploads/2012/04/xbox-on-pc-logo.jpg)
![Read more about the article [Tutorial] How To Quickly Clean Printer Head In Windows](https://thetechjournal.com/wp-content/uploads/2012/10/asdevice-printers-asd-aaa654ds65a4sd654ass.jpg)
![Read more about the article [Tutorial] How To Rearrange Your Keyboard Layout With SharpKeys](https://thetechjournal.com/wp-content/uploads/2013/01/keyboard-buttons-replace-ttj-logo-512x219.jpg)