One of the great things that Microsoft have added inside Windows 8 is certainly the new Store for apps. But, what most users are worrying about when it comes to these apps installation is – where are these saved and installed? There are plenty of Windows users who would like to change this location to a drive in which they have enough free space. This tutorial will show, how to do that using Windows Registry Editor.
To get started follow the steps below.
Step 1: From your Windows 8 desktop, press Win+R on your keyboard.
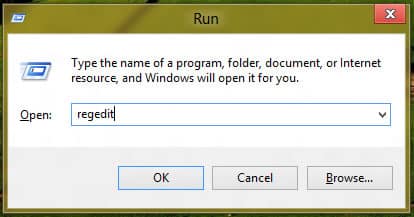
Step 2: When Run window opens up, type regedit inside it and press Enter.
Step 3: If you got prompted by UAC click OK to continue.
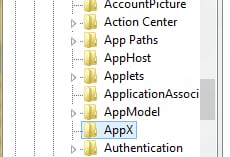
Step 4: Inside Registry Editor window that opens up, on the left pane follow this path HKEY_LOCAL_MACHINE\SOFTWARE\Microsoft\Windows\CurrentVersion\Appx.
Step 5: When you select Appx key, inside right pane you should see a string called PackageRoot. This string contains a location to which Windows 8 will save your Store apps.
Step 6: In order to change this location, first you need to have required permissions over AppX key. Follow our tutorial on registry ownership to find out how to do that.
Step 7: Once you took ownership over AppX key, double-click on PackageRoot inside right pane, and inside the window that opens up, change the value to your custom location where you want to save your Store apps.
Step 8: Click OK to save the changes and close the Registry Editor window.
From now on, whenever you install new apps from Windows 8 Store they will be saved inside your defined location.
Visit our Windows 8 tutorial section for more tips and tricks.
[ttjad keyword=”laptop-acer”]


![Read more about the article [Tutorial] How To Activate NumLock Upon Boot In Windows 8](https://thetechjournal.com/wp-content/uploads/2013/01/2-ok-sa5d46e4r65we4r6ew.jpg)
![Read more about the article Turn Windows Phone 7 into USB Drive[How To Guide]](https://thetechjournal.com/wp-content/uploads/2010/11/turn-windows-phone-7-usb-drive-300x222.jpg)
![Read more about the article [Tutorial] How To Turn Off Store App In Windows 8](https://thetechjournal.com/wp-content/uploads/2013/01/store-app-disable-windows-8-ttj-logo-512x210.jpg)