In this Windows 8 tutorial I will show you how to create VHD (Virtual Hard Disk) or VHDX (Hyper-V Virtual Hard Disk) file in Windows 8. To be able to perform this operation you will need to be signed in as an administrator.
To get started follow steps below:
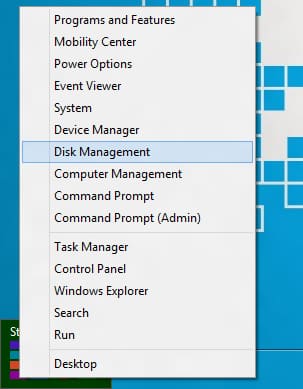
Step 1: Move your mouse pointer to bottom left corner of your screen and do the right mouse click.
Step 2: From context menu that appears chose Disk Management. If you go prompted by UAC simply click on Yes.
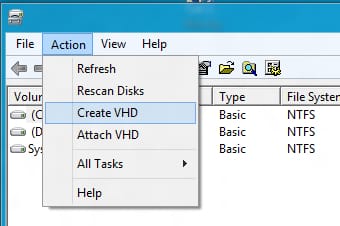
Step 3: A Disk Management window will appear. In top navigation click on Action and from drop down menu choose Create VHD.
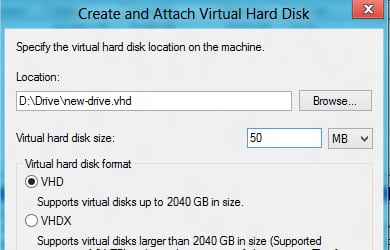
Step 4: Under Virtual hard disk format section select whether you want to create a VHD or VHDX file and then click Browse button.
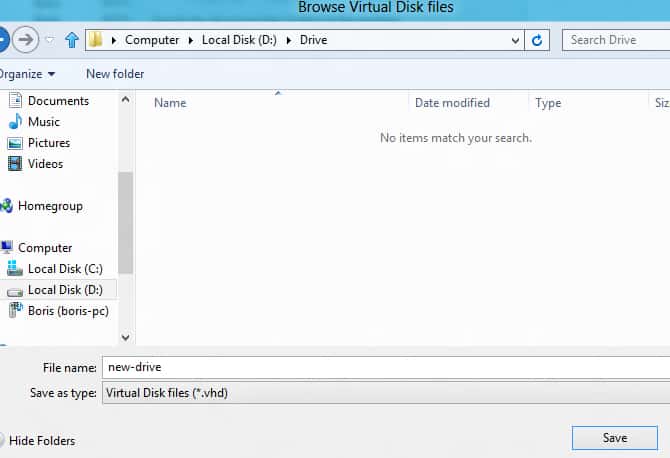
Step 5: Locate the folder or a drive where you want to save your VHD or VHDX file and inside File name field type its name. Click Save to continue.
Step 6: Now under Virtual hard disk size type the maximum size you want to use for your VHD or VHDX file and select whether its size will be in MB, GB or TB.
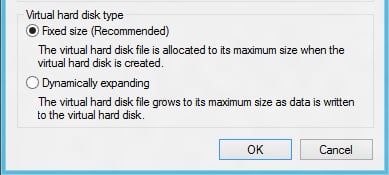
Step 7: Under Virtual hard disk type, choose whether you want Fixed size or Dynamically expanding (my suggestion is to select Fixed size).
Step 8: Click OK to continue.
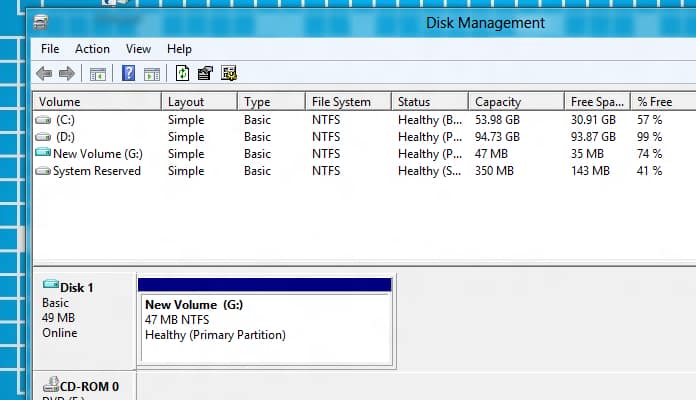
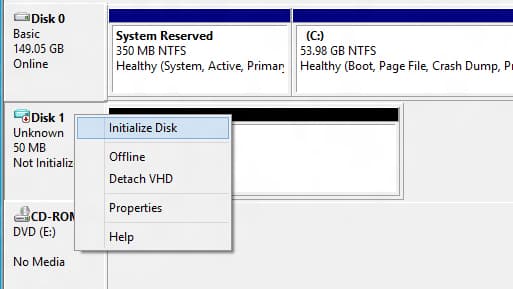
Step 9: Inside Disk Management window right mouse click on an Unknown disk (the one we just created) and from context menu select Initialize Disk.
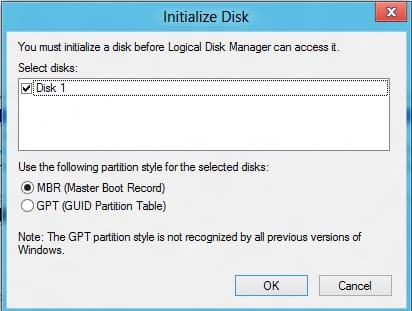
Step 10: In a small window that open, under Select disks section select your Disk 1. Then select MBR (Master Boot Record) or GPT (GUID Partition Table) and then click OK to continue.
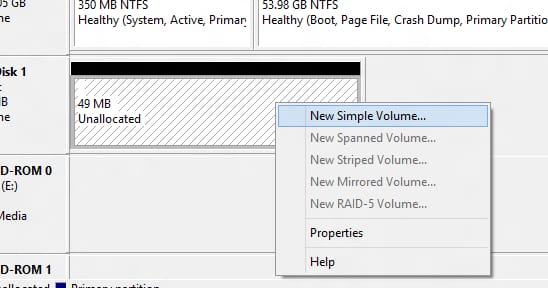
Step 11: We will return to Disk Management again. Right mouse click on Unallocated space (again disk we created) and then from context menu choose New Simple Volume.
Step 12: Click Next button.
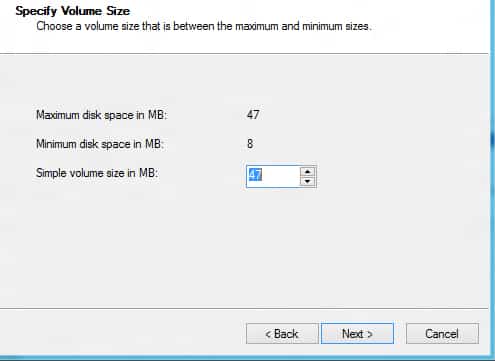
Step 13: Under Simple volume size in MB type a number of your maximum disk space in MB and click Next.
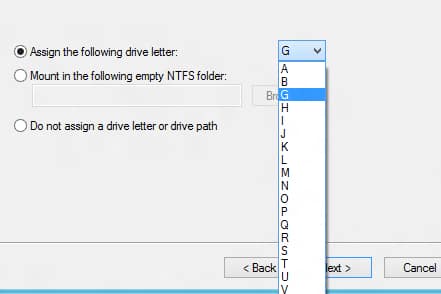
Step 14: Select Assign the following drive letter and from drop down menu choose a letter for your drive. Click Next to continue.
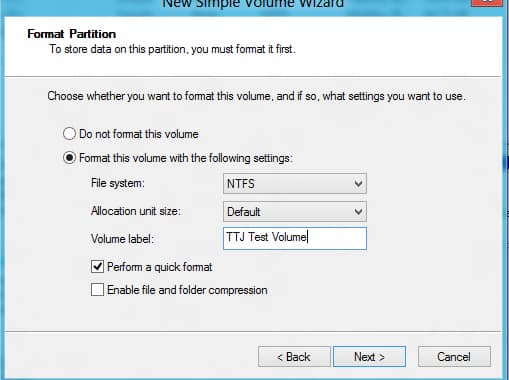
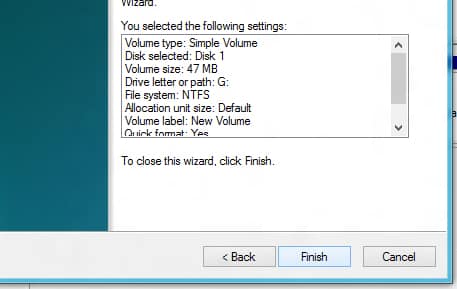
Step 15: In next window select Format this volume with the following settings and then type in Volume label. Also make sure that Perform a quick format check box is selected.
Step 16: Click Finish button.
Now you have your Virtual hard ready for work.
[ttjad keyword=”all-in-one-desktops”]


![Read more about the article [Tutorial] How To Use Gmail – A Helpful Guideline For Beginners](https://thetechjournal.com/wp-content/uploads/2014/03/gmail-512x333.jpg)
![Read more about the article [Tutorial] How To Use On-Screen Virtual Buttons At Ice Cream Sandwich ROM On Android](https://thetechjournal.com/wp-content/uploads/2012/02/11-512x173.jpg)
![Read more about the article [Tutorial] How To Disable Auto Play For Advertisement In Google Chrome](https://thetechjournal.com/wp-content/uploads/2012/10/chrome-settings-asd87et1t65u4ty654.jpg)