When you convert audio CDs to MP3 with Windows Media Player 12, the name of MP3 files will include track title and track number. If this file name does not match your taste, you can easily customize the output file name by adding names such as artist, genre and bit-rate. Follow this tutorial to find out how to apply these changes inside Windows Media Player.
To get started follow the steps below.
Step 1: Run the Windows Media Player.
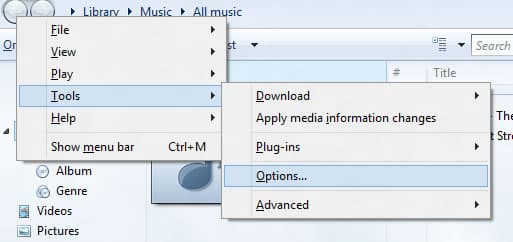
Step 2: Press the Alt key to display the menu bar and then click the Tools menu and click on Options.
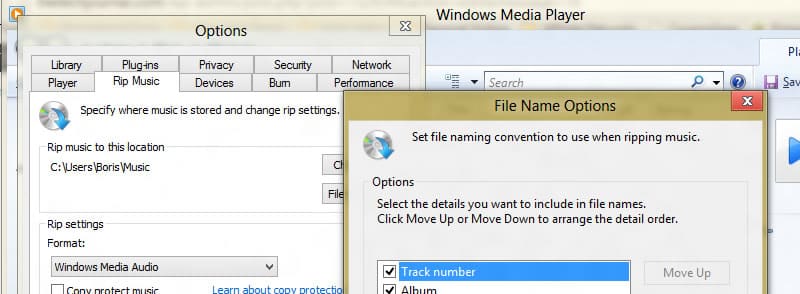
Step 3: Open the Rip Music tab.
Step 4: Under section Rip music to this location, click on the File Name button.
Step 5: Check the boxes in front of the items which you want to include in the file name. You have the option to choose –
- Track number – This number is automatically generated based on track position inside your audio disk.
- Album name
- Song title
- Artist
- Genre – A genre of your track e.g. Jazz, R & B, Pop, Rock, etc…
- Bit rate – This is a length of your track in format minutes:seconds e.g 05:30.
Step 6: Use the Move Up and Move Down buttons to set the order information in the file name.
Step 7: A preview is displayed on the screen.
Step 8: By default, the information is separated by a blank space. You can change the separator by clicking the drop-down menu under Separator.
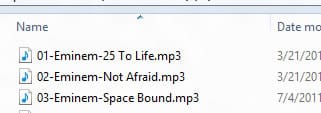
Step 9: Here is the sample of my MP3 files converted from audio file. I have selected to use the following file name format: Track number-Artist-Song title and I have separated them with middle dash (-).
Step 10: Then press OK to save your changes.
We are done. If you liked this tutorial, then visit our Windows tutorial section for more tips and tricks.
[ttjad keyword=”microsoft”]


![Read more about the article [Tutorial] How To Install Cortana On Android Device](https://thetechjournal.com/wp-content/uploads/2015/08/cortana1-512x283.png)
![Read more about the article [Tutorial] How To Print From Your Nexus 7](https://thetechjournal.com/wp-content/uploads/2012/07/cloud-print-action-as8d7a6sd32.jpg)
![Read more about the article [Tutorial] How To Block A Website In All Web Browsers – Windows](https://thetechjournal.com/wp-content/uploads/2012/05/website-block-logo.jpg)