More and more laptops and other portable devices are equipped with a biometric reader that allows by pressing your finger on it, to connect to log into the Windows. Biometric reader is also the most effective way to secure your Windows. To learn how to setup Windows 7 to recognize your biometric reader and your fingerprints follow steps below.
This instruction is only for Biometric enabled device, So you have to have Biometric reader attached to your Windows.
To get started follow steps below:
Step 1: To get started open the Control Panel and then in Large Icons View mode, click Devices and Printers.
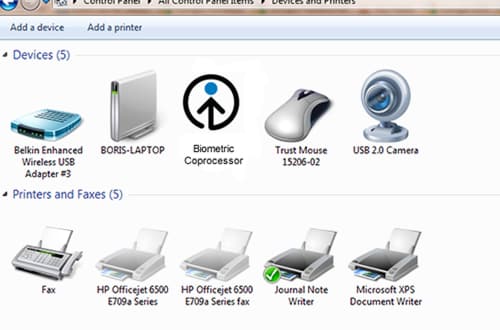
Step 2: Under Devices section you should see Biometric Coprocessor icon. Right click on Biometric Coprocessor icons and from context menu choose Biometrics.
Step 3: Inside new window, on the right side you should see Manage your fingerprint data
Step 4: Once you click on Manage your finderprint data a new window will open asking you to enter your Windows login password and then click OK
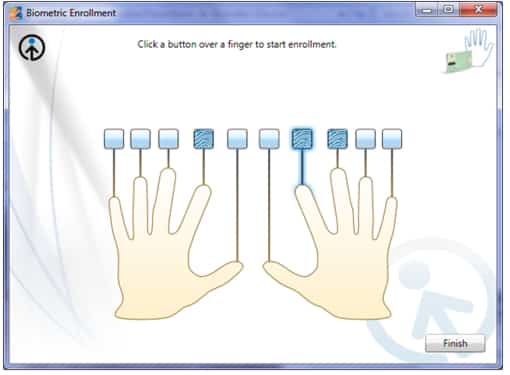
Step 5: Then click on the finger you want to use. As shown in the animation, you must slide your finger on the biometric reader until the progress bar at the bottom right confirms its good enough.
Step 6: After successful registration, click Finish and Close.
Step 7: If you want to set other records of your fingerprints, click Manage your fingerprint data and repeat above steps.
How to remove biometric data?
If you do not want to keep your fingerprint data simple click Delete your fingerprint data in the left sidebar and then click Delete to confirm. Then for security reasons enter your Windows login password.
How to Enable/Disable the biometric reader?
Step 1: You can also disable the device if you do not want to use it by clicking Change biometric settings in the left sidebar.
Step 2: Then check the appropriate box.
Step 3: Click Save Changes to complete. Remember that once you choose Biometrics Off and you click save, your fingerprint records will be deleted.


![Read more about the article [Tutorial] How To Disable The Lock Screen In Windows 8](https://thetechjournal.com/wp-content/uploads/2012/11/windows-8-charm-menu-search-5s6a5d4a65s4d65s4d.jpg)
![Read more about the article [Tutorial] How To Change Action Related To Windows 7/Vista Power Button](https://thetechjournal.com/wp-content/uploads/2012/02/windows-power-button-change-512x230.jpg)
![Read more about the article [Tutorial] How To Setup iMessage On Your New iPad](https://thetechjournal.com/wp-content/uploads/2012/03/imessage-ipad-logo-512x275.jpg)