How many times it happened that you forgot your phone at home or at work, but you need to have it near you to receive important calls and messages? Well, you don’t have to worry about it any more. Because, now you can easily display notifications from your Android phone directly to your computer. All you need to do is use the free Android Notifier app. In this tutorial I will guide you trough the process of setting up the system.
Before we go further, you need to know a few things about the Android Notifier app and how it works. The app comes in two parts – one sits on your phone to transmit notifications, and another sits on your computer to receive and display them on your desktop. However, to send alerts from your phone to your computer, a data connection over Wi-Fi or mobile must be available.
To set up the system follow the steps below.
Step 1: To start receiving alerts from your Android to your computer we will need two apps (more precisely, two versions of the Android Notifier app for two platforms). First one is called Multi Droid Notifier and is available for Windows. Download it from this link and install on your computer.
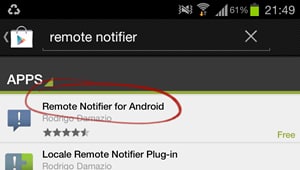
Step 2: Now, take your Android phone, go to Google Play, download the app called Remote Notifier and install it on your phone.
Step 3: When you have both of the necessary apps up and running, you need to edit some configurations.
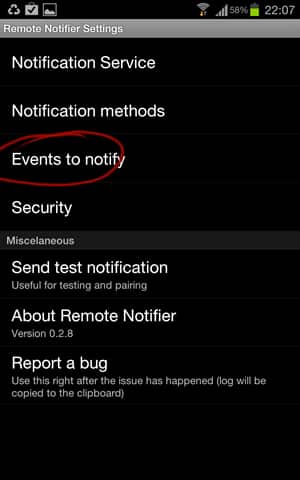
Step 4: Start the app on your Android phone and tap Events to notify.
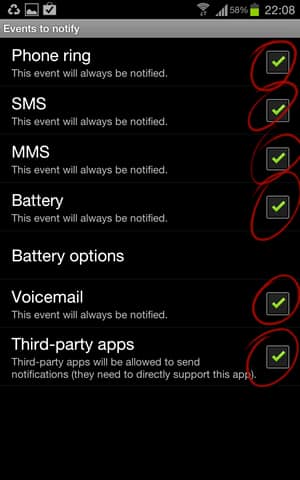
Step 5: Now select the check boxes next to the alerts you want to send to your computer. For example – when someone calls you (Phone ring), when you receive an SMS or MMS, Voicemail and so on.
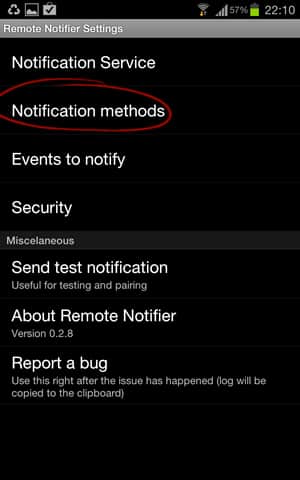
Step 6: Then go back to main menu and tap Notifications Methods.
Step 7: If you use Wi-Fi connection for notifications, uncheck Bluetooth to avoid conflicts. Then tap on IP/WiFi options.
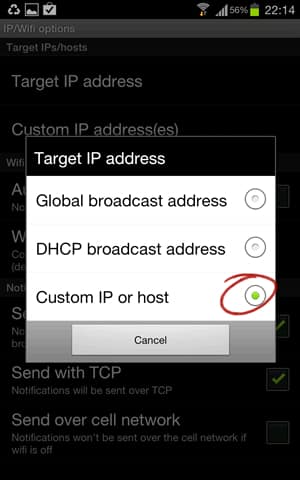
Step 8: Now tap Target IP address located at the top and then click Custom IP or host.
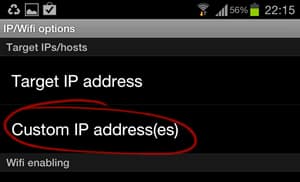
Step 9: A small window will automatically close and you will be returned to options window. Now tap Custom IP address.
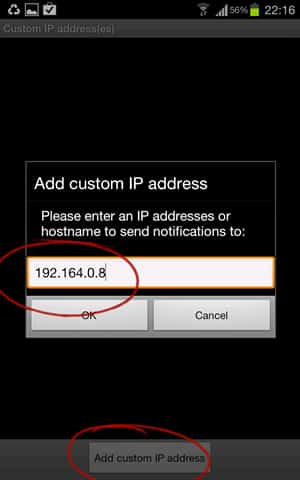
Step 10: Tap Add custom IP Address and enter the IP address of the computer where you want to send notifications.
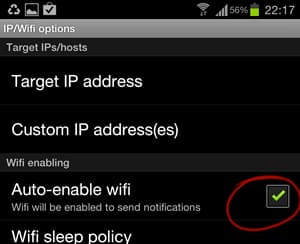
Step 11: By the way, check the Auto-enable wifi option. If you have disabled the Wi-Fi, the software will attempt to activate it to send its alerts and then disable.
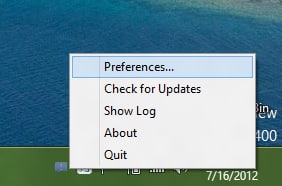
Step 12: Now let’s make necessary changes on your computer. Launch the app you installed earlier on your computer.Click the right mouse on the Android Notifier icon located in the system tray and choose Preferences.
Step 13: Check the box Start at login to automatically start the software when Windows starts.
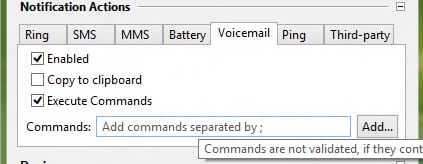
Step 14: You can also choose to display Notification Actions, and by selecting the checkbox in front of Execute commands you can choose which sound will be played when certain action is executed. Use tabs to navigate trough different actions.
Step 15: Once you are done click Save.
Step 16: When you any incident happens (like receiving an SMS, or a call, or any thing you have configured to be notified about) on your phone, it will displayed on your desktop. If someone tries to call you, a notification is also displayed.
[ttjad keyword=”chrome-laptop”]





![Read more about the article [Tutorial] How To Manage Your Saved Games Easily In Windows](https://thetechjournal.com/wp-content/uploads/2012/07/gamesave-manager-scanning.jpg)
![Read more about the article [Tutorial] How To Sync Windows Paid Apps on Other Windows 8 Computers](https://thetechjournal.com/wp-content/uploads/2012/10/microsoft-store-a7s8d95s4df54s654df-512x289.jpg)