If you have upgraded to Windows 8 then you have probably noticed the Windows.old folder sitting inside your root partition. You are probably wondering what this large folder for. This folder is created when you perform a refresh of Windows 8 or when you upgrade to Windows 8 from a previous Windows version. It contains a copy of previous Windows installation and as I already said it can be quite large in size. In this tutorial I will show you how to safely delete this folder in Windows 8 using Disk Cleanup manager.
To get started follow steps below.
Step 1: On your keyboard, press Win+Q to lunch search charm bar. Inside search field type cleanmgr and then inside left pane lunch the app cleanmgr.exe.
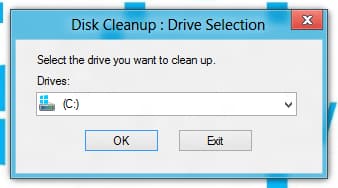
Step 2: When Disk Cleanup window opens, select the drive that you wish to clean up (choose the drive where you Windows.Old is located) and then click OK button.
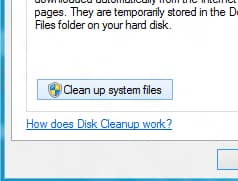
Step 3: Inside the next window that appears click on Clean up system files button.
Step 4: If you got prompted by UAC, click on Yes button.
Step 5: Now again choose a drive which you want to clean (the one you choose in Step 2) and click OK.
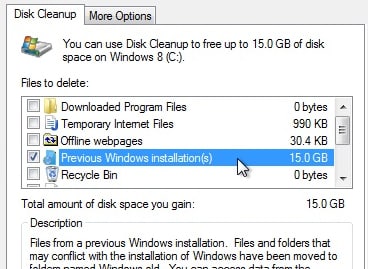
Step 6: Select the checkbox in front of Previous Windows Installation(s) and then click OK.
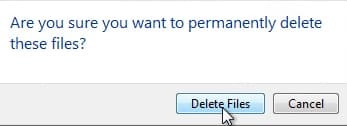
Step 7: In the confirmation window click on the button Delete Files.
Step 8: Wait until cleanup process is finished, which may take few minutes, and the C:\Window.old folder will be deleted.
Hope, you have found this tutorial useful.
[ttjad keyword=”microsoft”]


![Read more about the article [Tutorial] Edit Your Facebook Look Back Movie](https://thetechjournal.com/wp-content/uploads/2014/02/Edit-button-On-Facebook-Look-Back-512x390.jpg)
![Read more about the article [Tutorial] Guide To Print From iPhone Or iPad Wirelessly](https://thetechjournal.com/wp-content/uploads/2016/05/1-2-512x288.png)
![Read more about the article [Tutorial] How To Enable Handwriting Recognition In Windows 7](https://thetechjournal.com/wp-content/uploads/2012/03/pen-touch.jpg)