If you did look inside Windows Defender interface you most probably noticed that it does not include an option to scheduler antivirus scan in your Windows 8 computer. Although Windows Defender provides most of its protection in real-time, you most probably want to set up scan to occur regularly without any actions from you end and this tutorial will show you how to do it in Windows 8.
To get started follow steps below:
Step 1: On your keyboard press Win+Q, inside search field type task scheduler and then press Enter on your keyboard.
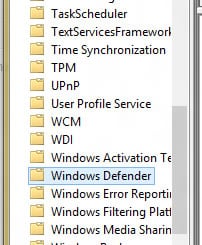
Step 2: When Task Scheduler window opens up inside left pane follow this path Task Scheduler Library\Microsoft\Windows\Windows Defender\.
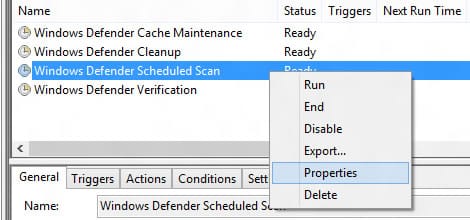
Step 3: With Windows Defender selected in left pane, inside right pane right mouse click on Windows Defender Scheduler Scan and from context menu that opens up choose Properties.
Step 4: From new window that opens up, under General tab, you will need to ensure that the proper user is selected to run this task. By default that user is SYSTEM so make sure its selected.
Step 5: Also under General tab make sure that Run with highest privileges is selected.
Step 6: Now select Triggers tab and then click on New button.
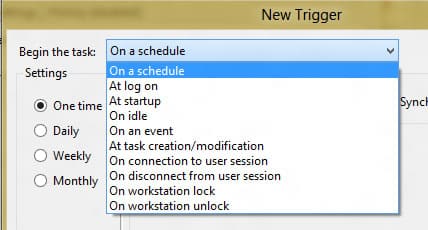
Step 7: Now under Begin the task: select On a schedule option.
Step 8: Under Settings section select how often you want to run the scan: One time, Daily, Weekly or Monthly. My suggestion is to use Daily or Weekly scan and then inside right pane select when to start the scan.
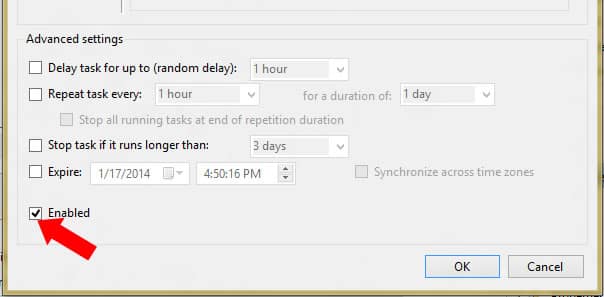
Step 9: Under Advanced settings section select checkbox in front of Enabled. Click OK to save your changes.
Step 10: Now select Actions tab you will see a default action is already configured for you so leave it as it is and don’t make any changes.
Step 11: Under Conditions tab you can specify starting conditions in order to ensure your task only runs when you want it to. Make sure that option Start the task only if the computer is on AC power is selected.
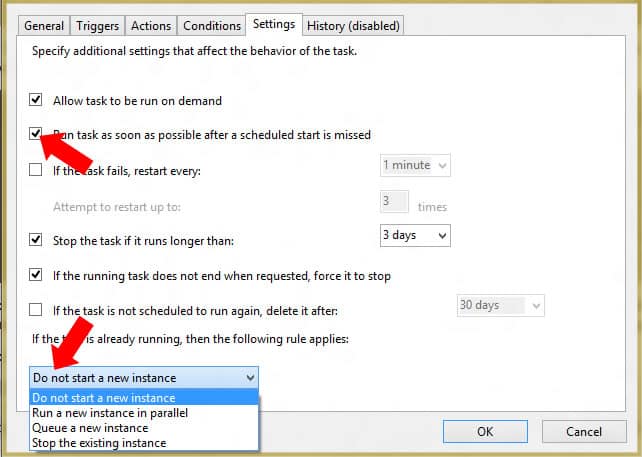
Step 12: Under Settings tab select option Run task as soon as possible after a scheduled start is missed. Also make sure that you select Do not start a new instance from drop down menu located at the bottom of Settings tab.
Step 13: Click OK to save your changes and your antivirus Task Scheduler will be created.
[ttjad keyword=”all-in-one-desktops”]







![Read more about the article [Tutorial] How To Play Media Files On Your PlayStation 3 With PS3 Media Server](https://thetechjournal.com/wp-content/uploads/2012/04/ps3-media-streaming-512x264.jpg)
![Read more about the article [Tutorial] Edit Your Facebook Look Back Movie](https://thetechjournal.com/wp-content/uploads/2014/02/Edit-button-On-Facebook-Look-Back-512x390.jpg)
![Read more about the article [Tutorial] How To Create A Shared Photo Album On Facebook](https://thetechjournal.com/wp-content/uploads/2013/09/Facebook.jpg)