In this tutorial I will show you how to set up a Virtual Private Network on your iPad or iPhone so you can easily share documents and multimedia files between your Apple devices.
To get started follow steps below:
Step 1: First we need to tap on Settings icon located in your home screen.
Step 2: When Settings window opens up, in left pane tap on General and then inside right pane tap in VPN.
Step 3: Tap on Add VPN Configuration…
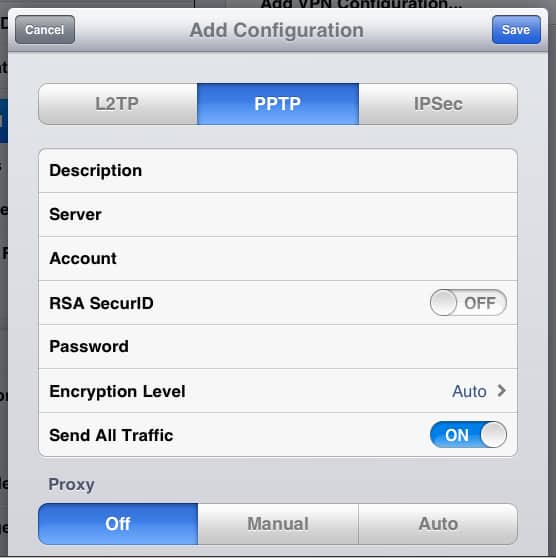
Step 4: Now it depends what type of VPN you need to choose L2TP, IPSec or PPTP located at the top of pop-up window.
Step 5: Fill out all required information’s in empty fields and once you done with that, tap on Save button located in top right corner.
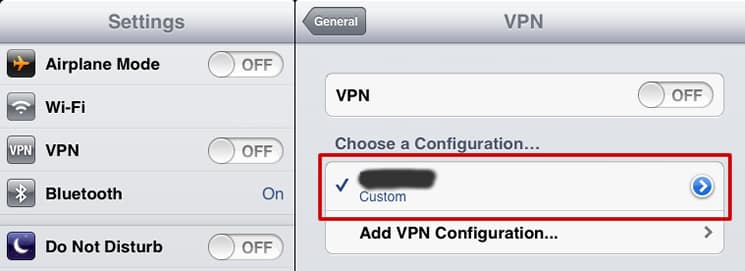
Step 6: From Choose a Configuration section make sure that your newly created VPN is listed and selected.
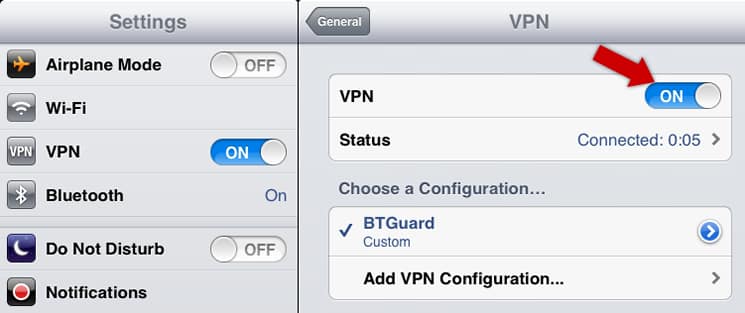
Step 7: Now under VPN section toggle from OFF to ON.
Step 8: Your iPhone or iPad should now connect to VPN and authenticate your credentials.
Step 9: If you want to disconnect from your VPN, simply repeat Step 9, but this time toggle VPN from OFF to ON.
[ttjad keyword=”ipad”]


![Read more about the article [Tutorial] How To Replace Laptop Hard Drive With SSD](https://thetechjournal.com/wp-content/uploads/2012/04/crucial-ssd-kit-512x273.jpg)
![Read more about the article [Tutorial] How To Launch Internet Explorer 8 With Private Browsing Mode](https://thetechjournal.com/wp-content/uploads/2012/02/ie-private-browsing-logo-512x248.jpg)
![Read more about the article [Tutorial] How To Change Metro Start Menu Background In Windows 8](https://thetechjournal.com/wp-content/uploads/2012/07/settings-as5d4a65sd4.jpg)