Nowadays, most of the computer mouse’s have at least four buttons on them, including the wheel that can also be used as button. Why not assign the extra buttons to perform a particular action that will save your time while working on computer? No matter what type of mouse you have you can use the free X-Mouse Button Control that allows you to configure the actions to be assigned to different buttons on your mouse, and for each software you use. It is therefore possible to define a button to perform a specific task in a word processor and another task in your web browser. Follow this tutorial to find out how to make setups.
Before proceeding to below steps make sure you download X-Mouse Button Control from this link and install it on your computer. Once installation is finished you can continue following steps below:
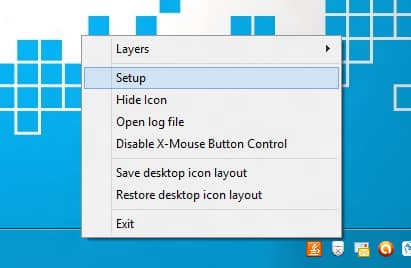
Step 1: Once you install X-Mouse Button Control, a new icon appeared in the notification area.
Step 2: Click with the right mouse button on X-Mouse Button Control icon in system tray and from context menu choose Setup.
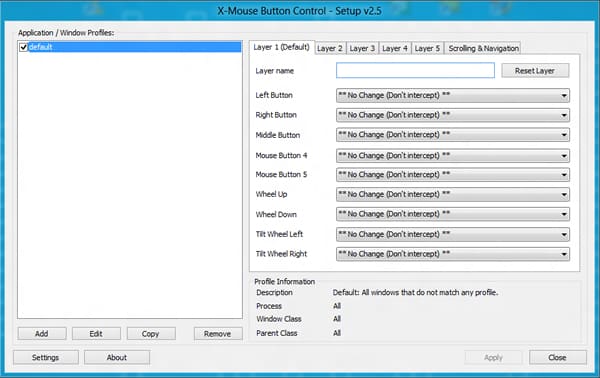
Step 3: In the window that opens, you can set the default settings for each button of your mouse.
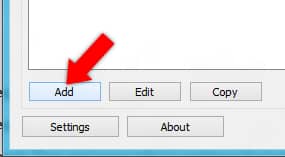
Step 4: To configure the buttons for a particular software, click the Add button.
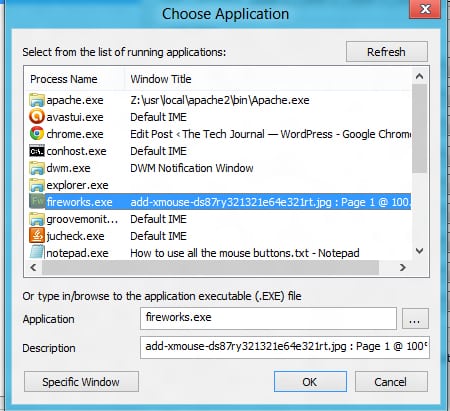
Step 5: From the list select the program from which you want to configure your mouse buttons. Click OK.
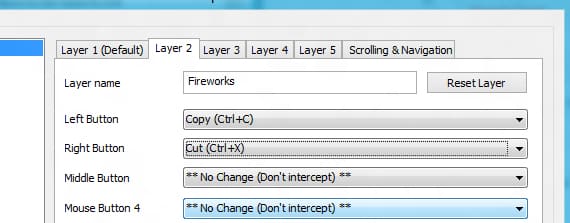
Step 6: Then use Layers tabs to configure the buttons of your mouse. Your settings will be active only for the software you added in Step 5.
Step 7: Once you are done with configurations click Apply button to make these changes active.
Step 8: Repeat previous steps to adjust buttons for other software.
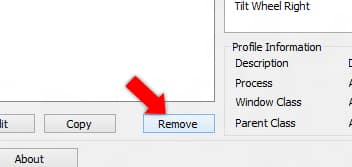
Step 9: If you want to apply a default settings to your software and reset all configuration you done simply choose Default checkbox or click on Remove button.
Note: Make sure that X-Mouse Button Control is constantly running in the background of your Windows, otherwise your configurations won’t work.
[ttjad keyword=”keyboard-mouse”]



![Read more about the article [Tutorial] How To Remove Your Computer From A Homegroup In Windows 7](https://thetechjournal.com/wp-content/uploads/2012/02/windows-home-group-512x288.jpg)
![Read more about the article [Tutorial] How To Install New Fonts in Windows 8](https://thetechjournal.com/wp-content/uploads/2012/10/font-esktop.jpg)
![Read more about the article [Tutorial] How To Integrate SkyDrive Inside Gmail For Sending Files Easily](https://thetechjournal.com/wp-content/uploads/2013/01/skydrive-gmail-attachments-ttj-logo-512x245.jpg)